
Mammoth Lakes is a town in California’s Sierra Nevada, sitting pretty at an elevation of 7,880 feet.
While the town itself is fairly small, with a population of around 9,000 people, the town can get crowded in the winter, as visitors flock from across the country (and even around the world) to ski at Mammoth Mountain Ski Resort.
But Mammoth Lakes offers activities year-round! A true mountain town, the Mammoth Lakes area is full of beautiful hiking and backpacking trails.
The town is the best way to access Devils Postpile National Monument, as well as the Ansel Adams Wilderness and the John Muir Wilderness Area.
The area is quite accessible even without a car, as the free Eastern Sierra Transit Authority (often called ESTA) has a Mammoth Lakes Basin Trolley that can take you to many hikes in the area. Shuttle stops are noted in every trail description below.
Hiking around Mammoth Lakes usually includes alpine lakes, beautiful granite, and stunning peaks. So hop on Highway 395 and scratch gravel! The mountains are calling you from Mammoth Lakes.
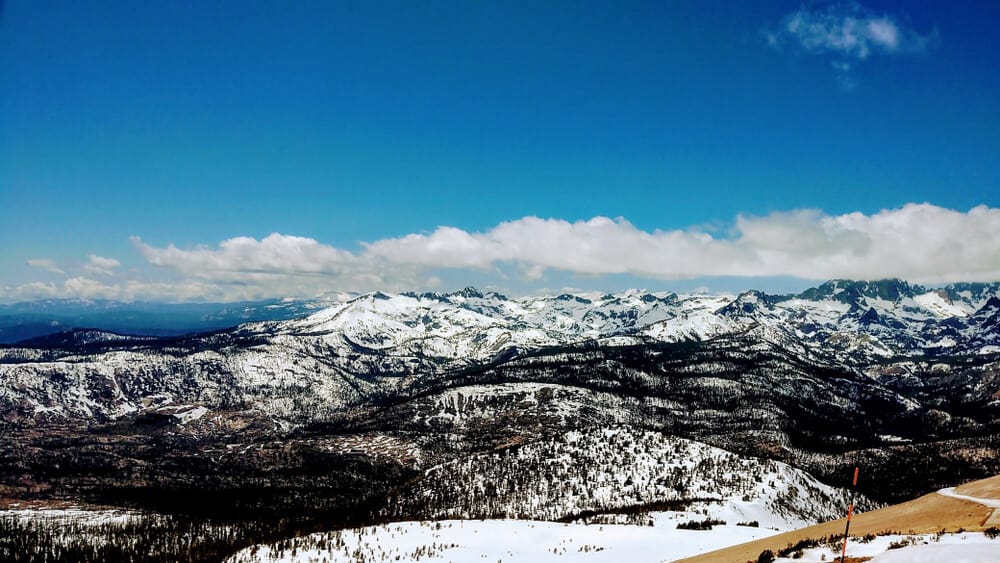
Note: The Mammoth Lakes hikes described below are best in spring or summer, after the snow has melted. Usually, snow melts in the Sierra Nevada around early June, depending on elevation, so it is best to check snow conditions with a ranger before attempting these hikes in the off or shoulder seasons. Only attempt winter hiking in this area if you are prepared with the necessary skills, experience, and equipment.
Best Day Hikes in the Mammoth Lakes Area
Panorama Dome Trail
Note: This post contains affiliate links, which earn me a small commission at no extra cost to you if you make a purchase using one of these links. Thank you for supporting this free content!
Distance: 0.7 miles round trip
Total Elevation Gain: 288 feet
Difficulty: Easy
The Panorama Dome hike is exactly like it sounds: a hike to a granite dome that offers views of much of the Mammoth Lakes basin, in addition to Mammoth Mountain itself.
The trail can get pretty steep in sections, but the overall elevation gain is fairly low.
This hike begins at the Panorama Dome Trailhead, or Trolley Stop 94. Cross Lake Mary Road from the parking area and trolley stop and follow the Lakes Basin Path to the trailhead.
Your hike will begin with a lovely stroll through a pine forest. You’ll soon begin hiking upward until you reach the dome.
From the dome, you’ll have panoramic views of the entire Mammoth Lakes basin.
Take in views of Dragon’s Back (a hike described below), Mammoth Mountain, Lake Mary, and many other sights.
There is a short loop walk at the top around the dome. Locals recommend doing the loop counterclockwise for the best views!
To experience a beautiful alpine glow on the large granite rock, consider doing this hike as a sunset hike or picnic dinner! Make sure you bring a headlamp for the walk back.
Seven Lakes Point Loop
Distance: 3-4 miles, depending on whether you do the trail as an out-and-back or a loop
Total Elevation Gain: 1,000 feet
Difficulty: Moderate
Note: This trail was impacted by a natural disaster and repairs may be underway. Check with a ranger before attempting this hike.
As the name suggests, this hike offers fantastic views of seven lakes within Mammoth Lakes Basin.
On your hike back, you’ll also get one of the best views through the “Bottomless Pit” lava tube, also known as the Hole in the Wall.
This hike is not recommended for those who are height-averse, as the Seven Lakes Trail does include a ledge walk.
While the hike is not exceedingly long, it does include some intense elevation gain and some exposed sections that can get quite hot during the summer. Bring plenty of water and sun protection.
This hike begins at the Twin Lakes Campground on the shores of Twin Lakes. You can access the campground by car, or on the Trolley at Stop 96.
You’ll begin hiking up the Dragon’s Back Trail out of the campground. This hike begins with a steep climb out of the campground and up a volcanic rock trail along the south side of Mammoth Mountain.
At around 0.7 miles, you will reach a junction. Go left towards the Seven Lakes Trail.
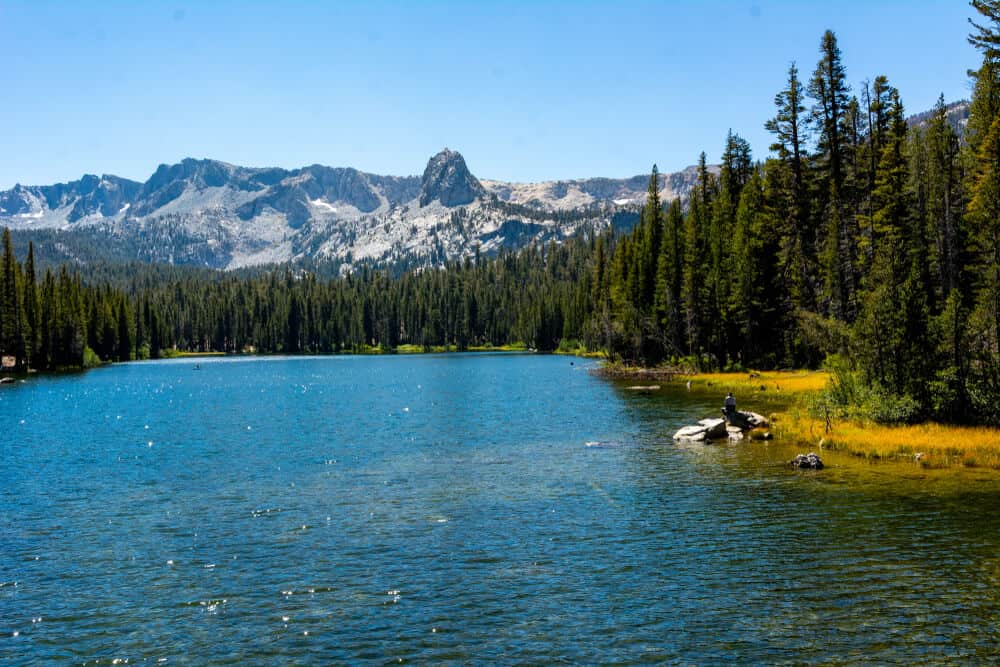
From the top, you’ll be able to see much of the Mammoth Lakes Basin, including Lakes Mary, Mamie, Twin Lakes, Horseshoe, TJ, and George, as well as Lake Crowley a bit further away.
Continue on the trail until you reach a junction. Take a left onto the Dragon’s Back Trail at around 1.6 miles (a right will take you to the summit of Mammoth Mountain. See description below.). Take the slightly more difficult Dragon’s Back Trail down.
Stop at the Hole in the Wall lava tube to snap some pictures before making your way back to the Twin Lakes Campground on the Dragon’s Back Trail.
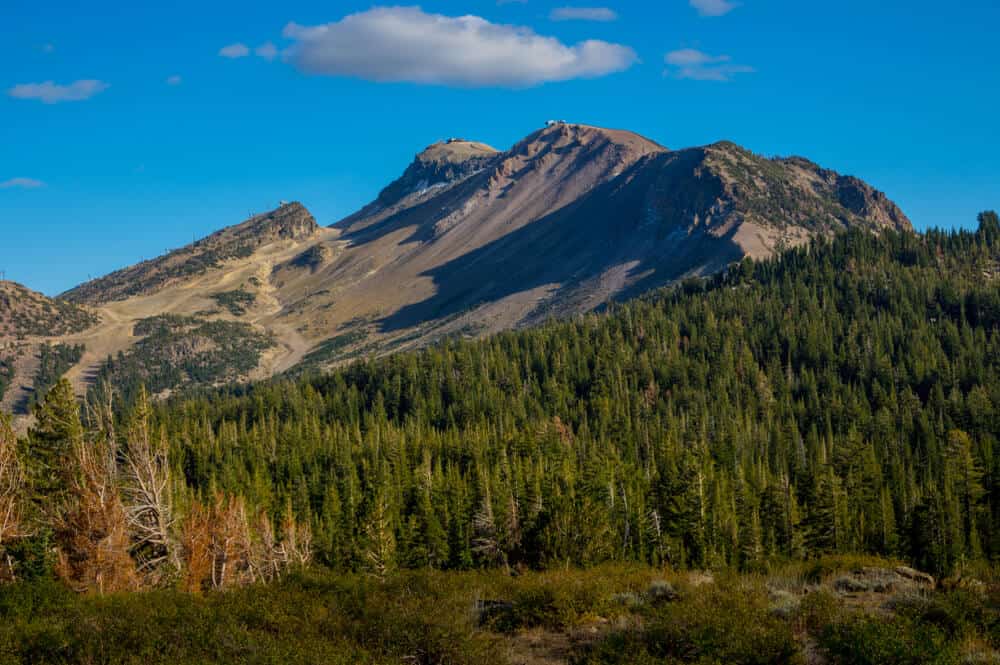
Dragon’s Back Trail to Mammoth Mountain Summit
Distance: 6.6 miles round trip
Total Elevation Gain: 2,419 feet
Difficulty: Strenuous
Note: As with many of these trails, you’ll experience high elevations on this hike. Altitude sickness can be dangerous. If you begin to feel the effects of altitude sickness, get to a lower elevation as quickly as possible. It is also recommended that you spend a few days acclimating to higher elevations before attempting a summit.
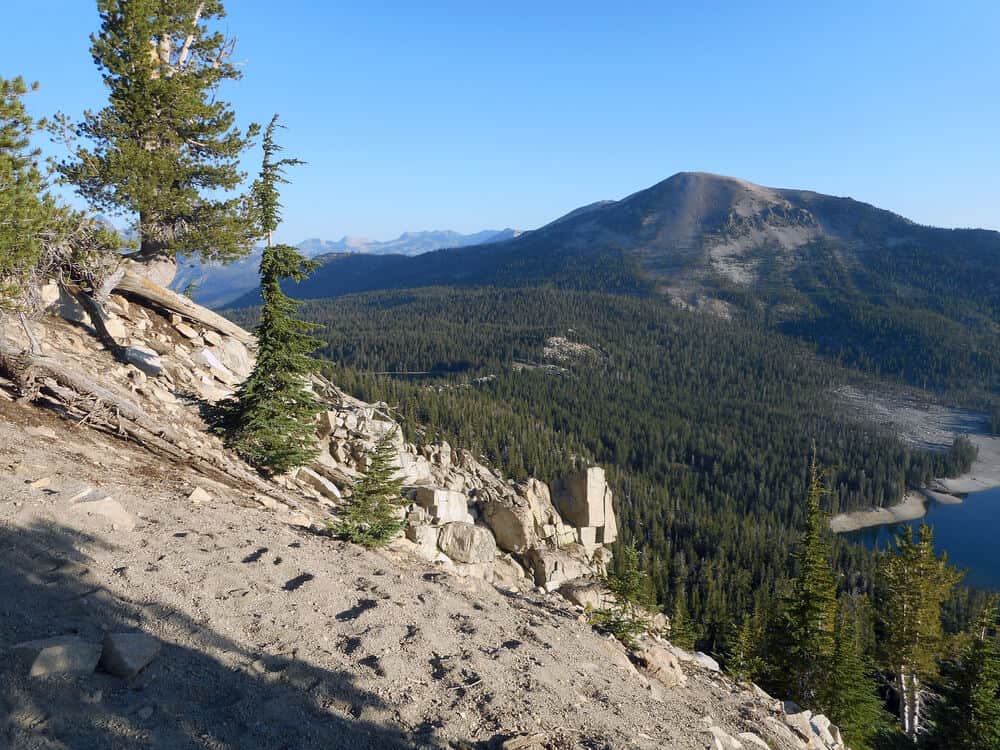
The Dragon’s Back Trail is the shortest and also the steepest route up to the summit of 11,053-foot Mammoth Mountain!
If you’re looking to bag a peak in only a few miles, this hike is for you. If you’re there in the summer, you’ll have the added bonus of a café on the summit, so no need to pack lunch!
This hike also begins at the Twin Lakes Trailhead, or Trolley Stop 96. Begin by switchbacking up the Dragon’s Back Trail from Twin Lakes.
The trail will narrow as you gain elevation and begin hiking on more exposed ridges about halfway through the hike up. Many hikers complain of high winds in this area, so it’s not a bad idea to bring a windbreaker.
When you reach the split with the Seven Lakes Trail, stay left to stay on the Dragon’s Back Trail. Pass by the Hole in the Wall lava tube, and continue your steady climb upward.
At around 2.7 miles, you will reach a junction with the Mammoth Mountain Trail. Stay right to head towards the summit.
From Mammoth Mountain’s summit, you’ll have stunning views of the rest of the mountain’s ski area, as well as the Lakes Basin, the town of Mammoth Lakes, and even farther north to Mono Lake.
Don’t be shocked if there are many more people on the summit than you expected – there is a gondola that will take hikers to the top during the summer, as well as Eleven53 Café. Eat a snack and take a rest before heading back down.
Arrowhead Lake Trail
Distance: 2.6 miles round trip
Total Elevation Gain: 500 feet
Difficulty: Moderate
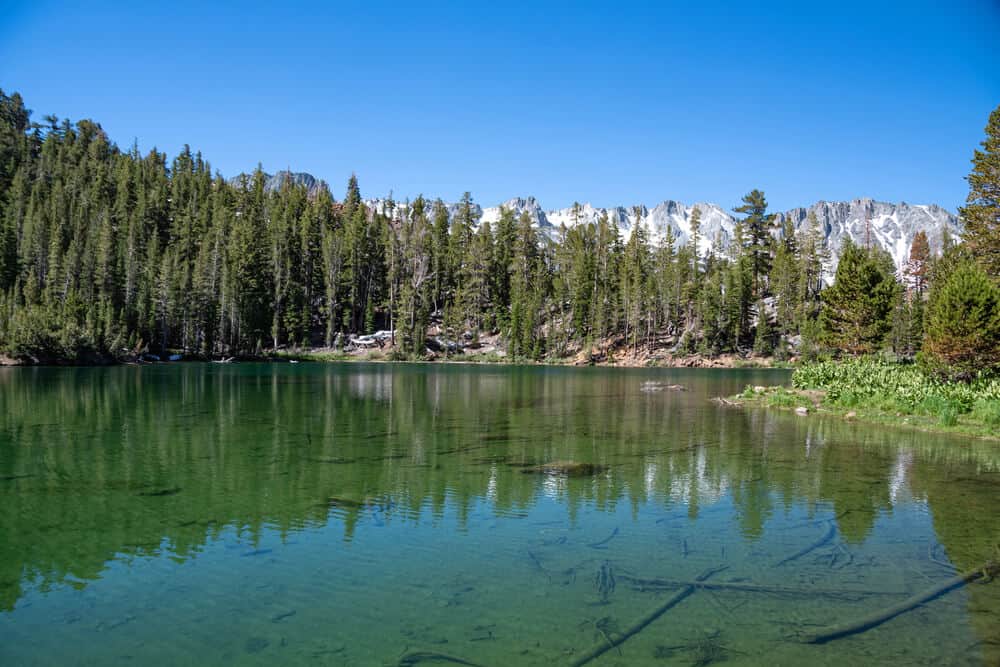
This moderate hike is nice and short and pops you out at a beautiful alpine lake after only a mile of hiking. Arrowhead Lake offers shady picnic spots, swimming, and even fishing, with the appropriate license.
This hike begins at the Coldwater Creek Trailhead, or Trolley Stop 100. The Duck Pass Trail starts at the south end of the parking area.
You will begin your hike by climbing up around 500 feet over about a mile. You’ll get the steepest part done first, as the first half-mile is the steepest part.
At around 1 mile, take a left onto the spur trail that leads to Arrowhead Lake’s western shore. You’ll follow the spur trail for a mere 0.3 miles before you reach stunning Arrowhead Lake.
The lake is the perfect spot for a picnic. Hang around under pine trees on the shore, or dive in to the clear water to cool down! When you’ve had your fill of the lake, hike back the same way you hiked in.
Heart Lake Trail
Distance: 2.4 miles round trip
Total Elevation Gain: 564 feet
Difficulty: Moderate
The Heart Lake Trail not only takes you to a beautiful alpine lake (that is vaguely heart shaped), but also offers side trips to old mineshafts and building ruins from the 1930s Mammoth Consolidated Gold Mine!
If you’re looking for a swim with a side of history, this is the perfect hike near Mammoth Lakes for you!
This moderate hike begins at the Coldwater Creek Trailhead, or Trolley Stop 100. Take the Heart Lake Trail from the Coldwater parking lot. You’ll cross Mammoth Creek and then begin to climb gently.
The first two forks on the left lead to the mining ruins, which are both great side trips if you’d like to extend the hike. To continue to Heart Lake, stay on the trail to the right.
The trail begins climbing a bit more steeply for the next half mile, but then will level out as you cross into the John Muir Wilderness. Hike along at this elevation until you reach serene Heart Lake. Cool off here before starting your hike back down.
If you continue hiking to the right of the lake for only 0.1 mile, you’ll have wonderful views of Lake Mary and a waterfall!
Mammoth Crest Trail
Distance: 14.4 miles round trip
Total Elevation Gain: 2,742 feet
Difficulty: Strenuous
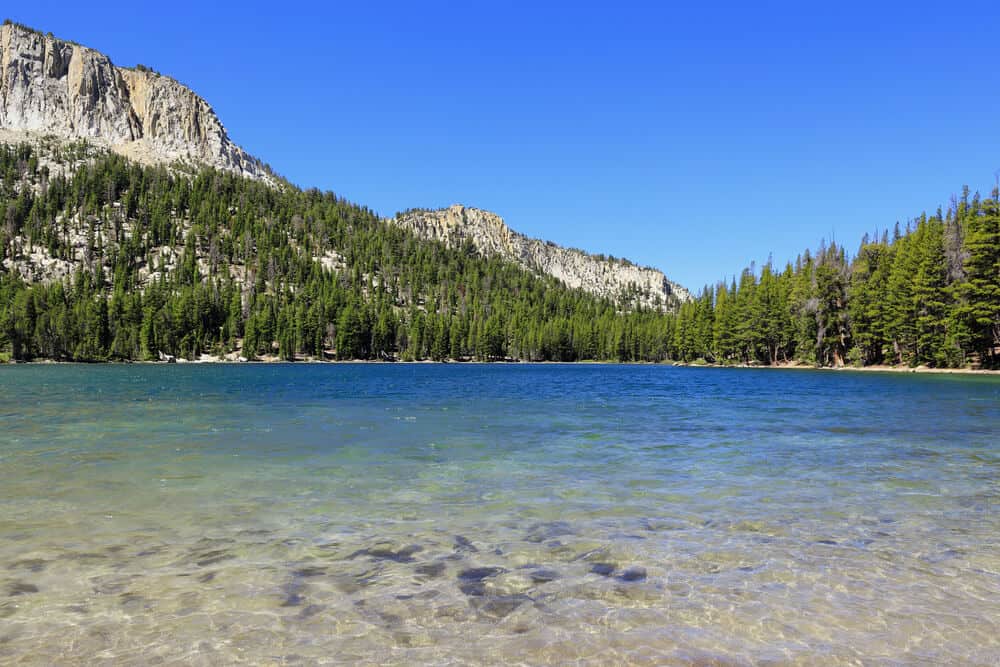
The Mammoth Crest mountain ridge is famous for its incredible 360-degree views and spectacular lakes. On this hike, you’ll be able to see all the way to Yosemite, as well as the entire Mammoth Lakes basin.
If you’re looking for a true High Sierra experience complete with alpine lakes, sharp peaks, and high elevation, then this hike is perfect for you.
A map is absolutely necessary for this trail, as the turnaround point can be confusing and the trail may not be easy to follow at points.
This hike begins at the Lake George Trailhead, or Trolley Stop 101. The trail begins at the north end of the parking lot. Follow the trail up the hill above Lake George, looking out for views of Crystal Crag while you climb.
At 1 mile, you’ll reach a fork. Going left will take you to Crystal Lake (a worthwhile hike on its own). Stay right to stay on this trail and switchback upwards. As you climb, you’ll be able to see much of the Mammoth Lakes basin.
Climb above the trees until you reach Mammoth Crest at 2 miles. Take a left to stay on this trail (stay straight on the Mammoth Crest Alternate Spur for amazing views of the famous Sierra peaks, Mount Ritter and Banner Peak, that tower above the equally famous John Muir Trail).
Cross into the John Muir Wilderness and continue up the crest. At 4.5 miles, you’ll reach the highest point of the crest at 11,188 feet. Finally, some downhill!
Head down to Deer Lakes. This is a great spot to relax, as there are three beautiful lakes surrounded by peaks. The trail may become harder to follow here, so if you’re not comfortable navigating, this is a good place to turn around.
To make a loop, continue to the last lake, which is the farthest south. You’ll climb up a slope to the east, then cross a plateau. Follow the (somewhat vague) trail until you see a bowl leading down to Duck Lake and Pika Lake.
Cross the meadow heading east (there are often cairns to help you find your way). You’ll hit the much more defined Duck Pass Trail right before you hit Duck Lake. Go back the way you came, or take the Duck Pass trail back to make a loop.
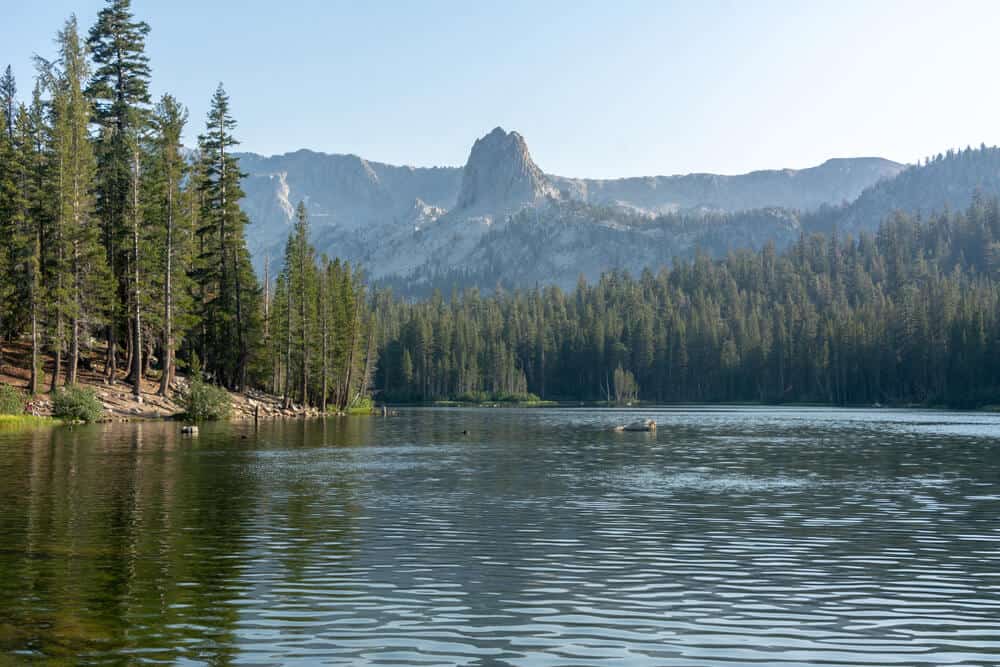
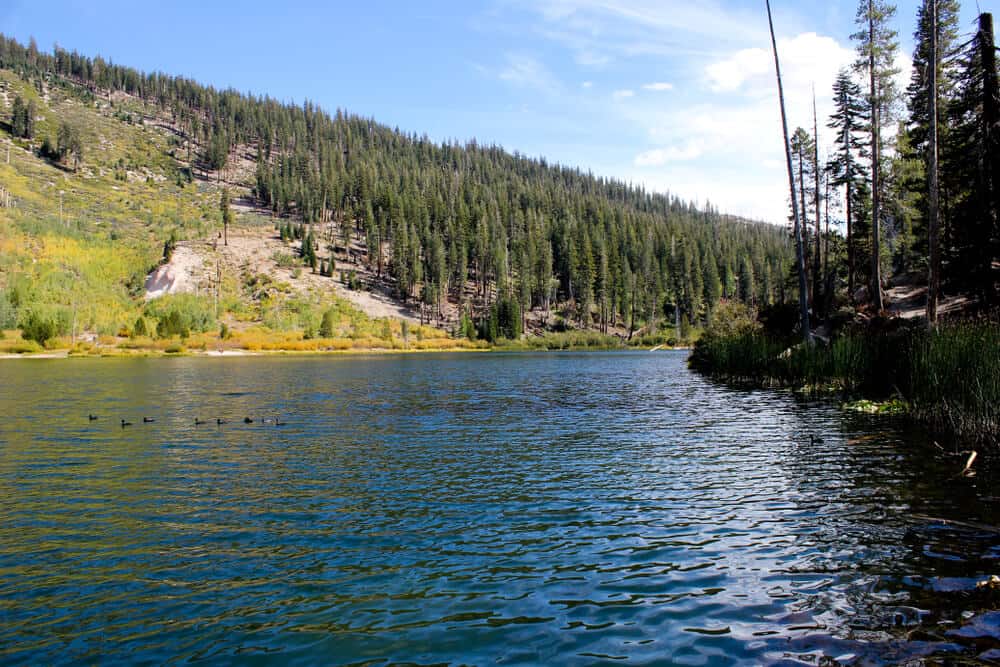
Horseshoe Lake Loop
Distance: 1.7 miles loop
Total Elevation Gain: 114 feet
Difficulty: Easy
This loop around Horseshoe Lake is a fantastic hike to do with the whole family, and the dog!
The hike travels around Horseshoe Lake on a fairly flat trail, and then finishes in a pine forest. The very end of the trail is paved. This trail is also great for beginner mountain bikers.
This Mammoth lakes hike begins at the Horseshoe Lake Trailhead, or Trolley Stop 104. From the trailhead, take a right to begin the loop counterclockwise. It’s possible to go left as well, but there is a larger uphill going clockwise.
The hike climbs slightly up and down as you walk near the shores of Horseshoe Lake. Breathe in the fresh mountain air at 9,000 feet!
If you’d like to extend the hike, at 0.2 miles in, there’s a junction that takes you about a mile to McLeod Lake. McLeod is much less crowded, so it makes for a nice quiet side trip.
Continue on the Horseshoe Lake trail to make your way around the lake. The second part of the hike veers away from the shores of the lake as you begin to descend about 100 feet. At about 1.3 miles, you’ll hit Lake Mary Road and a junction with the Lakes Basin Path.
Take a left on the Lakes Basin Path and make your way back to the parking lot. Make sure to stop at the wonderful beach along the trail – it’s a fantastic spot for a picnic and a swim!
Mammoth Pass Trail
Distance: 7.7 miles round trip
Total Elevation Gain: 2,070 feet
Difficulty: Moderate
This hike within the beautiful Ansel Adams Wilderness leads you along a rocky trail with great views, right up to Red’s Meadow, near Devils Postpile (see description below).
The Mammoth Pass Trail begins at the Horseshoe Lake Trailhead, or Trolley Stop 104. Take the farthest right trail option for the Mammoth Pass Trail. The first part of the hike leads you up and away from Horseshoe Lake.
You’ll only be climbing for a bit, as the rest of the trail to your turnaround point is downhill, for a total descent of around 2,000 feet. To your right will be Mammoth Mountain looming above you.
Make your way down through meadows and forest until the trail dead-ends into a network of trails near Minaret Road and Reds Meadow Campground.
You have a few options here. First, you can choose to turn around and hike back the way you came. For this option, at around 6.7 miles, take a right on the McCleod Lake Trail to stop by the lake on your way back. Ignore the lake side-trip to cut about 1 mile off your total hiking distance.
Second, you can choose to take a right and walk roughly a mile to Reds Meadow Campground. Camp here (you may need reservations), or just grab a milkshake at the nearby Reds Meadow Resort!
Lastly, if you still haven’t gotten enough hiking in, you can follow the trail network about 1.5 miles to Rainbow Falls, within Devil’s Postpile National Monument. Lounge around at the falls before hiking back, or taking the shuttle back to Mammoth Mountain from Reds Meadow Resort.
As with all trails, a map is highly recommended for this last section, as there are many overlapping trails within the network near Reds Meadow.
Sotcher Lake Loop
Distance: 1.5 miles loop
Total Elevation Gain: 183 feet
Difficulty: Easy
While Sotcher Lake is just a short jaunt from the parking area, it is just as beautiful and peaceful as lakes that require hours of hiking to reach!
Sotcher Lake is the perfect quick hike in Mammoth Lakes for beginner and experienced hikers alike.
Start your hike at the Reds Meadow Campground, or shuttle stop #7 on the Reds Meadow Shuttle. Parking is also available at the picnic area.
The trail goes around the lake, with plenty of opportunities to stop and relax by the water.
While the very first part of the trail is slightly uphill, the trail largely flattens out as it wanders along the banks of the lake. Make sure not to miss the waterfall about halfway through the hike.
There is a lovely beach on the east side of the lake that is a great place to hang out and go for a swim. Picnic tables are also available at beaches along the trail, so don’t forget to bring a lunch!
Devils Postpile National Monument Loop & Rainbow Falls
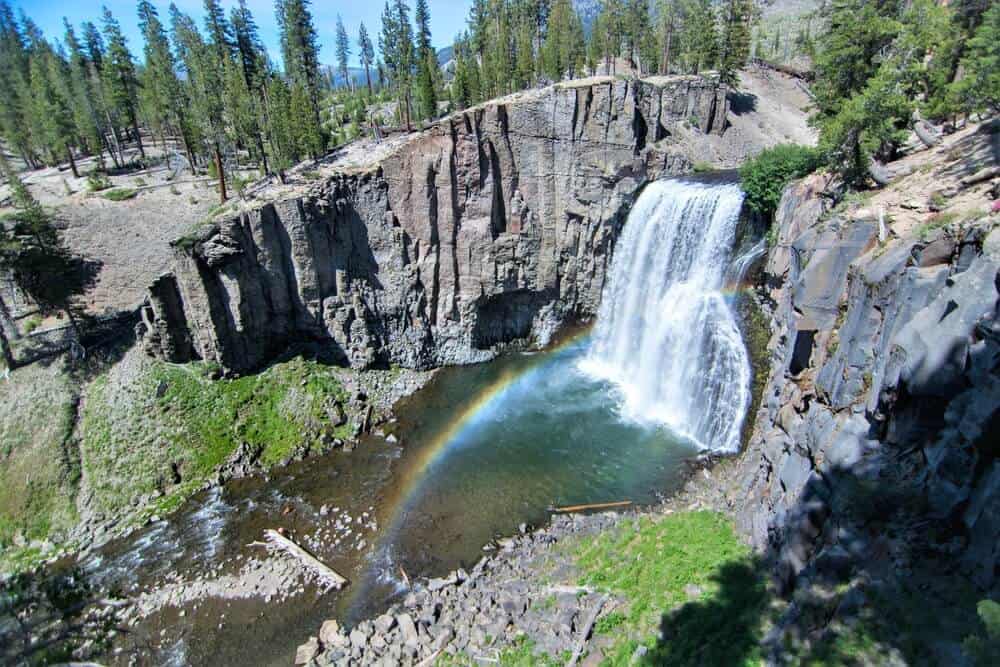
Distance: 1.3 miles round trip to Devils Postpile, 4.5 miles round trip to Rainbow Falls
Total Elevation Gain: 232 feet to Devils Postpile Upper Loop, 690 feet to Rainbow Falls
Difficulty: Easy
Devils Postpile National Monument is a bizarre rock formation made of vertical rock “posts” that shoot upward toward the sky.
This trail will allow you to marvel at the formation from below, as well as on the upper loop above the rocks.
Your hike begins at the Ranger Station. The Ranger Station is accessible by a shuttle that leaves from the Mammoth Mountain Ski Area. There is no parking, so the shuttle is mandatory.
Enjoy the views along the road from the Minaret Vista Station, and then get off at Shuttle Stop #6.
Pick up a free map at the Ranger Station, and then begin the short hike to the Postpile. After less than a half-mile, you’ll reach a junction with the Upper Postpile Loop trail.
Continue straight for another 100 feet to get a fantastic view of Devils Postpile from below. This view is arguably the most impressive vantage point, as you’ll get a clear view of just how high these columns rise.
Return to the junction, and then take the Upper Postpile Loop. This does include a small climb, so if you’re not up for that, you can turn around at the bottom view.
However, on the loop you’ll be able to see the fascinating geologic formation from the top, including how the posts fit together hexagonally.
Continue the loop and return to the Ranger Station. If you’re interested in a longer hike, you can easily extend this trail to Rainbow Falls.
To get to the falls, continue on the trail for 1.4 miles, cross Red’s Creek, cross the John Muir Trail, and continue on the Rainbow Falls Trail for another 2 miles or so. The falls are quite beautiful, and offer a wonderful viewing area from the rocks at the bottom.
The hike to Rainbow Falls adds about 3 miles and 450 feet of elevation gain to your hike, but the plus side is that you don’t have to return the entire way.
When you turn around, take the trail back to the bluff above the falls and take a left, but look out for a right soon after that. Simply take a right to go to Reds Meadow Resort (Shuttle Stop 8), grab a milkshake, and take the shuttle back to your car at Mammoth Mountain.

Lena is an outdoor recreation enthusiast born and raised in the San Francisco Bay Area. After going on her first camping trip at 3 months old, she hasn’t stopped since. While her backpacking adventures have taken her to wilderness destination across the country, California’s mountains and deserts will always be her favorite.