
Out of all the national parks in the United States, Yosemite is one of the most iconic!
If you like the peace and quiet of a beautiful national park, this is an ideal stop on your next trip to California.
You can breathe easy – (uh, provided you aren’t visiting during wildfire season!) – and enjoy some amazing scenery without needing to do an extremely intense hike.
Visiting any national park is also a great way to support the park. Your entry fee covers expenses around staff, environmental protection, and all of the repairs associated with those nasty fires that have been devastating California recently!
How to Get to Yosemite National Park
Note: This post contains affiliate links, which earn me a small commission at no extra cost to you if you make a purchase using one of these links. Thank you for supporting this free content!
If you are flying in from afar, using the Fresno-Yosemite Airport or the Mammoth-Yosemite Airport will get you closest to Yosemite — but not that close!
To Yosemite Valley from either of these airports, you’re looking at about a 2.5 hour drive. You’ll want to rent a car no matter where to fly into.
Not sure where to find the best price on your rental? I use and recommend RentalCars when traveling California — they have the best search engine and find the best deals!
The San Francisco and Sacramento airports are also good options, especially since the closest airports are still 2.5 hours away — what’s another hour or two?
In any case, it’ll be a few hours of driving to get to Yosemite, but it’ll be worth it once you get there!
Yosemite is a massive park, so you should go in with a plan. Luckily, you really can’t go wrong with any of the trails or campsites – some areas may be more crowded than others, but there’s certainly something worth exploring at every point.
Note: Yosemite is currently requiring reservations unless you have accommodations or camping reservations within the park. Read here for more information.
Where to Stay in Yosemite
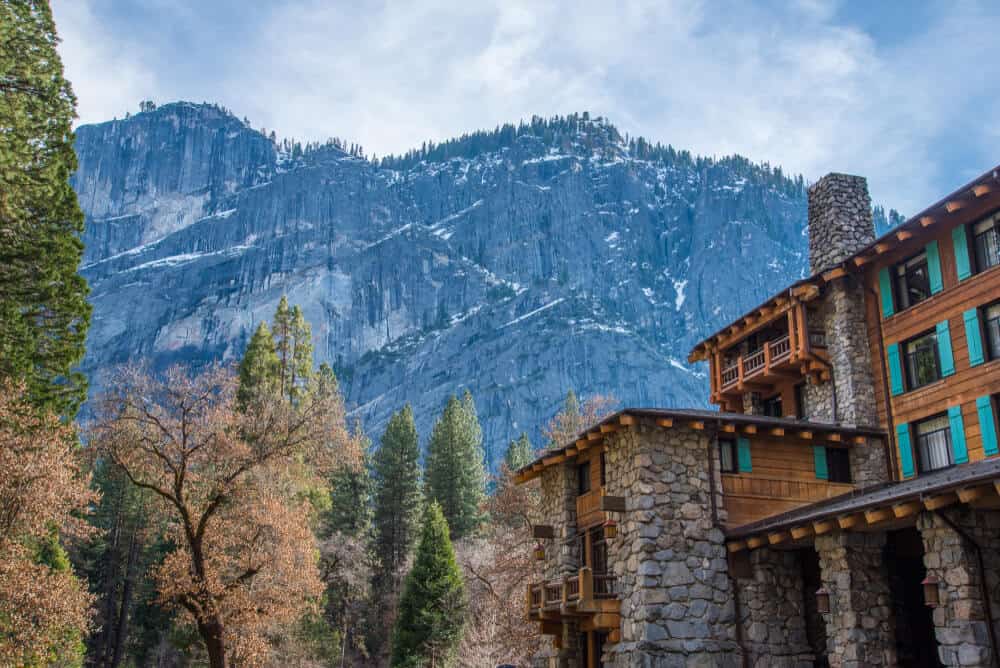
While in an ideal world, we’d all stay in the Ahwahnee Hotel, let’s be real: you have to plan that like, a year in advance for peak times (and 6 months out for off-peak).
Plus it costs like, $800 a night at a minimum even in off-peak times, which is pretty cost-prohibitive for most people.
I’ve picked two affordably-priced options: one more ideal for people heading in from Southern California and another better suited for people heading in from Northern California.
Yosemite has five entrances and they can be up to 2.5 hours between them so you will want to be careful when you book!
Coming from the South (LA/San Diego): Tenaya Lodge
Located right by the South Entrance, the Tenaya Lodge in Fish Camp is a great place to stay — especially if you’re coming from Southern California, as it couldn’t be more convenient.
Tenaya Lodge has all the amenities you want in a comfortable mountain lodge: A/C rooms, an on-site restaurant (a luxury near national parks!), a fitness center (if those Yosemite hikes weren’t enough), and a spa if you want to soothe tired and achy muscles.
The rooms are clean and spacious. They also offer private deluxe cabins with small kitchenettes if you’d like to cook your own meals and have more space to yourself — or they’re a great choice for families.
Check availability, prices, and photos of Tenaya Lodge here!
Coming from the North (San Francisco Bay Area): The Groveland Hotel
Located by the West Entrance — perfect for those coming from the San Francisco Bay Area — The Groveland Hotel is a great home base during your trip to Yosemite, just 24 miles away.
While not in the park per se, it’s a short drive, and Groveland is a really cute California Gold Country town!
The Groveland Hotel’s rooms all offer A/C, seating areas, and Keurig coffee-makers (so you can pack that morning coffee bright and early!).
Some suites have spa baths or even fireplaces — perfect for a cozy, romantic Yosemite getaway!
Best of all, the hotel is pet-friendly and it also has its own electric vehicle charging station in case you are bringing an electric car to Yosemite!
Check availability, reviews, and photos of the Groveland hotel here!
Easy Yosemite Hikes
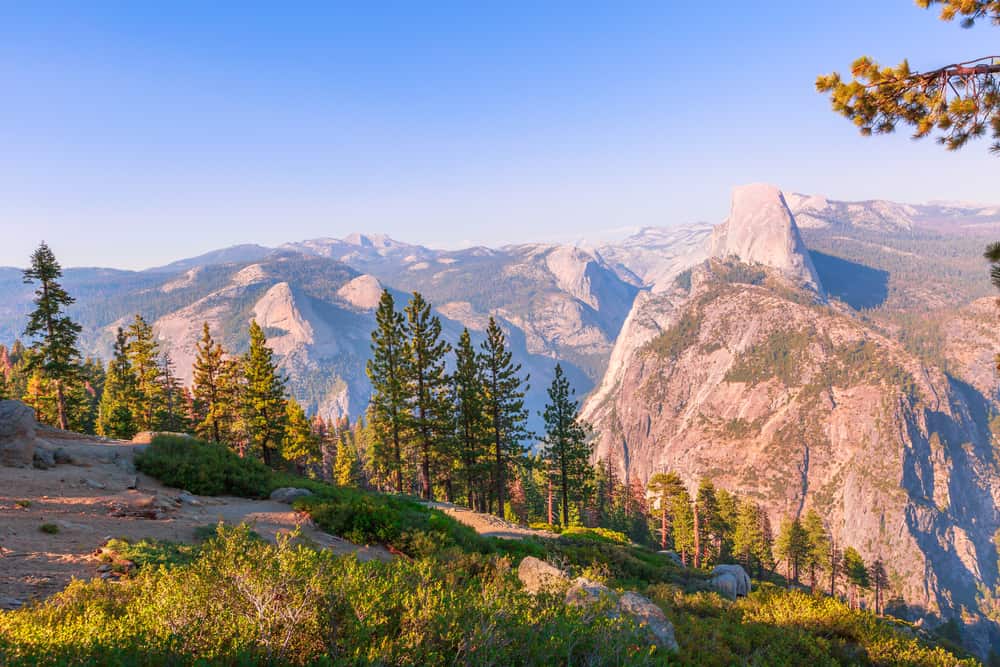
Glacier Point

Distance: 1.2 miles, round trip
Time to Hike: 30 minutes
Elevation Gain: 167 feet
Elevation at Trailhead: 7,200 feet
Read hiker updates and trip reports on AllTrails here.
There’s a lot to be said for Half Dome… and more for hiking it. But this option requires a lot of forethought and a bit of luck.
Half Dome hikes require permits, generally distributed by a lottery system. Even if you are lucky enough to be chosen, Half Dome is a notoriously difficult hike, especially due to its legendary cables.
If you’re looking for an easier way to check out Half Dome, consider Glacier Point instead.
The trail is only a little over a mile, but it boasts a panoramic view of Yosemite Valley that includes a great view of Half Dome – among other things!
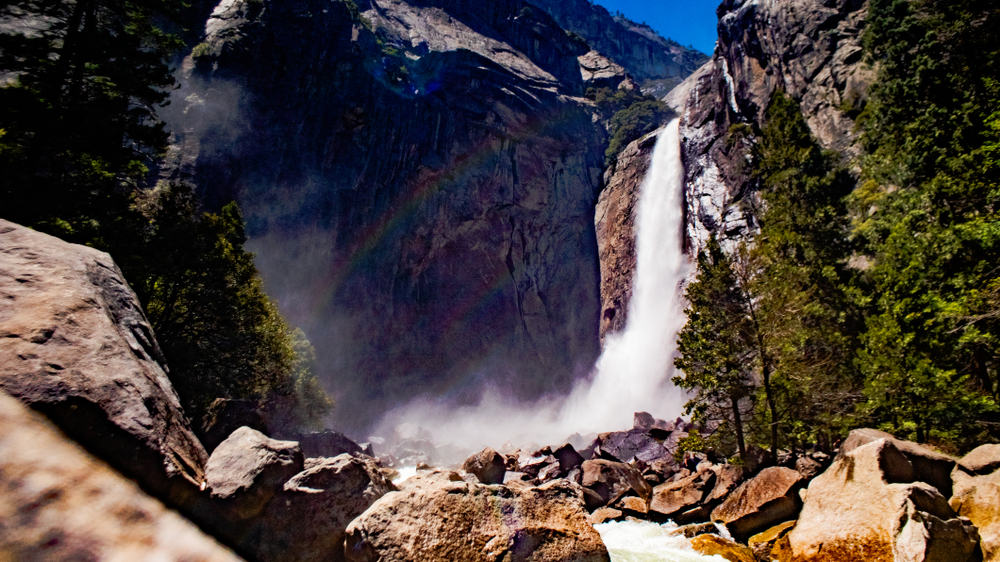
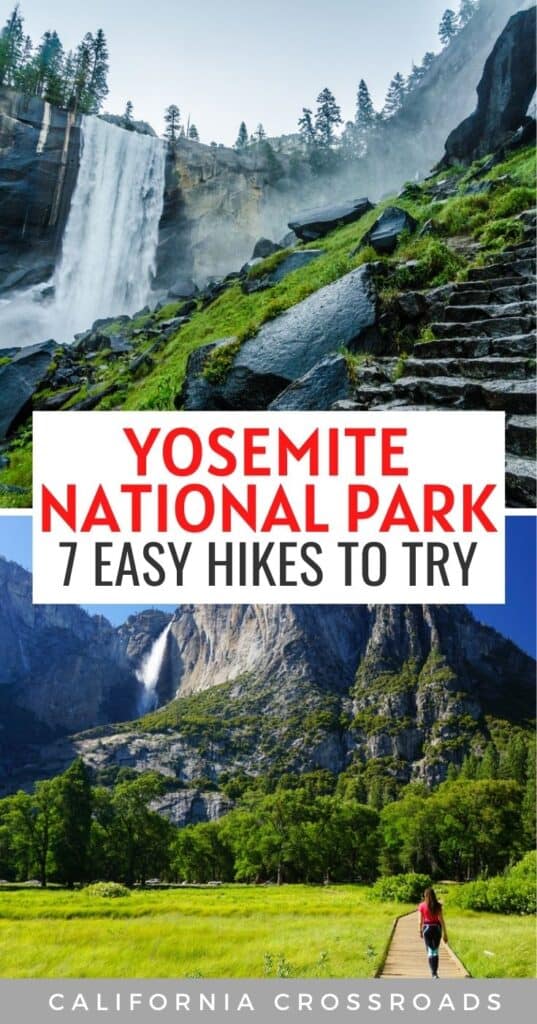
Lower Falls Trail
Distance: 1.2-mile paved loop
Time to Hike: 30 minutes
Elevation Gain: 60 feet
Elevation at Trailhead: 4,000 feet
Read hiker updates and trip reports on AllTrails here.
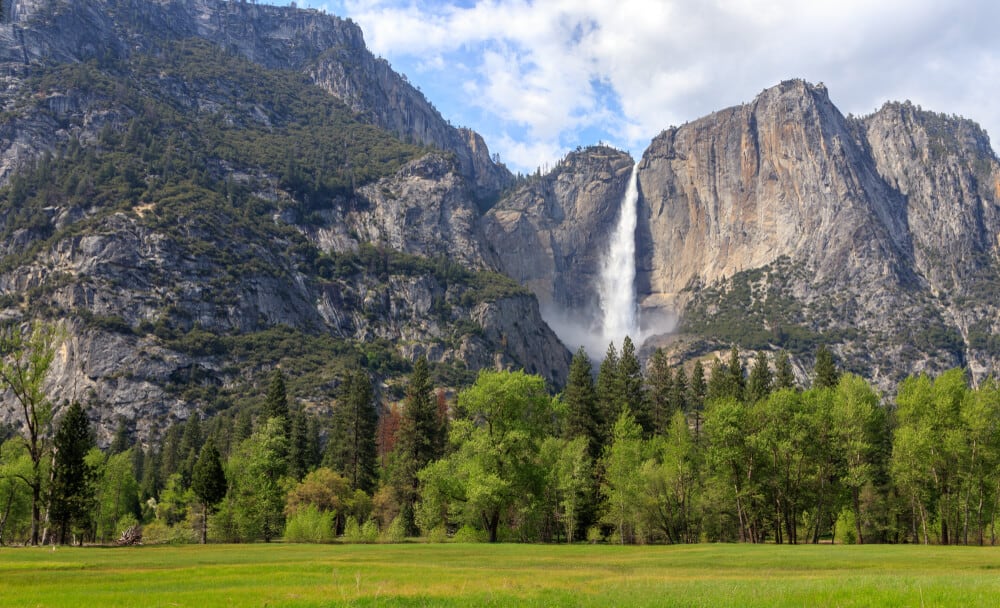
The Upper Falls are definitely scenic, but the ascent can make this option less appealing than the more easily accessible Lower Falls.
Note that in both cases, you have to mind the season of your visit. The falls are only active when there’s water flowing, and it will dry out each fall in Yosemite (and often by mid-summer, especially in these times of drought!).
The hike is still beautiful, but you won’t get the wow-factor of the waterfalls. You may be better off with one of the groves if you’re visiting late in the fall or even just during a drier year.
This is only a 1.2-mile trail, which makes for an easy Yosemite hike. Along the way, you’ll find interpretive signs marking the way with facts about the park and its history.
This is a family-friendly trail: it’s paved, so it’s great for strollers, walkers, and wheelchairs alike during the late spring, summer, and fall seasons.
However, be mindful that you may get wet when the water is flowing at peak volume during spring and early summer, and that can also make the path slippery!
On the other hand, if you visit Yosemite in winter, parts of it may be icy or snow-packed and not recommended for those with mobility limitations.
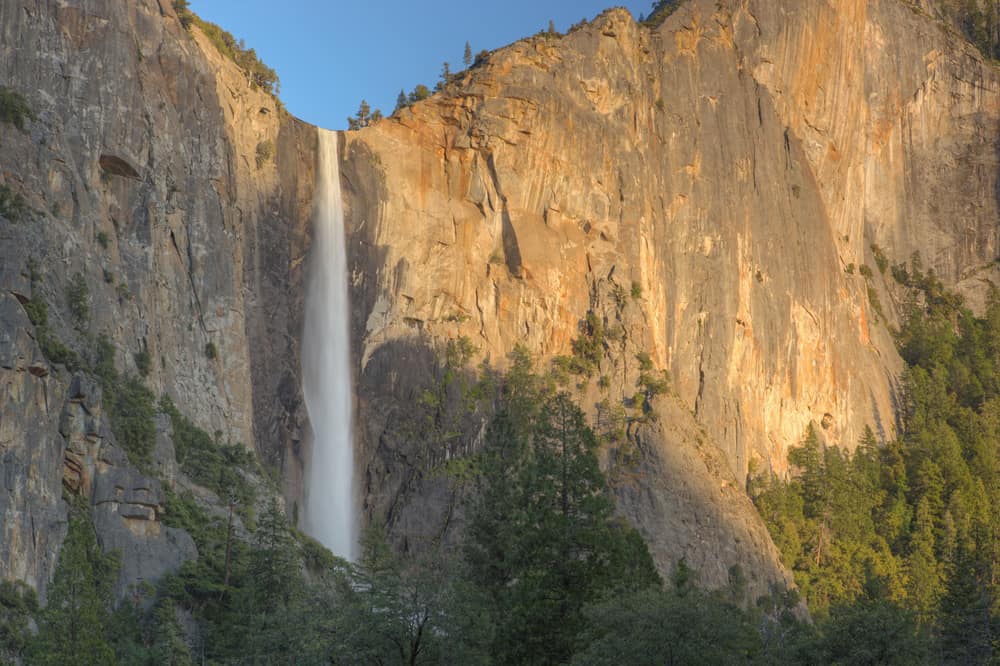
Bridalveil Falls
NOTE: This trail is currently closed for renovation and construction. Check the AllTrails page for updates!
Distance: 0.5 miles roundtrip
Time to Hike: 20 minutes
Elevation Gain: 80 feet
Elevation at Trailhead: 4,000 feet
The Bridalveil Falls trail is short, only about a half-mile round trip.
Despite this being a short and easy Yosemite hike, take note that the path can get a bit steep towards the end, so younger travel companions or anyone using a stroller may have a bit of trouble here.
Even so, the view is iconic and well worth the hassle, especially considering how little time it will take to make the quarter-mile journey in.
This waterfall is fairly close to the entrance, so you’ll probably want to make it one of the first or last stops along your trip.
Like all of the waterfalls in Yosemite, this one will be more impressive if you are visiting during early on in the year, when the snow is melting and there is more water flowing through Yosemite Valley.
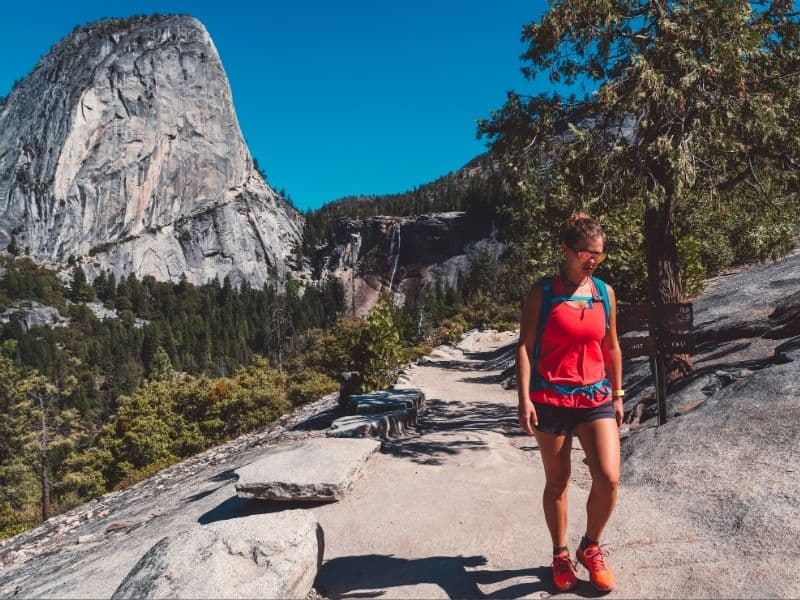
Vernal Falls (via Nevada Falls
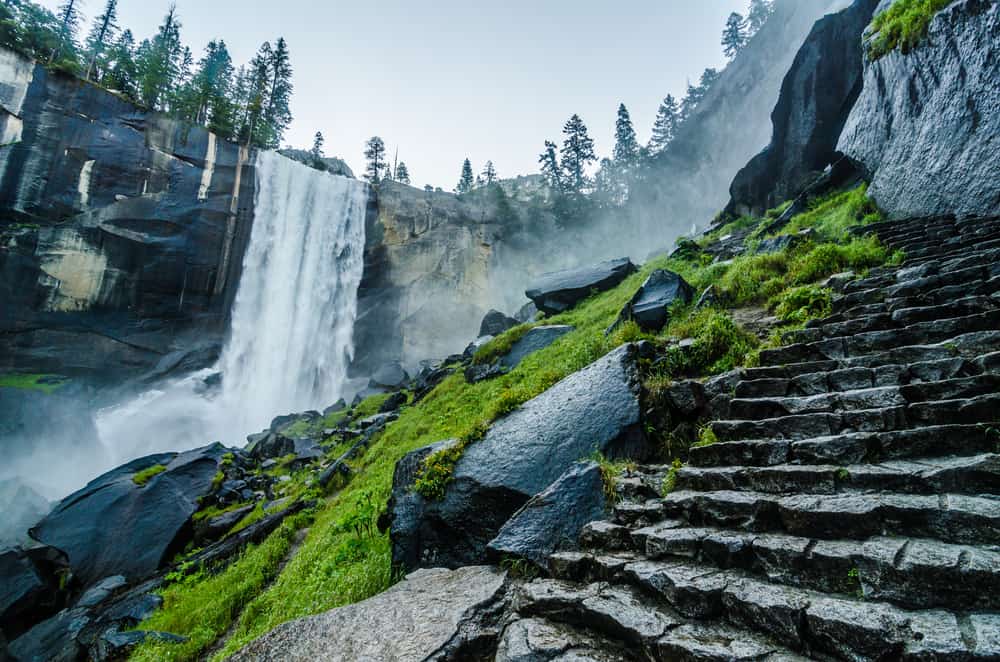
Distance: 2 miles roundtrip
Time to Hike: 1-1.5 hours
Elevation Gain: 300 feet
Elevation at Trailhead: 4,000 feet
Read trail reports and hiker updates on AllTrails here*
*Note: Reviews and stats are for the entire 7-mile loop — what we are deeming ‘easy’ is just the bit to Vernal Fall Footbridge, and then we suggest you turn around there!
This Yosemite trail is a bit steep, but if you’ve got an hour you can make it to the highlight of the trail without too much trouble.
The Nevada Falls are the final endpoint, and to get here it would require a seven mile trek roundtrip: hardly an easy hike in Yosemite!
For an easier version, stop at the Vernal Fall Footbridge and enjoy the view. That spot is just about one mile into the hike!
It will take a bit of a climb, but bring a picnic and take it slowly. If you’re interested in something a little more challenging, you can keep going along this path. There’s no shortage of scenic views along the way.
But if you tackle the whole thing, know that this is also one of the more strenuous hikes in the park outside of the classic Half Dome hike or Clouds Rest.
You won’t want to spend too much time going further on this trail if you aren’t up for a steep, arduous climb!
Sentinel Meadow – Cook’s Meadow Loop

Distance: 2.3 mile loop
Time: 40-60 minutes
Elevation gain: 91 feet
Elevation at trailhead: 4,000 feet
Read hiker updates and trail reports on AllTrails here
As the name suggests, Sentinel Meadow & Cook’s Meadow is one of the flatter hikes in Yosemite National Park.
It goes straight through the valley, and you’ll catch glimpses of many of the most well-known landmarks in the valley, including the Falls, Half Dome, and Sentinel Rock: all from a flat and wheelchair-accessible boardwalk path.
This is an easy 30 minute add on to your existing trip, but putting it at the start could help you get a good feel for the layout of the park.
It’s also very close trailheads for several of the other hikes on this list, too, as a bonus.
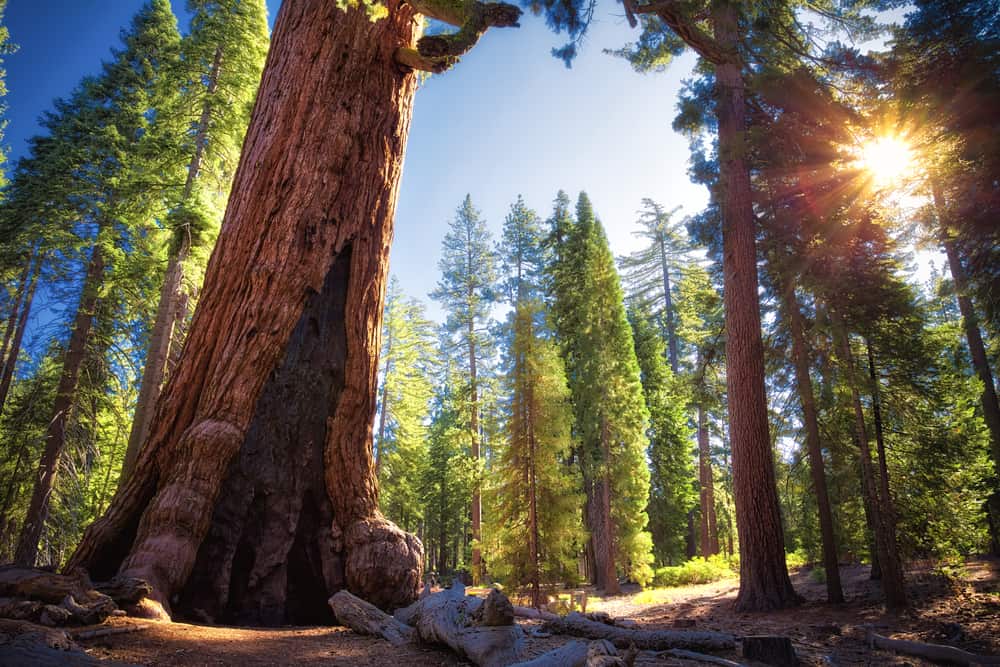
Giant Grizzy Loop
Distance: 2-mile loop (Giant Grizzly Loop)*
Time: 1-1.5 hours
Elevation gain: 300 feet
Elevation at trailhead: 5,600 feeet
*Current trip reports on AllTrails indicate that you need to park about 2 miles away, which makes this a 6-mile roundtrip hike.
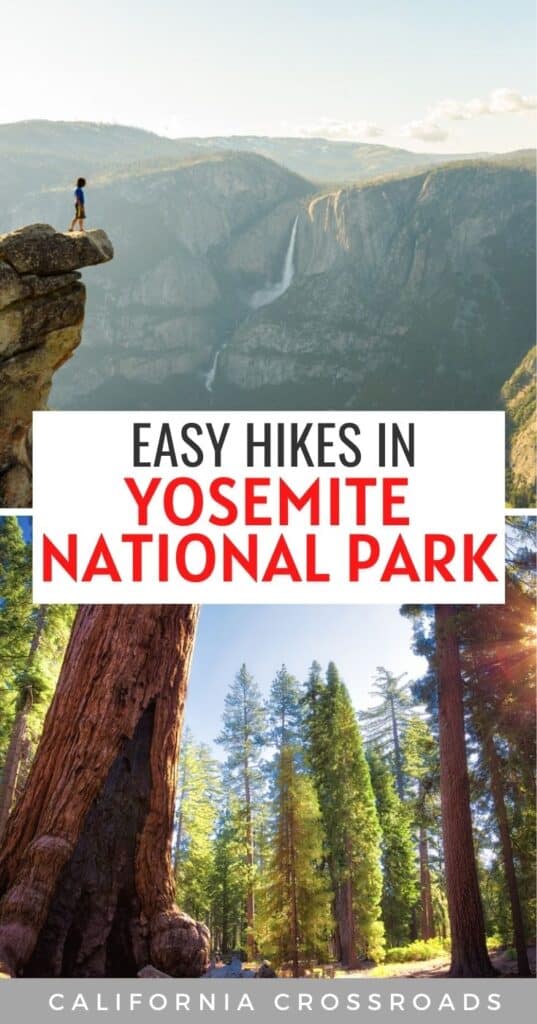
If there’s one point of interest you shouldn’t miss while visiting Yosemite, it’s Mariposa Grove and the Grizzly Giant.
The site reopened a couple years ago after renovations, and is actually one of the most accessible locations in Yosemite.
It’s actually wheelchair accessible, and if you have a parking placard you can drive right up.
However, people without accessible parking placards will have to walk from the Wawona Visitor Center (thus adding 4 miles return), as the upper parking lot is currently closed. This is due to damage from fallen trees after a wind storm.
The Grizzly Giant is a 3,000 year old sequoia tree, apparently one of the oldest and largest living things in the world.
It’s hard to describe exactly how breathtaking the Grizzly Giant is, so I’ll just encourage you to go see it yourself.
Mirror Lake
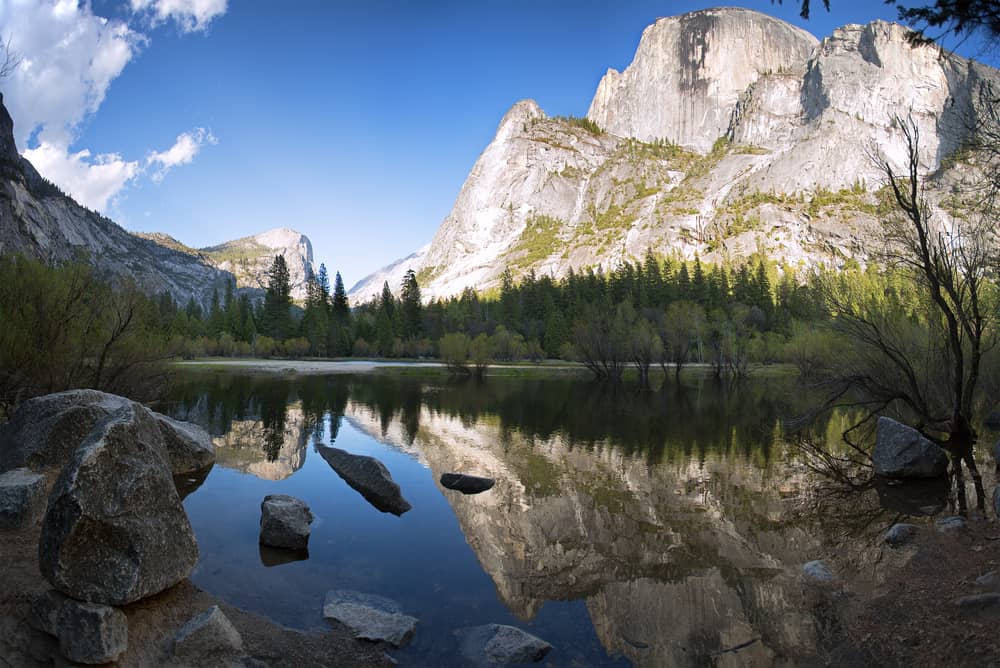
Distance: 2 miles roundtrip to the lake and back; 5 miles if you loop around the lake as well
Time: 1 hour; 2-3 hours
Elevation gain: 100 feet
Elevation at trailhead: 4,100 feet
Read trip reports and hiker updates on AllTrails here.
This can be one of the busier hikes in the park, but the lake is beautiful and the walk is short enough that you can bring along all the supplies you need for a family picnic.
It’s the simplicity of this one that makes is so special – if you’re looking for the perfect family-friendly hike in Yosemite, this is the one.
You’ll have the option to sprint through and head straight for the destination if you like, it wouldn’t take much time at all to go there and back as the trail is only about two miles to the lake, round trip.
That trail leading up to Mirror Lake is ideal for leisurely morning strolls, though, and provides an easy walk for you and pretty much anyone you love to chit chat along the way.
If you want to spend more time, you can walk the whole loop around Mirror Lake. That’s closer to five miles, though, and is best for those who really want to relax into the peace and tranquility of Mirror Lake.
Washburn Point
Washburn Point can’t even really be considered a hike, but it is worth a stop if you’re nearby. Just head down the stairs and take in the view!
What to Pack for Yosemite Hikes
First aid kit: You’ll want to pack a small kit with the things you need — but in my opinion, it’s better to buy a pre-made first aid kit as it’ll likely cover things you might forget. I recommend this HART Weekend First Aid kit, which has extras in case you use something, so you won’t have to replace it as often.
Headlamp (and extra batteries): In case you’re planning any sunset hikes where you may come back after dark, you’ll want a headlamp to keep your hands free as you hike in the dark (trust me, you don’t want to have to rely on the flashlight funciton of your phone – I’ve learned this the hard way before!). This Petzl headlamp is highly-rated and affordable.
Water Filter Bottle: There are a wide variety of water filtration systems and treatments, but for a day hike, I recommend a water bottle with a filtration system set up inside of it. I recommend the GRAYL Geopress. It’s compact and easy to use, and you can refill from anywhere: streams, waterfalls, lakes, you name it, without getting sick. Otherwise, you can only refill at designated drinking water stations in the park.
Rain gear: A rain jacket is great to have as a just-in-case: nothing ruins a hike quite like a sudden shower without a rain jacket. I recommend Marmot brand — this men’s jacket is great and stylish, and I have the women’s Marmot Precip (and have had it for years) and love it.
Day pack: No need for a giant backpack for these easy Yosemite hikes! Just bring a comfortable day pack. Look for something with a mesh back panel, so it’s less hot and sweaty against your back, and perhaps something with waist straps and a shoulder strap to help distribute weight if you’re someone who gets back pain easily *raises 80-year-old hand*. I love the Osprey day pack – it’s cheap but durable, so comfortable, and has all the features you need for a day hike.
Sunscreen: Wear this every day of your trip — even on a cloudy day!
Sunglasses: Great for unshaded trails and sunny days!
Hiking boots: You’ll want good, possibly waterproof hiking shoes for these Yosemite hikes! I own and love my pair of Ahnu Sugarpine hiking boots and recommend it for other women – especially if you have wide feet like I do! For men, I’ve heard good things about the KEEN Durand boot, but haven’t used them personally (for obvious reasons).
If you’re only doing the really easy no elevation hikes, you can maybe get away with doing these Yosemite hikes tennis shoes, but I have really bad ankles and am always grateful for the extra ankle support. Even a pair of work boots like Timberlands are a lot better than sneakers.
Camera: I use and love my Sony A6000! It’s mirrorless, so it’s lightweight and perfect for a high-quality camera that won’t weigh your pack down.
Sunhat: To keep sun off your face – I recommend a packable hat like this one which has a strap so it won’t blow off in guests of wind and you can easily wear it on your back when you don’t feel like wearing it on your head.

Allison Green is a travel blogger, writer, and podcaster who grew up in the Bay Area of California. She has spent time living in New York, Prague, and Sofia, but has returned to live in the East Bay. She has traveled to 60 countries before the age of 30 while running several digital travel publications. Her writing and podcast have been featured in Forbes, CBC Canada, National Geographic, the Huffington Post, and CNN Arabic, amongst others. She’s obsessed with bouldering, houseplants, other people’s pets, and anywhere she can see the ocean.