
The High Sierra Trail is a stunning trek through Sequoia National Park into the eastern Sierra Nevada mountains. You’ll pass high elevation lakes, amble along rushing rivers and lush meadows, and finally end your hike on top of Mount Whitney, the highest point in the Lower 48.
The High Sierra Trail, or the HST, was built in the 1920s as a passage through Sequoia National Park after the park’s expansion into the East Side of the Sierras.
The trail cuts straight through the most beautiful sections of the Sierras, climbing from west to east over the Great Western Divide, also known as Kaweah Gap, and up into the Eastern Sierras.
If you’re looking for a strenuous hike in the heart of the Sierras but only have a week, this is the perfect hike for you!
If you’ve got a looser schedule, you can certainly take your time on the High Sierra Trail and spend time jumping in lakes and sunning on granite slabs.
The High Sierra Trail at a Glance
Distance: 72.2 miles
Difficulty: Strenuous
Total Elevation Gain: 13,303 feet
Highest Point: 14,505 feet
Time: Average of 6-8 days
Direction of Your High Sierra Trail Hike
Note: This post contains affiliate links, which earn me a small commission at no extra cost to you if you make a purchase using one of these links. Thank you for supporting this free content!
Most people begin their hike in Crescent Meadow, near Sequoia National Park’s Giant Forest. From there, you’ll have one big climb across the Great Western Divide of the Sierra Nevada mountains, and another up to the summit of Mt. Whitney.
Mt. Whitney is the highest point on the trail, so it is recommended to start in Crescent Meadow at lower elevations and work your way up to the higher elevations near the end of your hike.
This direction also means a more climactic finish when the High Sierra Trail meets and joins routes with the John Muir Trail and the Pacific Crest Trail!
It is also possible to hike from Mt. Whitney to Crescent Meadow. However, when hiking in this direction, you should be prepared to experience high altitudes and a hard, long climb right off the bat.
Permits may also be more difficult to obtain. Difficulty aside, the second half of your hike will be gentler as you hike toward Sequoia’s Giant Forest.
Travel Logistics for the High Sierra Trail
Getting to and from your trailhead can be difficult. Unfortunately, driving between Whitney Portal and Crescent Meadows in Sequoia National Park is not at all a direct drive, and so public transportation options are limited and can get pricey.
In fact, the most direct route between Crescent Meadow and Whitney portal is, you guessed it, the High Sierra Trail itself!
The best way to do it is to have two cars, and park one at either end of the trail, or to park your car at your terminus and have a lucky friend or family member drop you off at your start.
Of course, it’s not always realistic to have two cars or a friend willing to shuttle you, so there are some options using public transportation.
The best option is to leave your car or rental in the town of Visalia, California, and take the Sequoia Shuttle to the Giant Forest Museum. Note that you will need reservations and will have to pay a roundtrip fee of $15 (although you will avoid the entrance fee to Sequoia National Park).
Next, take the free Sequoia National Park shuttle on the green line to the Lodgepole Visitor Center, where you will pick up your permit, and then hop back on to get back to the Giant Forest Museum.
Take the Sequoia National Park Shuttle gray line to your trailhead at Crescent Meadow. The shuttles have limited hours and seasonal closures, so make sure to check that before you go.
To return to your car from Whitney Portal, hitchhike or take a shuttle to get to the town of Lone Pine. You will not have cell service at Whitney Portal, so plan to reserve a shuttle ahead of time.
From Lone Pine, you can take the Eastern Sierra Transit Bus to Mojave for $22, and then take a Greyhound bus back to Visalia for $20.
Seasonal Weather on the High Sierra Trail
The best time of year to hike the High Sierra Trail is between late June and September.
It is important to check snow levels before setting out on your hike, as snow may remain on the high passes into late June, making the hiking not only much more difficult, but possibly dangerous if you don’t have the proper mountaineering skills and equipment.
July through mid-September is really the hiker sweet spot. You’ll get to see wildflowers and have abundant running water without too much snow, and hopefully without too many mosquitos.
You’ll get sunny days in the 60s-80s F, and nighttime lows around 30-40 F, although it can get colder at high elevations. Later in the season (August/September), you’ll probably experience a few hot dry sections of trail as well, so bring plenty of sun protection!
River crossings can be dangerous when there is a lot of rain or snow melt, so make sure you check at the ranger station before you leave for water level and river crossing information.
While rain is not common, you will likely experience at least one thunderstorm while hiking. Stay at lower elevations until the storm passes.
How to Get a High Sierra Trail Permit
The High Sierra Trail is quite popular, so the park has implemented permit quota systems for hikers between May 28-September 20th to ensure the area does not damaged by overcrowding.
The best way to get a permit is to reserve a permit ahead of time. You can get a permit up to 6 months before the start of your trip. Because of the trail’s popularity, it may be helpful to get your permit exactly 6 months before your start date.
Starting in 2021, Sequoia National Park permits can be reserved on Recreation.gov. Check Recreation.gov to see how many permits are still available on your desired start date at your trailhead (Crescent Meadows). Permits cost $15 total, plus $5 per person.
You’ll pay for your permit on Recreation.gov, but you can get refunds per-person up to 1 week before the trip.
Important: your confirmation letter from Recreation.gov is not your permit. Bring a printout of your confirmation letter and a photo ID to pick up your permit at the Lodgepole Ranger Station. You can pick up your permit as early as 1:00 PM the day before, and no later than 9:00 AM on the day of.
If you’re lucky, there may also be walk-up permits available beginning the day before at 1:00 PM. You’ll need to arrive at the Lodgepole Ranger Station with your entire party. See the Sequoia National Park website for more permitting information.
If you’re beginning your hike from Whitney Portal, you’ll need to contact Inyo National Forest for a permit.
Finally, you must also get a (non-competitive) California Fire Permit. This does not allow for campfires, which are prohibited on most of the trail, but is required to use a cooking stove on trail. Check the Sequoia National Park website for more permit information.
Physical Fitness and Preparation
Training for your High Sierra Trail hike can be fun, as the number one way to train is to do training hikes! It doesn’t matter where you live — just get outside and walk.
Ideally, you should hike with your backpack in order to get used to carrying significant amounts of weight. This will also give you a sneak peek at any gear problems you may face before you’re stuck out on the trail with a painful pack.
General physical fitness will be important, as some of the trail is quite strenuous. Cardio training is an important facet of hike training, as your lungs especially will need to be in good shape, especially with the altitude! But don’t forget to build up your core and leg strength; you’ll need those also as you climb up steep mountain passes.
Much of the trail is above 8,000 feet, so training at altitude is ideal if possible. High elevations can make physical exertion more difficult, and it can cause altitude sickness if you ascend too quickly or higher than your body can handle.
If possible, plan to spend a little time acclimating to higher elevations before you begin your hike. Once you’re hiking, pay attention for signs of altitude sickness; if you start feeling the signs, immediately get to a lower elevation.
If you don’t have much backpacking experience under your belt, try hiking a few shorter trails first in order to get comfortable with wilderness skills. It is also a good idea to learn first aid and carry a satellite phone on any backcountry trip, as you won’t have cell signal in the event of an emergency.
Trail Etiquette
The High Sierra Trail is a true gem that feels extremely remote and pristine. It is important to follow some guidelines in order to preserve the natural landscape so it can be enjoyed for years to come.
Camp at least 200 feet away from water in an already established campsite. Established campsites will often have a flat area where others have put up a tent before, and perhaps a small fire ring. Campfires are usually not allowed due to high wildfire risk, so make sure to check with a ranger before you set out.
You will be required to carry your food in a bear canister, a plastic container that bears and other wildlife can’t open, along the entire trail.
Bear canisters help protect animals from human interference, and, perhaps more immediately important to you, protect your food from becoming a bear’s lunch! All scented items, including toiletries, should be stored in a bear can.
Lastly, when using the bathroom outdoors, do so in a six-inch deep hole away from your campsite and water sources. Pack out, don’t bury, your toilet paper.
In the Mt. Whitney zone, you’ll be required to use a provided “wag bag” to do your business so as not to overrun the already-crowded area with bathroom holes.
Follow all principles of Leave No Trace to keep the area natural and let others enjoy the beautiful wilderness.
The High Sierra Trail Route
Now let’s get to the good stuff — the actual hike!
The High Sierra Trail is quite well marked, so you shouldn’t have any trouble following the route.
Camping and water are also quite easy to find. This sample itinerary breaks up the hike into 6 days, but you can certainly camp more frequently with lower mileage days, or take a “zero” day of no hiking to hang out and soak in the outdoors.
The mileages presented below are for a daily average mileage of around 10 miles, but feel free to split the hike up into longer or shorter sections.
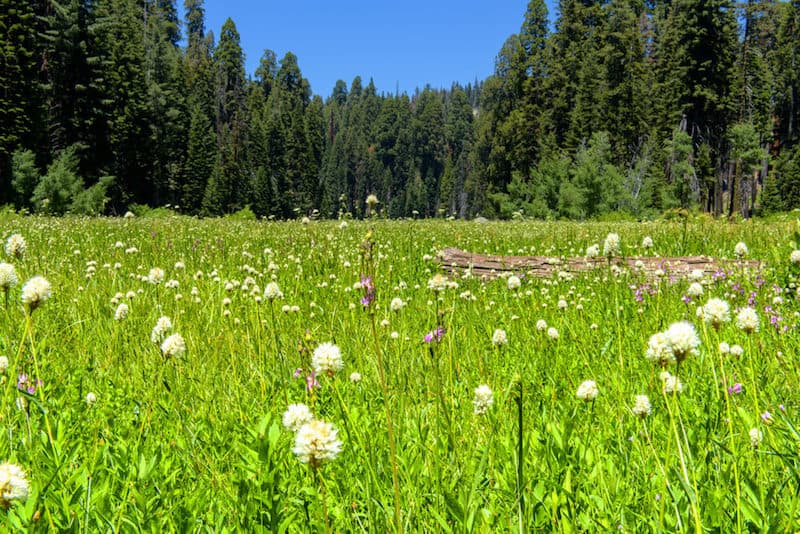
Crescent Meadow to Bearpaw Meadow: 11.4 miles
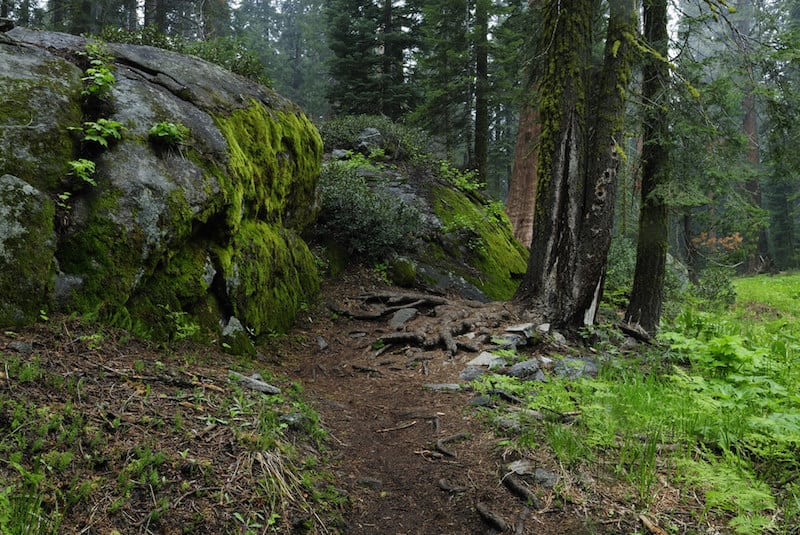
The trail starts in a meadow but quickly moves into a dryer, rockier landscape. You’ll have views of a broad valley, including Sequoia National Park’s famous Moro Rock.
The trail is fairly flat here, and passes across several small streams. After passing the junction with the Seven Mile Hill Trail, you’ll begin to climb a bit more. You’ll have the option to camp near Nine Mile Creek at 8.8 miles, where there are several established campsites above the creek with flat spots to set up your tent.
If you’re not done yet, you can continue on into Buck Canyon, over Buck Creek, and finally up a slightly steeper climb up to Bearpaw Meadow.
Set up your tent near Bearpaw Meadow, or make reservations to stay at the Bearpaw Meadow Camp. The Camp offers tent lodgings, and has a small store offering drinks and snacks. Don’t depend on the camp for your supplies, as it may not be open or well-stocked.
Bearpaw Meadow to Big Arroyo Junction: 11 miles (22.5 miles total)
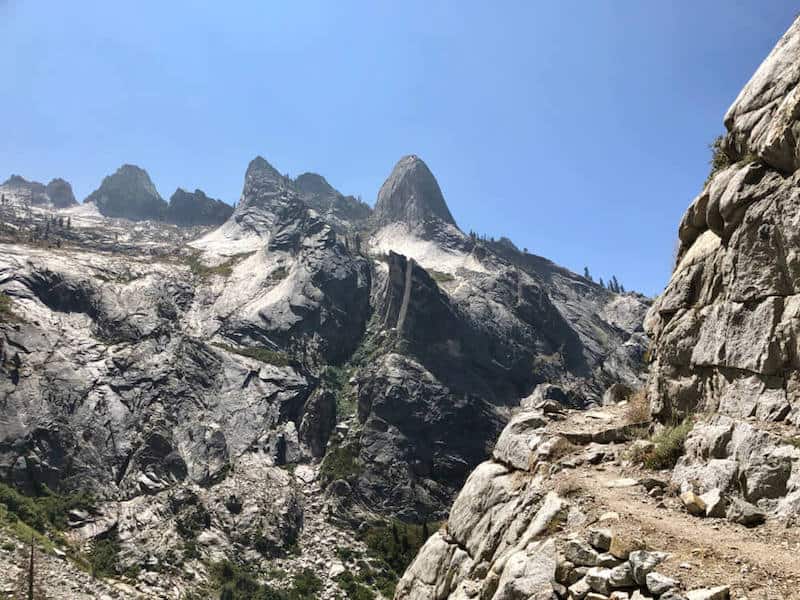
This is where your big climb into the Great Western Divide begins. You’ll begin switch-backing up towards Hamilton Creek. Look out for Angel Wings, a large granite wall, looming high above you.
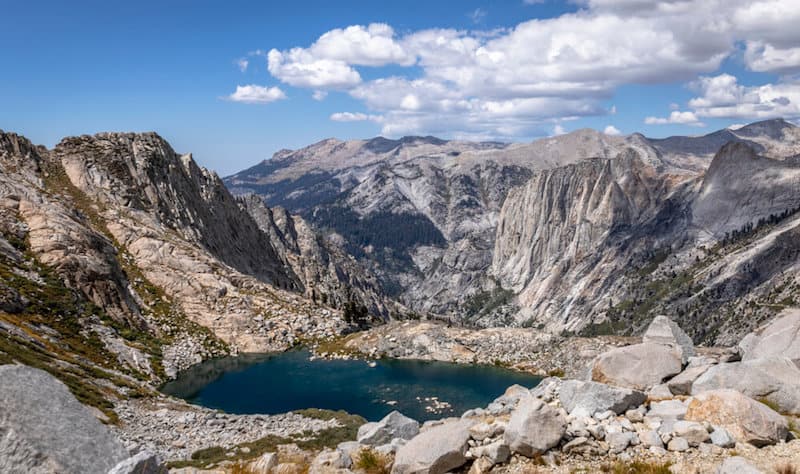
At around mile marker 16.5 you will reach sparkling blue Big Hamilton Lake. Many people choose to camp here. Even if you don’t stop here for the night, it’s worth at least a quick break for a swim! Use the warm granite lakeshore to warm up, and then keep hiking.
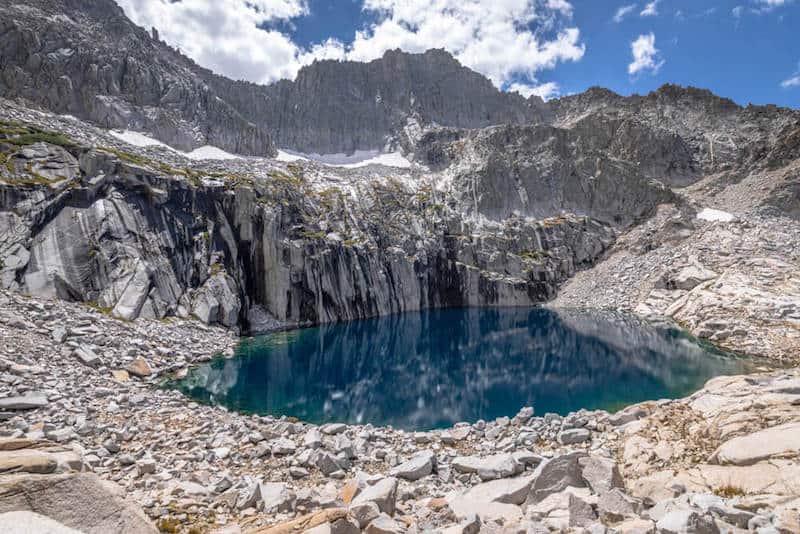
You’ll face a big climb that begins with switchbacks and then hugs a cliff wall. Pass through a tunnel cut into the rocky wall before hiking up further into a true alpine landscape.
Precipice Lake is nestled high up below stunning stripy granite walls. Camping here is chilly, but there are a few camping spots here that offer beautiful views of Big Hamilton Lake below.
Past Precipice Lake, you’ll have a short walk to Kaweah Gap itself, the high point of the Great Western Divide at 10,700 feet. From there, you’ll have a quick descent in the Big Arroyo valley, with campsites available in 2.5 miles at the Big Arroyo Junction.
Big Arroyo Junction to Upper Funston Meadow: 12 miles (34.5 miles total)
This section of the High Sierra Trail will give weary hikers a nice break, since you won’t have any huge climbs.
First, you’ll climb slowly up to the Chagoopa Plateau, where the trail becomes flat. Soon you will reach a junction towards Moraine Lake. If you’re interested in a small detour to another lake, the Moraine Lake Trail will meet back up with the High Sierra Trail and only adds 0.8 miles.
If you’re short on time, skip Moraine Lake and take the more direct trail, meeting back up with the Moraine Lake Trail at mile marker 30.8.
Next, you’ll have a long descent towards the Kern Trench. Hike down the many rocky switchbacks until you reach Upper Funston Meadow at 34.5 miles.
Upper Funston Meadow to Junction Meadow 9.7 miles (44.2 miles total)
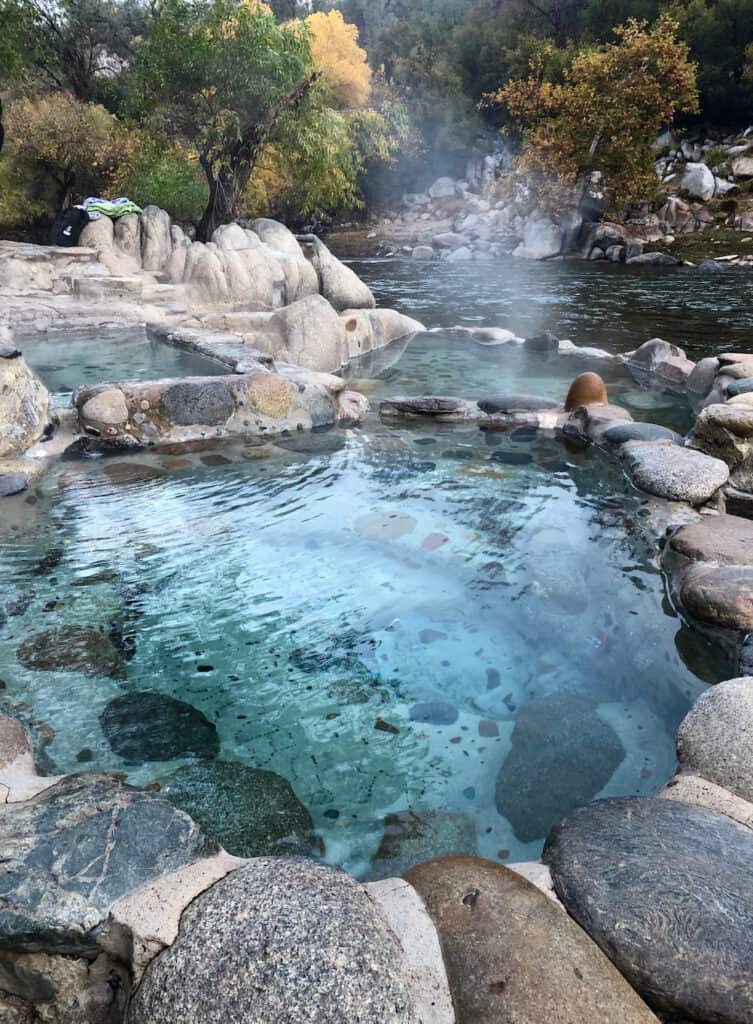
This section of trail begins in the bottom of the Kern Trench valley. You’ll follow the rushing Kern River north through a large forest. Make sure to stop at mile 36.8 for a soak in Kern Hot Springs! The small cement tub has a natural hot spring flowing into it. Take a nice hot soak in the tub, or jump into the Kern River if it’s too hot! Camping next to the hot springs is limited, but there are several sites, as well as camping about a mile north next to the river.
Past the hot springs, you’ll follow the river along the valley floor through forest for quite some time, until you begin to climb up to Junction Meadow. This section of trail can be quite hot and dry, so make sure you have plenty of water and sun protection.
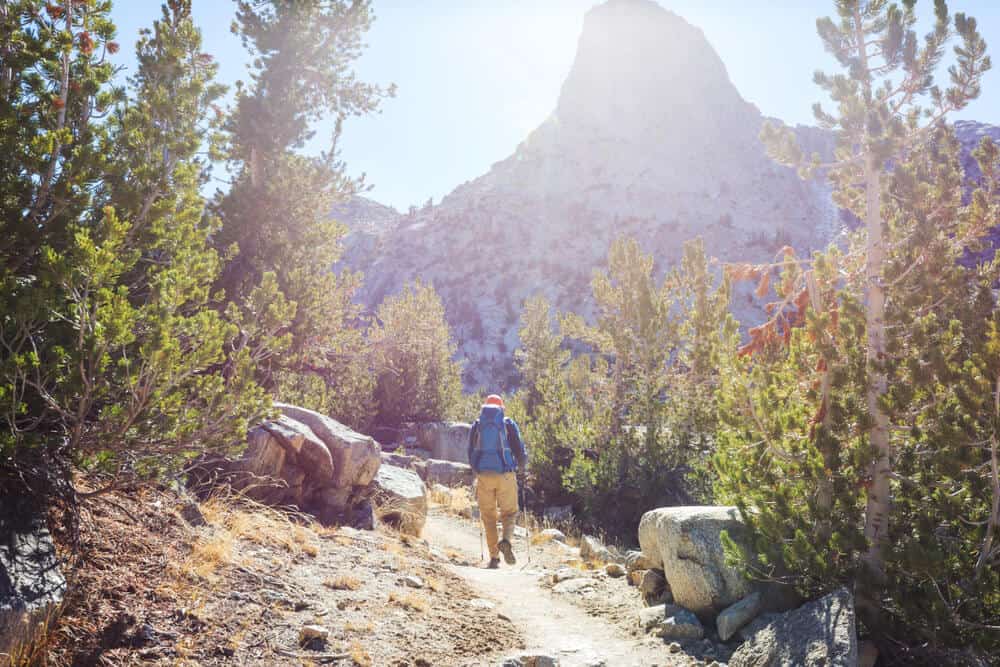
Junction Meadow to Guitar Lake: 9 miles (56.6 miles total)
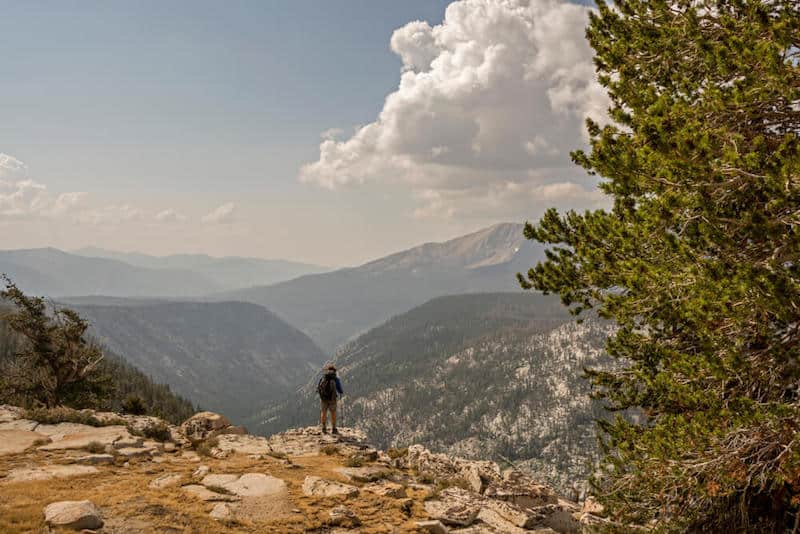
You’ll start your day after Junction Meadow with a steep climb out of Kern Canyon.
While the hike can be hot and difficult, you’ll be rewarded with beautiful views, making the climb worth it. Soon you will hit a junction with the John Muir Trail at 48.9 miles, where you can find abundant camping next to the river.
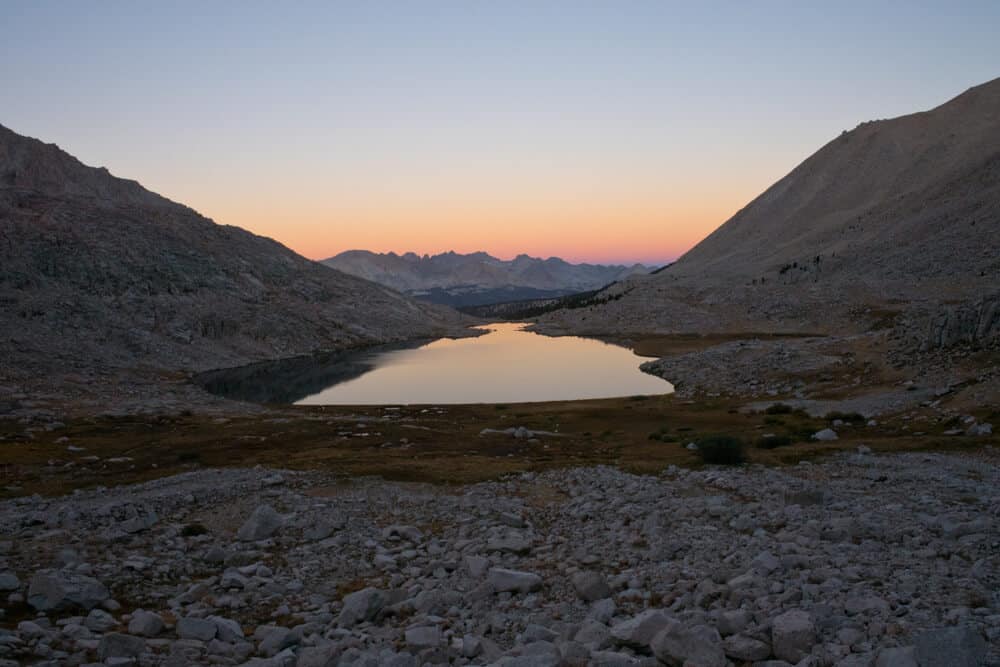
Further along, you can find camping at Crabtree Meadow (mile marker 53.1) or continue on past small meadows up to Guitar Lake.
Camping at Guitar Lake, the closest camping to Mt. Whitney, will make your ascent of Whitney as short as possible!
There is no shade at Guitar Lake, so don’t get there too early in the day.
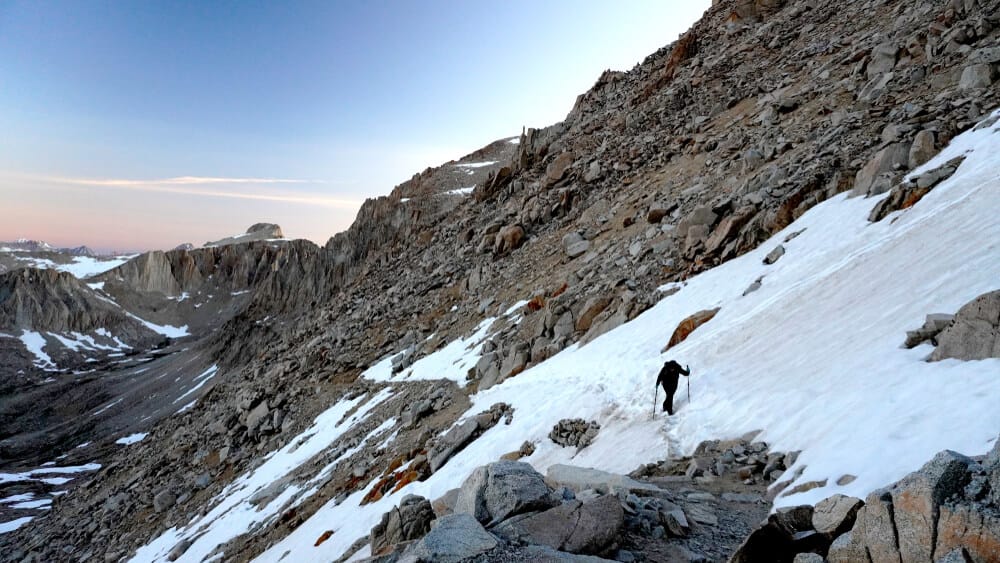
Guitar Lake to Mt. Whitney Summit: 4.9 miles (61.5 miles total)
Hooray! You’ve made it to the crux of the trail. From Guitar Lake, you’ll hike up switchbacks for about 3 miles. These switchbacks may feel never ending, but not to fear. Soon you’ll hit Trail Crest, and the hardest part will be over. You can choose to leave your pack at Trail Crest and continue the last 2 miles to the summit. These last two miles are uphill, but are much gentler.
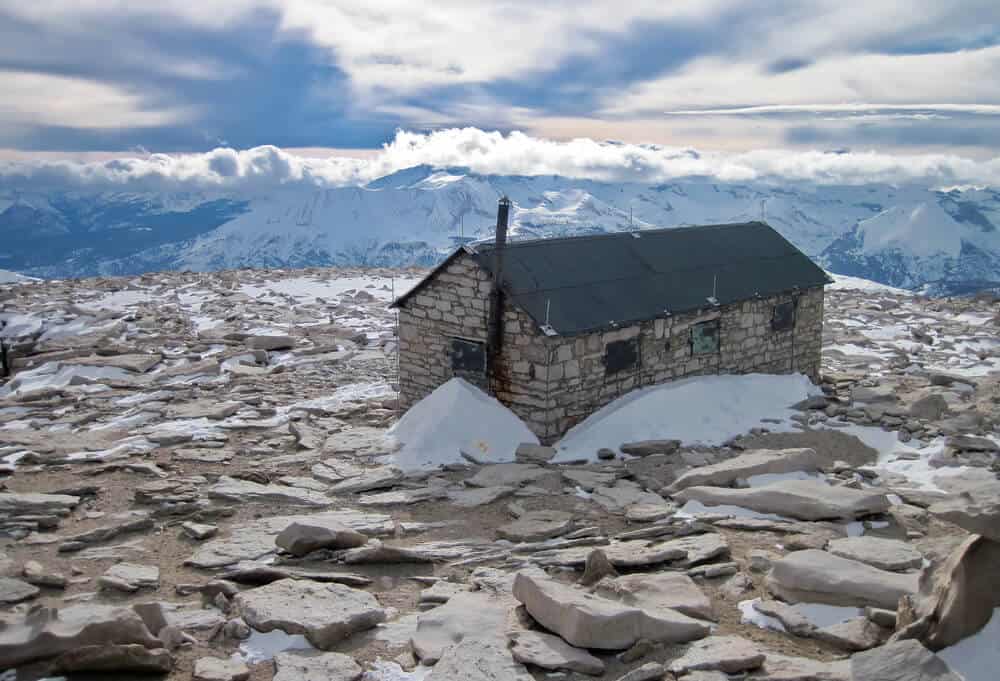
Celebrate at the rocky summit and take in the amazing views of distant mountains and the small town of Lone Pine glittering below you. If you are an experienced hiker and want a special treat, do a sunrise summit of Mt. Whitney by leaving Guitar Lake around 2AM to catch sunrise at the summit. Please use caution, as hiking by headlamp can be dangerous. Make sure to bring your sleeping bag or other warm layers to the summit, as it will be quite cold before the sun rises.
Whitney Summit to Whitney Portal: 10.6 miles (72.2 miles total)
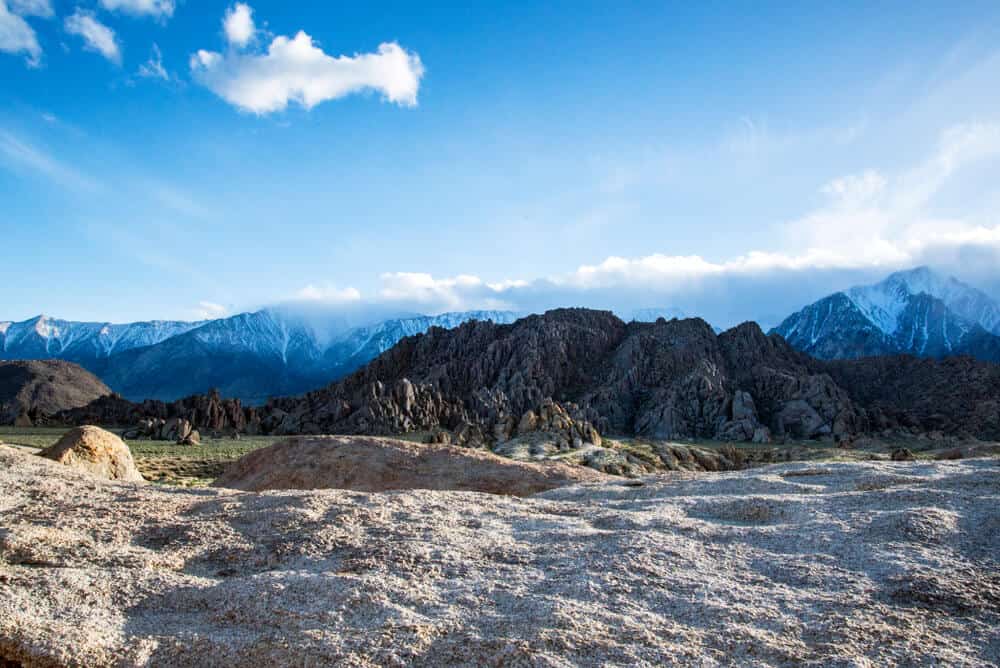
From the Whitney Summit, hike almost 11 miles to Whitney Portal, your exit point.
The first part of this section traverses 100 switchbacks down to Trail Camp, 4.2 miles from the summit. True to its name, Trail Camp offers plentiful camping and great views, but it is still quite high at 12,000 feet.
If you’re hoping to descend to lower elevations, you’ll hit Outpost Camp at another 3 miles after Trail Camp. Outpost Camp is your last camping option before Whitney Portal.
From Outpost Camp, follow the river and switchback down another 3.5 miles to Whitney Portal.
What to Pack for the High Sierra Trail
Everyone has their own preferred packing list, but there are some things that all backpackers on the High Sierra Trail should carry to stay safe and comfortable. Here is a rough guide to what you should bring:
- Permit (with photo ID to pick it up)
- Maps and navigation tools
The Big Three
- Tent
- Backpack
- Sleeping bag & pad
Clothing
- Warm clothes & extra layers
- T-shirt and shorts
- Rain Jacket
- Sun hat
- Hiking shoes
Safety / Protection
- Microspikes, if hiking in snow
- Sunglasses & sunscreen
- Headlamp
- Hiking poles
- Bug spray
- First aid kit
- Trowel
Cooking
- Minimum 2 L of water carrying capacity
- Water filter
- Food
- Stove & Fuel
- Cooking pot
- Bowl & utensils
- Bear can

Lena is an outdoor recreation enthusiast born and raised in the San Francisco Bay Area. After going on her first camping trip at 3 months old, she hasn’t stopped since. While her backpacking adventures have taken her to wilderness destination across the country, California’s mountains and deserts will always be her favorite.