
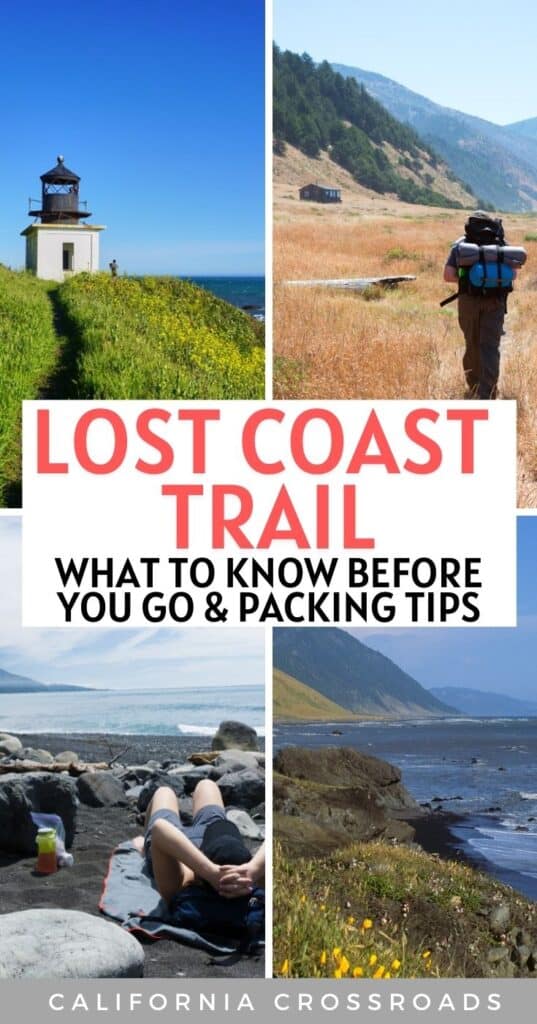
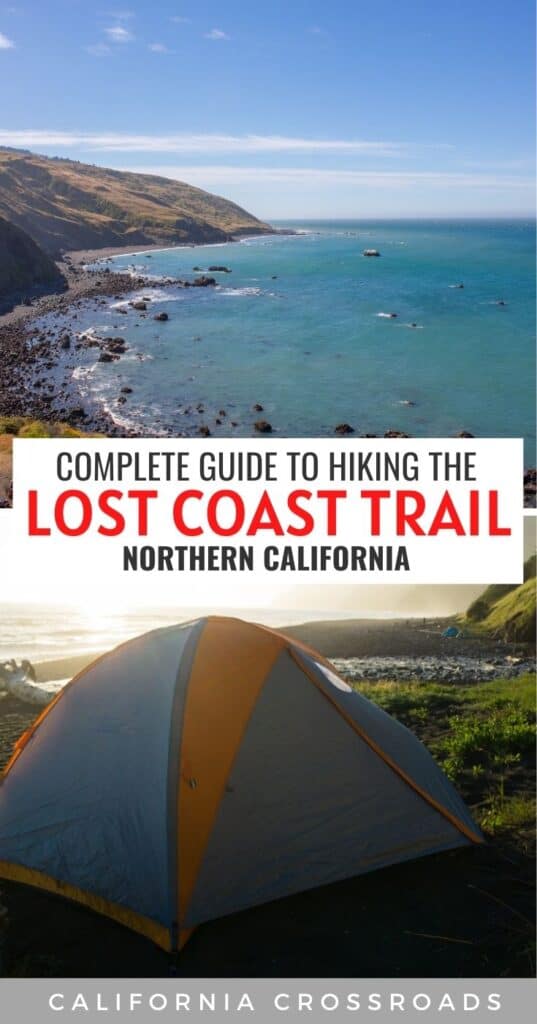
The Lost Coast Trail (LCT) is a backpacking trail in the Sinkyone Wilderness, Humboldt County, California.
It has a north and south section covering 60 miles of California’s beautiful coastline. Most hike the northern section: this is the section we will be covering in this guide to hiking the Lost Coast trail.
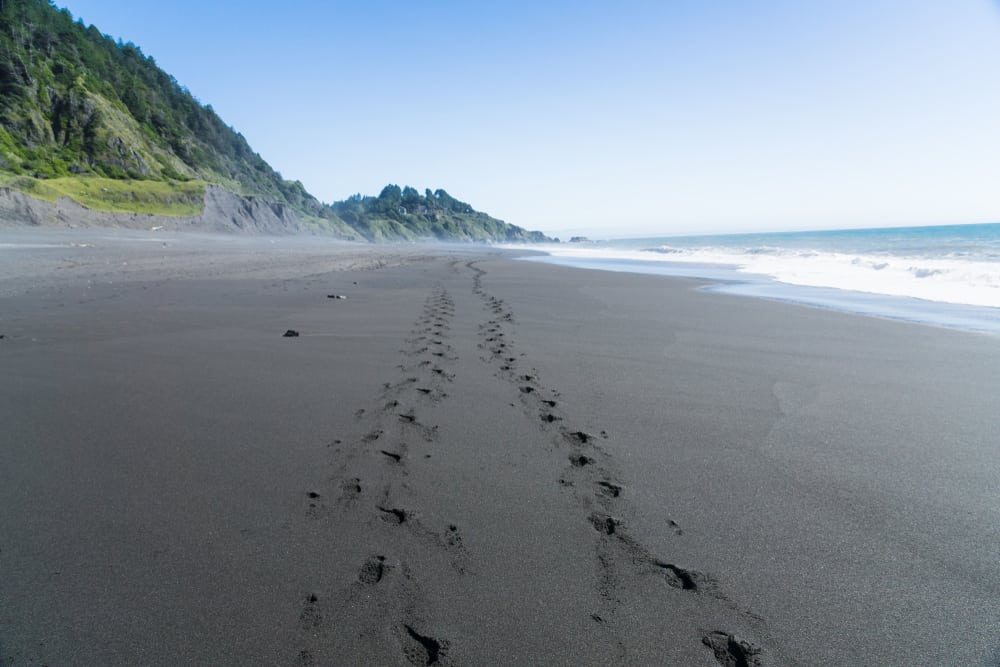
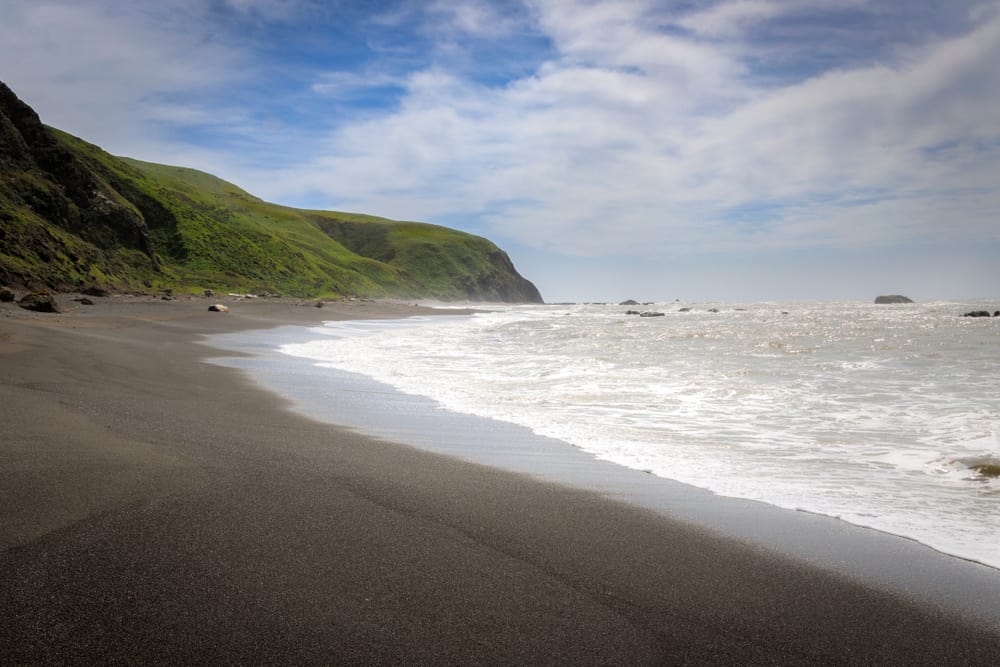
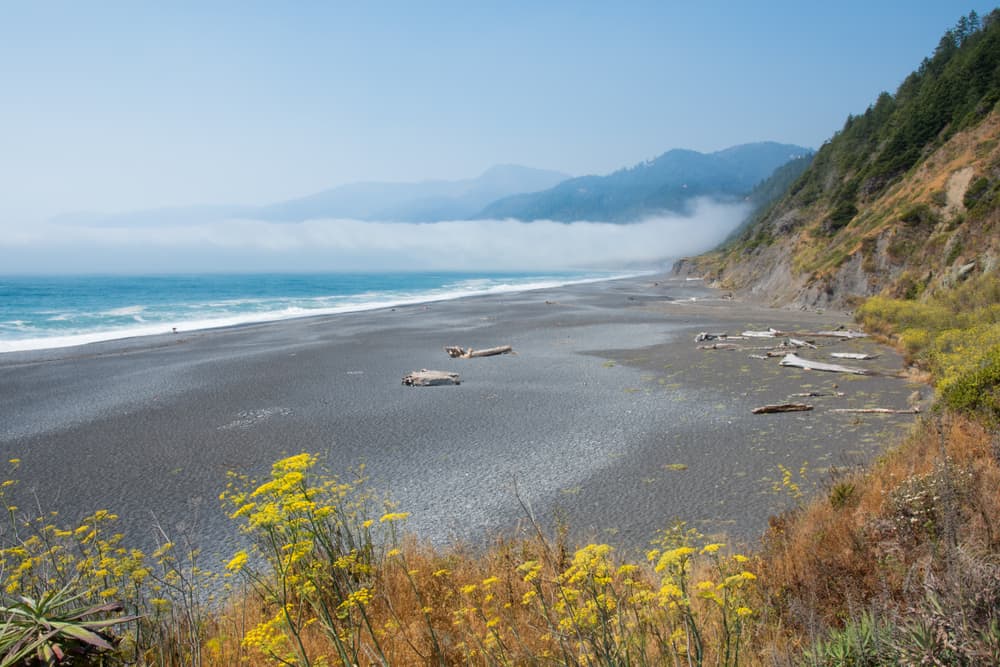
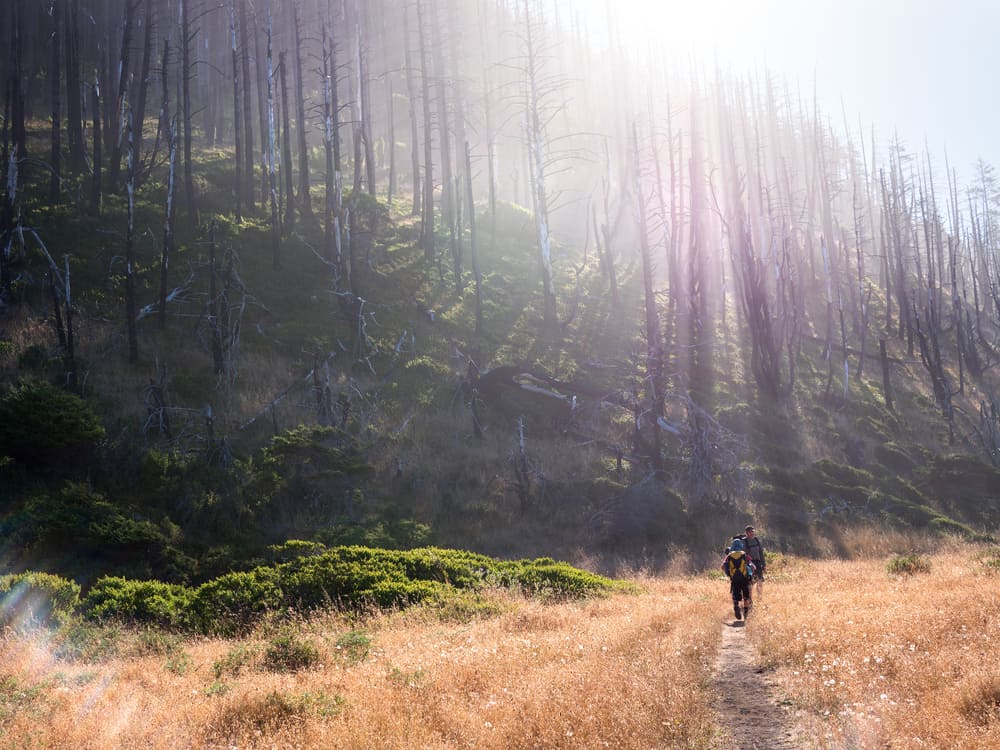
The northern section starts at Mattole Beach Trailhead and ends at Black Sands Beach. It is 24.6 miles and it is exquisite! It is the largest stretch of coastal wilderness in California – a total escape from day to day life.
It is one of the most beautiful places in the world, offering a remote coastal hiking experience with amazing views and plenty of excellent places to camp. It is strictly a backpacking route. That means there are no amenities. A few things to consider when planning this trip would be: tides and route, transportation, your gear, and must-see stops along the trail.
What to Know Before Hiking the Lost Coast Trail
Note: This post contains affiliate links, which earn me a small commission at no extra cost to you if you make a purchase using one of these links. Thank you for supporting this free content!
The first thing to consider when planning your hike on the Lost Coast Trail is the intertidal zones. There are parts of the trail that are impassable during high tide.
This speaks to the unique experience the Lost Coast Trail gives the hiker, but it is also a dangerous aspect. Do not attempt to hike when the trail is washed in water. People have died when trying to pass at high tide.
It is imperative to use a tide chart and time your hike accordingly. Hit the impassable zones when the tide is going out. Because of this, you may have to hike the Lost Coast trail at odd hours.
For example, the tide may start going out at 3 AM which could mean you are hiking at 4 AM, so definitely bring a headlamp!
Note: there is one section that is ALWAYS IMPASSABLE. Take the overland route, as marked on the BLM map.
Finding Tide Charts for the Lost Coast Trail
There are tide charts at Mattole Trailhead.
You can also get a map that shows the impassable sections when you get your permit from the BLM (Bureau of Land Management) office.
The Bureau of Land Management is an awesome resource for information on hiking the Lost Coast Trail trail. Talk to them, ask questions and be sure to get a permit.
Yes, you need a permit to hike this trail and they go fast, so plan ahead!
Always practice “leave no trace” principles. In a nutshell: carry out what you carry in. It is a privilege to have access to this amazing place. Treat it this way!
If you do, we will continue to have access to this location and areas like it. Be reverent to this privilege. Respect the wilderness you are called to explore. It will benefit you, the earth, and all those wishing to also explore wilderness areas of the world.
Lost Coast Trail Tips
Tides
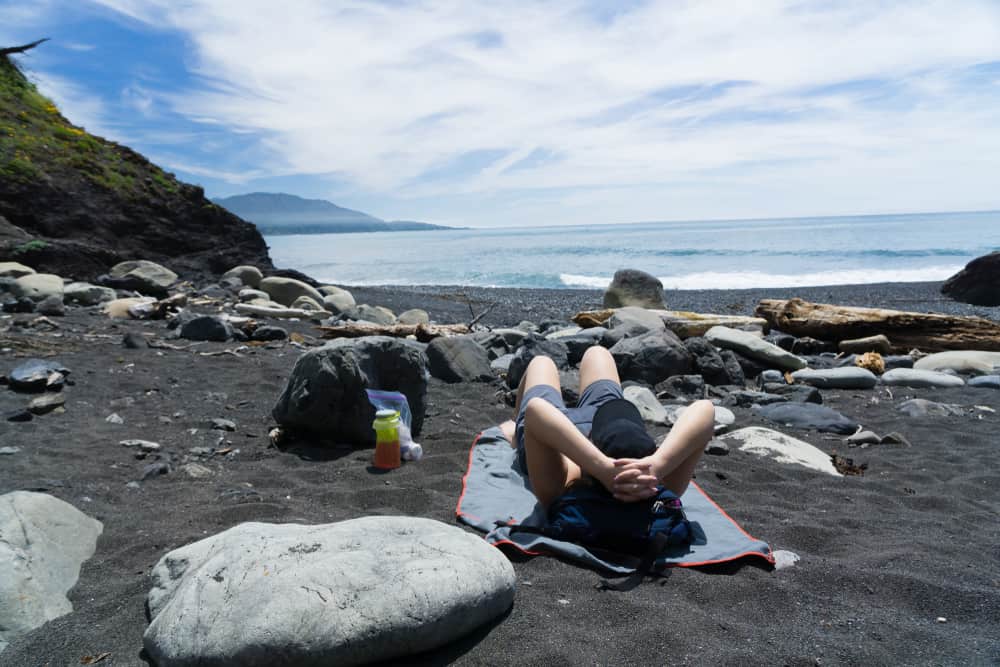
Hiking with the tides is a very interesting component of this hike. Depending on how much time you have to hike the Lost Coast Trail, it can allow for this hike to be quite leisurely compared to others, since you are at the mercy of the tide charts so you can’t always go as far as you’d like in a day.
There is plenty of time to hike and rest while waiting for the tide to change. There are also lots of trails that intersect the LCT, creating a plethora of spots to explore while waiting for the tides as well, if you don’t just want to set up camp and call it a night.
Transit
Transportation is another consideration when planning your hike of the Lost Coast Trail.
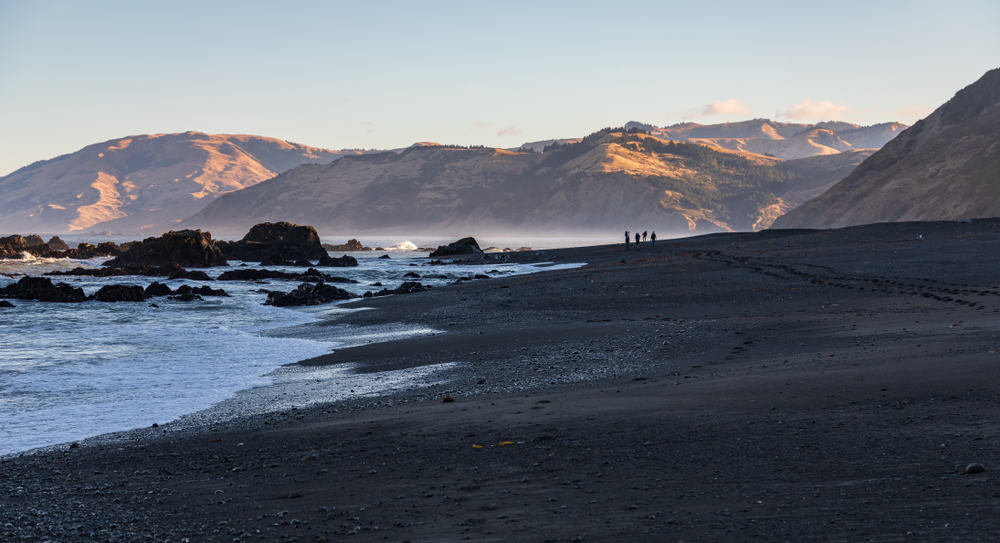
Some people choose to team up and leave one vehicle at Mattole Beach trailhead and another at Black Sands Beach (black sand = lava rock sand!).
There are also shuttles available. They will drop you off at the trailhead and pick you up at the end, for a reasonable price. Many choose the shuttle because the road to Mattole is very rugged and full of potholes, so it’s not for every car!
Timing
Plan 3-4 days to complete the 24.6 mile trail, although it can sometimes be done in 2 days if the tides and your pace cooperate.
Your timing will depend on your pace, the tides, and if you choose to add on any other hikes to the Lost Coast Trail track.
Terrain
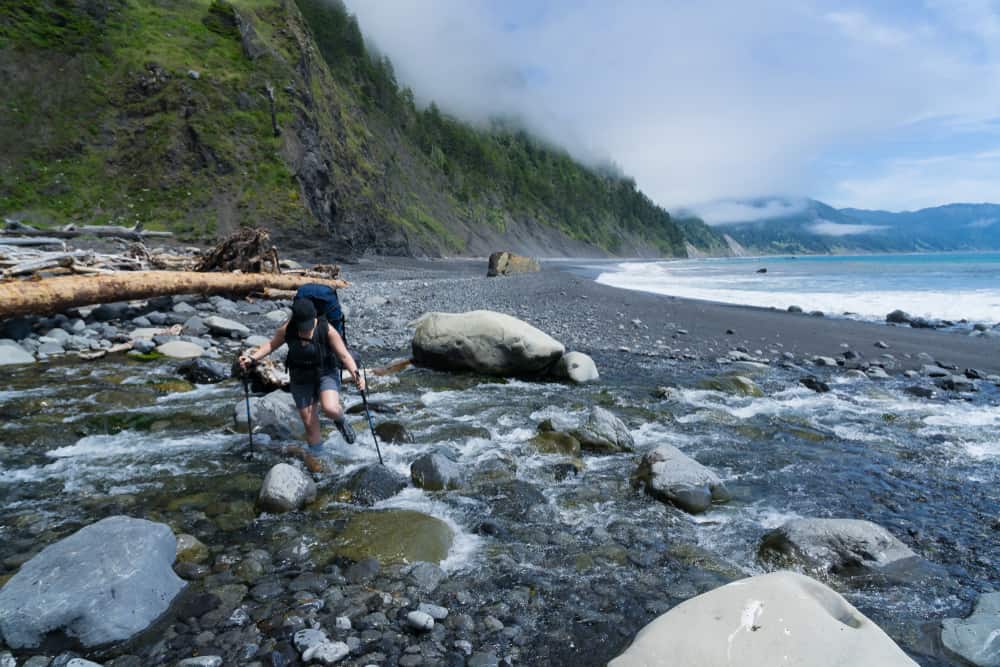
It is quite flat in parts, but it also has a few inclines, and there are nice opportunities to hike above the ocean on the cliffs. There are sandy parts of the trail, and there are boulders one has to cross and climb.
This topography can be tough on the knees and ankles, especially with 40-60 lbs of gear on your back (check out the gear list at the bottom of the article)!
This trail can be a challenge for some, but it is not overly difficult compared to others. Just plan ahead and you will get to see some incredibly special places, with a full belly since you only have a few days you need to pack for. Plus, it is mostly flat!
What to Pack
Some hikers choose to bring hiking poles to help knees and ankles on the terrain: I would recommend this! Others wear gaiters to keep sand out of their shoes.
Water is plentiful as there are many creeks that run right through the trail. You will need a water filter, of course. There is a presence of black bears in the Sinkyone Wilderness, so it is required to carry a bear canister. You can rent them for $5 with a $75 deposit from the BLM office.
When considering food to bring, remember, you have to carry it all. Lightweight food goes a long way. Examples would be: ramen, tortillas, granola, trail mix, jerky and a small amount of peanut butter. There are also freeze-dried meals you can bring. Be creative! Remember, bring a bearproof canister to store your food in.
There’s a complete gear list at the bottom of this post.
Sights to See Along the Lost Coast Trail
On the first day (if hiking north to south) expect to see elephant seals on the beach. They are massive! It is an honor to watch them sun themselves on the beach in their natural habitat.
Just do not approach them or try to touch them. Leave them be. They are large animals and you are in their territory. Be conscientious. You will hike on the cliffs and also in the sand, so you will pass near to them, but be sure to always keep a safe and respectful distance.
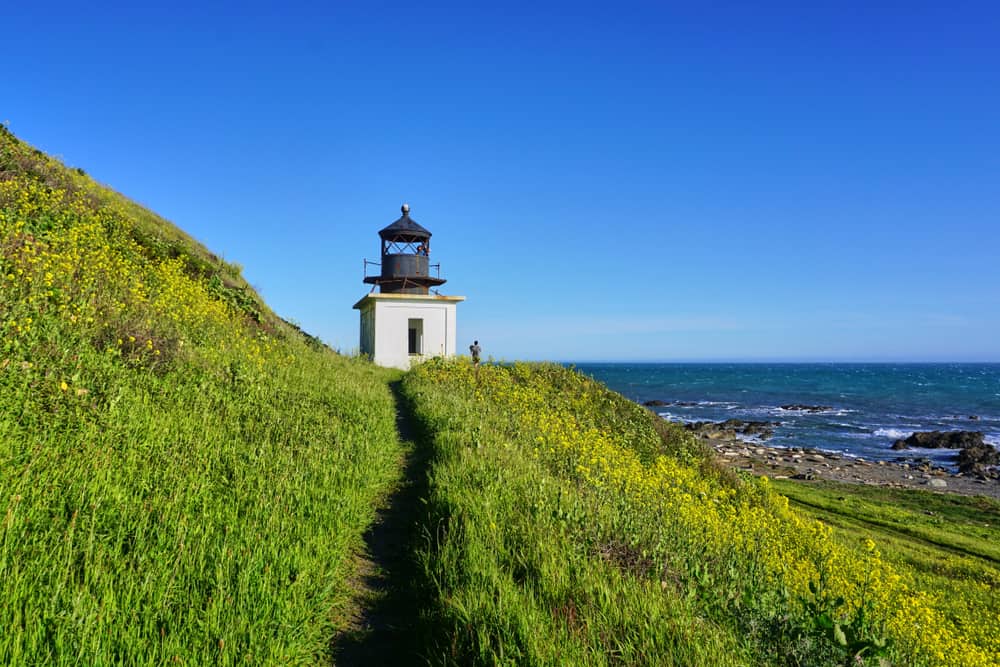
Along the way, be sure to check out Punta Gorda Lighthouse. It is a fun and unique stop!
Along the trail, expect to find many creeks and spacious campsites. There are many sea urchins and other sea creatures washed up on the beach to check out. Remember: look at, don’t touch, the marine life!
There are spots where the ocean moves rocks as the waves crash, creating the most beautiful, deep ocean rumble you may ever have the pleasure of knowing. There are places you will hike where the water hits the trail, even at low tide. It is exhilarating to hop rocks through these little spots. You may get wet, but hey, it is a coastal trail after all — that’s part of the fun (just a bring an extra pair of socks).
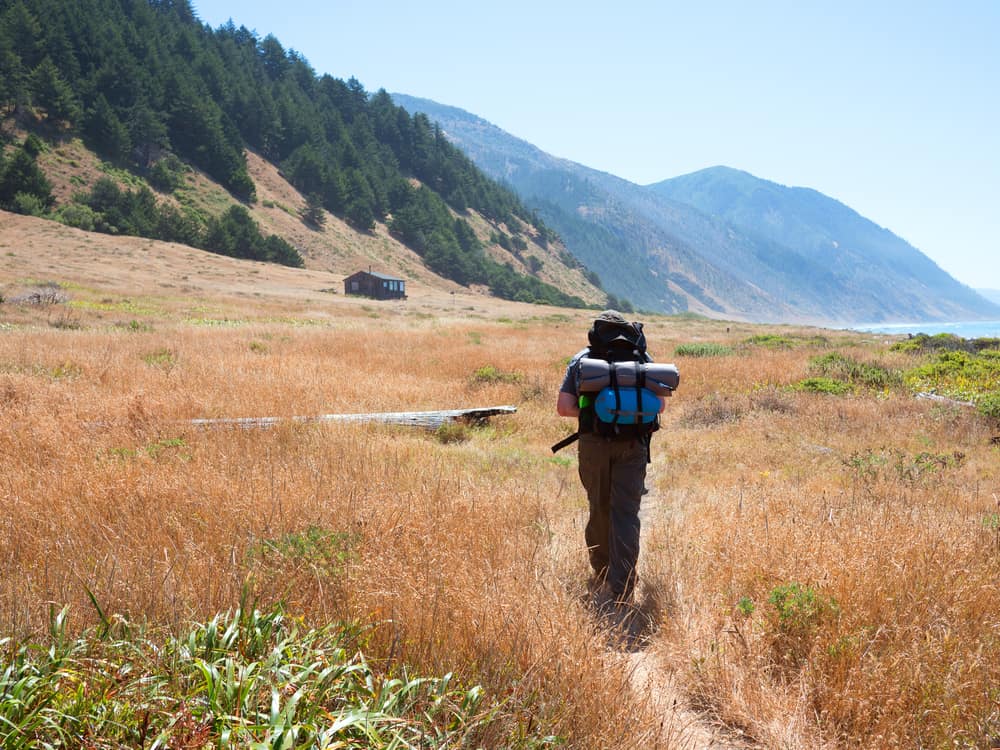
Also, there is an amazing homestead on the trail. It is like walking up on something out of a storybook. When you go, you will see it. It is absolutely stunning.
Camping Areas on the Lost Coast Trail
The camping area at Big Flat is a treat. There are plenty of little campsites spread out all around, including one called Cal’s Loveshack, the words carved into the driftwood that bordered this campsite. It is wooded which allows for shade while camping on the sand.
It can be seen that there are many people, locals most likely, that frequent this camping area and put a lot of love into making rustic “home away from home” campsites for all to share!
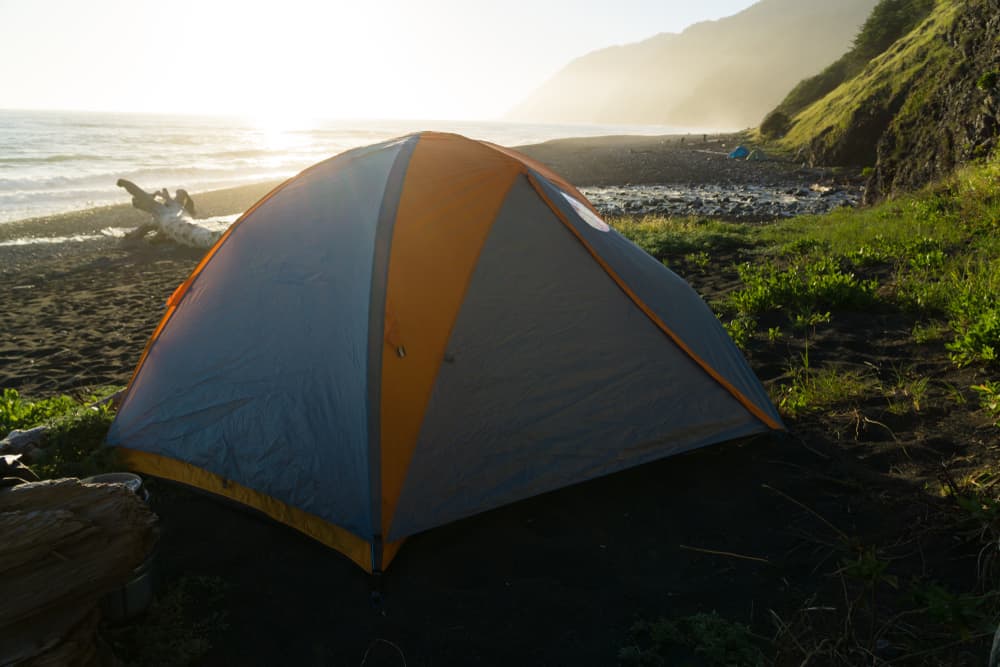
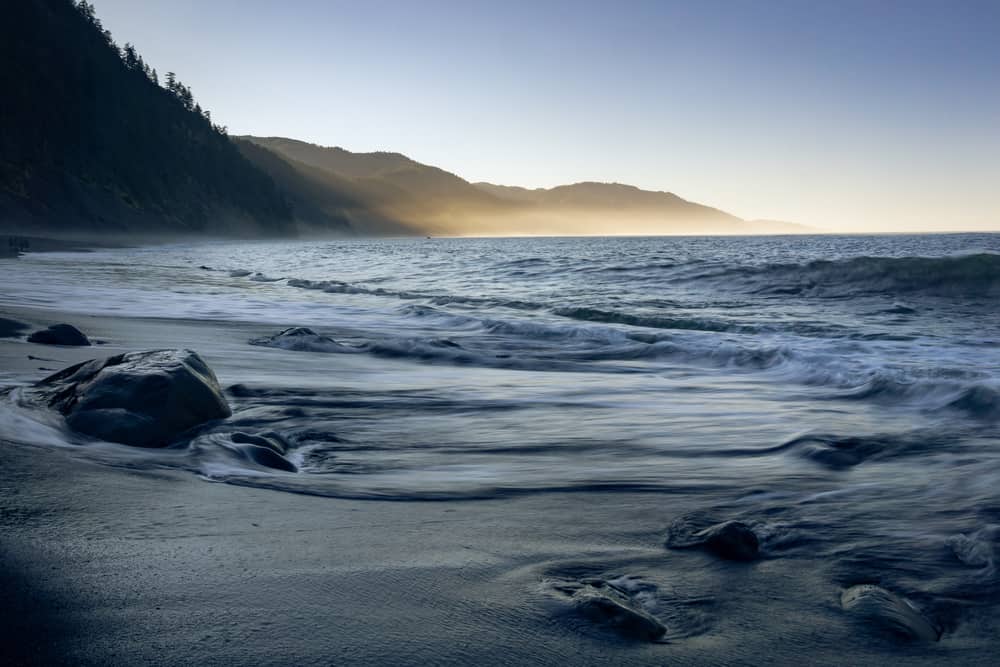
Other popular camping areas include Jones Beach, Cooksie Creek and Big Flat, but there is ample camping along the entirety of the LCT. You will find yourself in misty, foggy air or enjoying sunny, glistening days. The weather changes rapidly, going from cloudy to sunny throughout the day. Nighttime can be very chilly on the coast, so bring lots of warm clothes.
However, sleeping under bright starry skies next to the comforting sound of the waves crashing constantly far outweighs any chill in the air. It is a treasure, a true wilderness experience. Full of awe and wonder you will be as you traverse through the sand and over boulders and ascend up cliffs.
The End of the Lost Coast Trail and Extending Your Trip
Upon the conclusion of your hike, you will be in Shelter Cove.
There are small hotels, AirBnbs and restaurants to enjoy in this village if you want to luxuriate a bit after a few rustic days on the trail.
It is a lovely and very small town. You may find yourself amongst local fishermen with stories to share or live blues music.
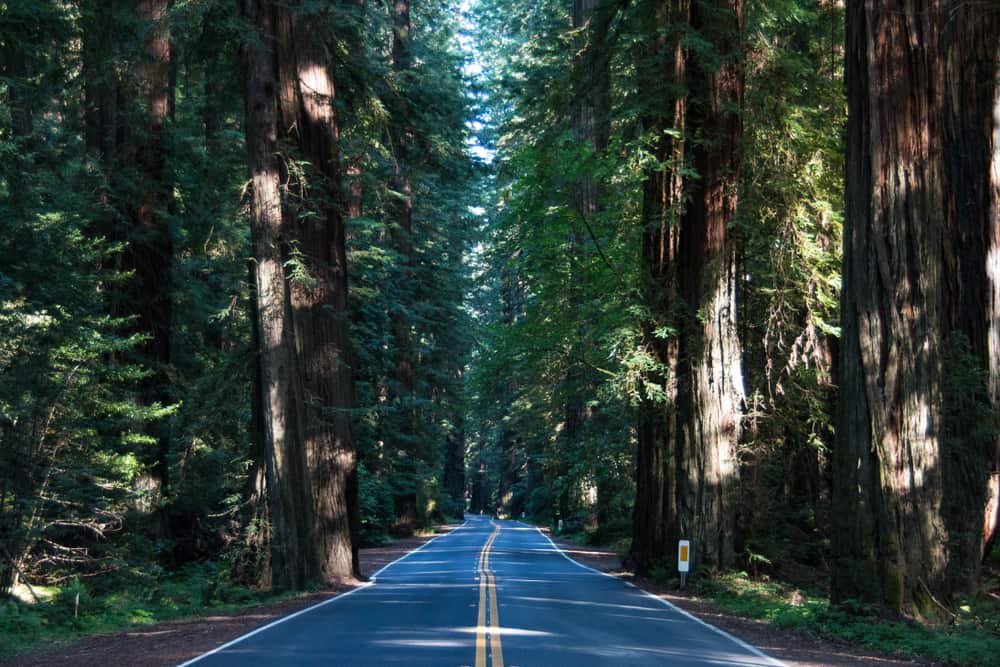
Beyond recuperating in Shelter Cove, the Humboldt Redwoods are not far. There are many hotels in the area to retreat and rest in. Plus, you will get to experience the Avenue of the Giants where you will find yourself amongst the world’s tallest trees. The Humboldt Redwoods are like none other. This is an iconic California location and definitely worth adding into your Lost Coast Trail experience!
In Conclusion
The treasures of the LCT are endless… Beaches and crashing waves to soothe the soul. Expansive views to cleanse the spirit. Black sand beaches, the King Mountain Range and beautiful creeks. Intertidal hiking to alert the senses adds a distinctive component to the Lost Coast Trail.
You will be isolated and content. Just remember, there are dangers to consider, so don’t be cavalier with your safety. Pack appropriately (list below) and always let people know where you are going and for how long. Have a permit and check in with BLM rangers.
However, if you plan accordingly, you will find yourself having an unforgettable experience. Pack your bag, get your permit, and go.
Gear List for the Lost Coast Trail
60L-65L backpack with rain fly: This REI Co-op 60L Backpack (men’s version) and (women’s version) is an affordable and comfortable choice for those who don’t want to invest a ton into their backpack. For an updated version, try the Osprey Aether 65L (men’s version) and Osprey Aura 65L (women’s version). Be sure to pack a waterproof rain cover like this Duck’s Back: even if there’s no rain in the forecast, the ocean spray and cool foggy climate can soak your bag!
Lightweight backpacking tent: This lightweight North Face Stormbreak 2-person tent weighs only 5 pounds 5 ounces, which is a nice low weight given the cost. It’s a good 3-season tent with loads of headroom, easy pitching design for fuss-free set-up, and there’s plenty of room for two hikers to share.
First aid kit: You’ll want to pack a small kit with the things you need — but in my opinion, it’s better to buy a pre-made first aid kit as it’ll likely cover things you might forget. I recommend this HART Weekend First Aid kit, which has all you need for 2 people for 2-3 days — bring one for each hiker to be safe and have extra supplies.
Headlamp (and extra batteries): Since a lot of the time, you’ll be at the mercy of the tide charts, you’ll definitely want to pack a headlamp and some spare batteries to go with them. This Petzl headlamp is highly-rated and affordable.
Water Filter: There are a wide variety of water filtration systems and treatments, but I have two preferred brands: LIfeStraw and GRAYL. The LifeStraw set-up I recommend is this one: LifeStraw Flex. It has a 2-stage filter that removes over 99.999% of bacteria, parasites, and microplastics. It can be used as a personal straw (its original iteration), but it also can attach to a gravity bag (included), a water bottle, or a typical hydration bladder. Each filter can be used for filtering up to 1,000 L of water. If you just want a water filter/water bottle set-up, I recommend the GRAYL Geopress. It’s compact and easy to use!
Water bottles or bladder (at least 2L capacity): I suggest having ones that have a filtration set-up built in, like I recommended above.
Sleeping bag (30 degree or colder): While you maybe hiking in California, that doesn’t mean it doesn’t get cold at night — especially on the Northern California coast! You can spend a fortune on a sleeping bag, but you don’t have to. For a comfortable sleeping bag that won’t break the budget, I recommend the REI Trailbreak 30 (men’s version) and (women’s version). You can go more high-tech, but then you’re looking around the $300 range.
Sleeping pad: This is what takes you from cold, uncomfortable nights on rocky ground to tent comfort! You can buy a cheaper version like the REI Trailbreak Self-Inflating Pad, but I’d recommend going with the Flash Thermal if hiking the trail in spring or fall, when the nights can get really cold!
Backpacking stove: This will depend a bit on your set-up. If eating only freeze-dried meals, oatmeal, ramen, and other “just-add-boiling-water” dinners, you can get by with a lightweight Jetboil, which weighs in at less than a pound (fuel included) and is also great for making coffee in the morning! If you want a more “cooking-friendly” set-up including pots and pans, check out this surprisingly lightweight Optimus camp stove that comes with a frying pan and cooking pot at under a pound of weight (not including fuel).
Fuel: Make sure you have plenty of fuel for whatever your backpacking stove set up is!
Cup: For water at the campsite if you don’t want to use your water bottle — or for a celebratory glass of wine if you’re the kind of person who doesn’t mind hauling around a bottle of California red on your back to celebrate the end of a long day’s camp! I like this Hydroflask cup.
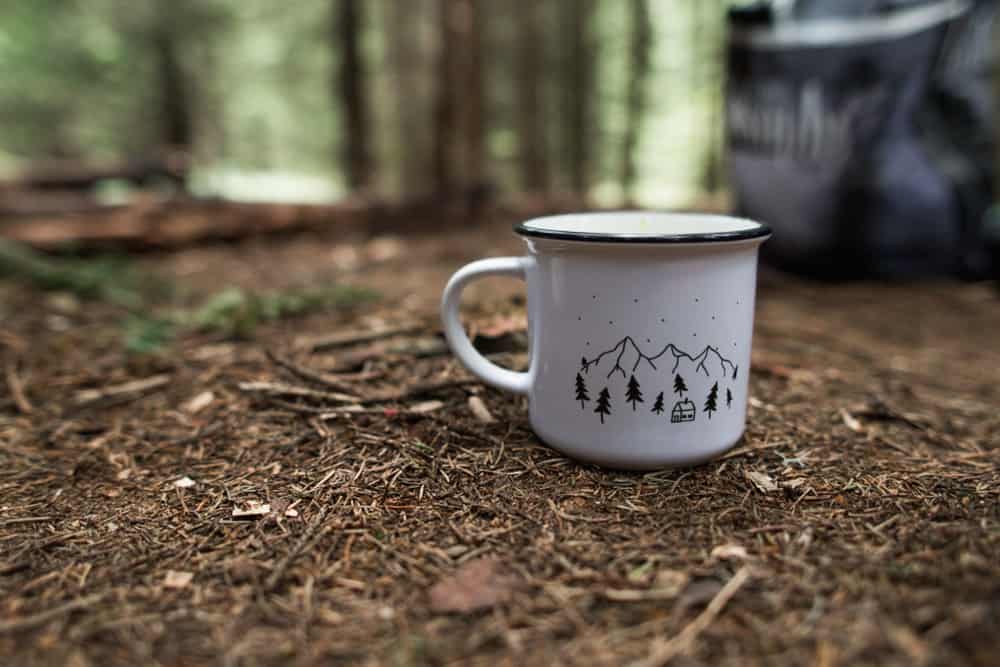
Mug: You’ll want a mug for morning coffee or tea! Bonus points if it has a cute design for morning campsite snaps, too.
Spork or similar utensil: You can’t forget a spork while you’re backpacking!
Bear canister: Keep your food away from bears with this bear-resistant canister! Yes, it’s heavy, yes, it’s bulky, and yes, it’s absolutely necessary.
Rain gear: Again, even if it doesn’t say rain, you’ll likely want rain gear to keep you dry on cold, foggy mornings and hiking alongside the shore. I recommend Marmot brand — this men’s jacket is great and stylish, and I have the women’s Marmot Precip (and have had it for years) and love it.
Sunscreen: Wear this every day of your trip — even on a cloudy day!
Toothbrush & toothpaste: This should go without saying!
Day pack: An easy to zip-away day pack is helpful to have when backpacking so you can easily put small things that you want more accessible and handy. You’ll also want it for later in your trip, if you’re extending beyond the hike, so you don’t have to bring your giant backpack with you everywhere.
Food: I recommend freeze-dried meals! AlpineAire is a favorite of many backpackers and has tons of choices: this black bean and beef chili is a fan favorite. Patagonia also has a great selection including lots of vegan options: vegans love this spicy red bean chili. For breakfast, grab some granola with blueberries and milk packets and some tasty Kuju instant coffee!
ID: Don’t forget your ID, driver’s license, and any other important documents you need!
Hiking boots: You’ll absolutely need good waterproof hiking shoes for this trek! I own and love my pair of Ahnu Sugarpine hiking boots and recommend it for other women – especially if you have wide feet like I do! For men, I’ve heard good things about the KEEN Durand boot.
Clothing: It can get chilly at night so plan accordingly. You’ll want at least 2 shirts (synthetic or wool, long and/or short sleeve depending on the season), 2 pairs of leggings or long underwear, 1 fleece or wool outer layer, a waterproof jacket, waterproof pants, beanie, gloves, and 3 pairs of socks.
Optional Gear
Camera: I use and love my Sony A600! It’s mirrorless, so it’s lightweight and perfect for a high-quality camera that won’t weigh your pack down.
Journal and pen: For noting down all your trail thoughts!
Reading material or fully-charged Kindle: For something to do at night or when waiting for tides to change to continue hiking
Sandals: To change into once you reach your campsite! Tevas are a backpacker favorite.
Sunglasses: To give your eyes a break from the sun
Buff (to keep sun off neck): If your neck burns easily, give this buff a shot!
Sunhat: To keep sun off your face – I recommend a packable hat like this one which has a strap so it won’t blow off in guests of wind and you can easily wear it on your back when you don’t feel like wearing it on your head.
Gaiters: These gaiters keep mud, sand, water, and trail debris out of your shoes — super helpful on sandy and muddy stretches of the Lost Coast Trail! I recommend these ones by REI Coop.
Hiking poles: These lightweight trekking poles from Black Diamond will help you keep your footing on muddy or sandy stretches of the trail.
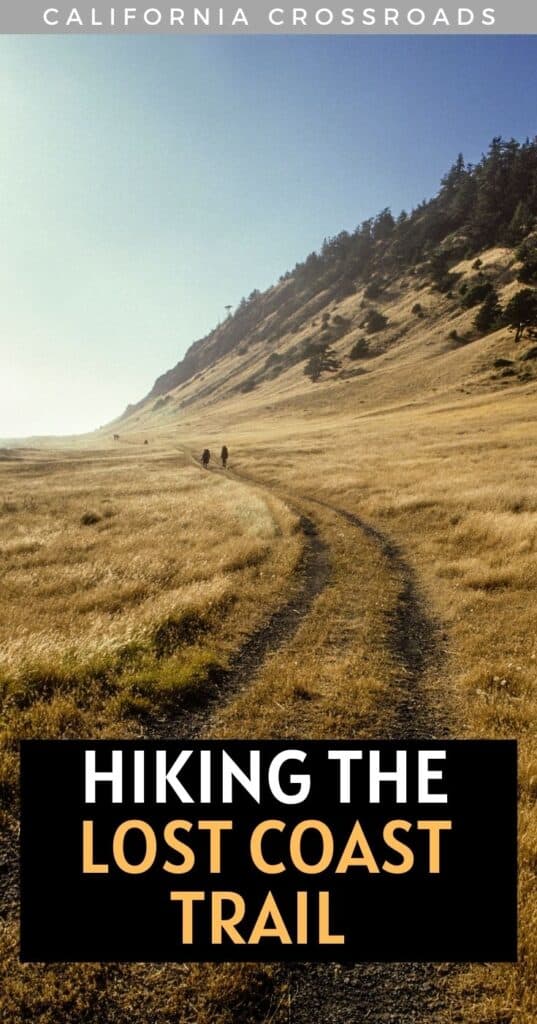
Pin This Guide to Hiking the Lost Coast!
Allison is a writer, herbalist, musician, and lover of nature. She is an avid traveler and backpacker, having traveled throughout most of the United States and through parts of Asia and Europe. She has lived in Hawaii, Philadelphia, New Jersey, Boston, and of course, California. Allison has lived in California for 5 years, working on farms and in Yosemite National Park. She has been all over the state, enjoying many cities and of course, the many amazing outdoor wonders California offers. She currently resides in Aptos, Santa Cruz County, CA.