
The Rae Lakes Loop Trail is one of the most coveted multi-day backpacking trips in the Sierras.
With scenery unmatched by any other trail in Kings Canyon, the allure of this footpath draws more and more visitors each year. Some careful planning and a spirit for adventure are all you need to execute this trip.
Alpine lakes and mountain vistas adorn this 54.2-mile loop that links up to parts of the Pacific Crest Trail and the famous John Muir Trail.
The loop, which circumvents the inner portion of Kings Canyon, can be completed in anywhere from 4-8 days depending on the amount of time you have, and your level of fitness.
Given a moderate pace and averaging 9 miles per day, 6 days is all that’s needed to finish the loop, and that’s a good benchmark for intermediate hikers.
At this pace, you should have plenty of time to appreciate the scenery, set up camp in daylight, and enjoy your evenings.
The Rae Lakes Loop Trail is considered strenuous due to the mileage, high altitude, and elevation gain topping 2,000 ft on any given day, so it’s definitely a difficult hike.
However, if you’re starting to dip your toe into multi-day backpacking trips, it can be a good choice for building up stamina for longer hikes like the JMT, High Sierra Trail, or stretches of the PCT.
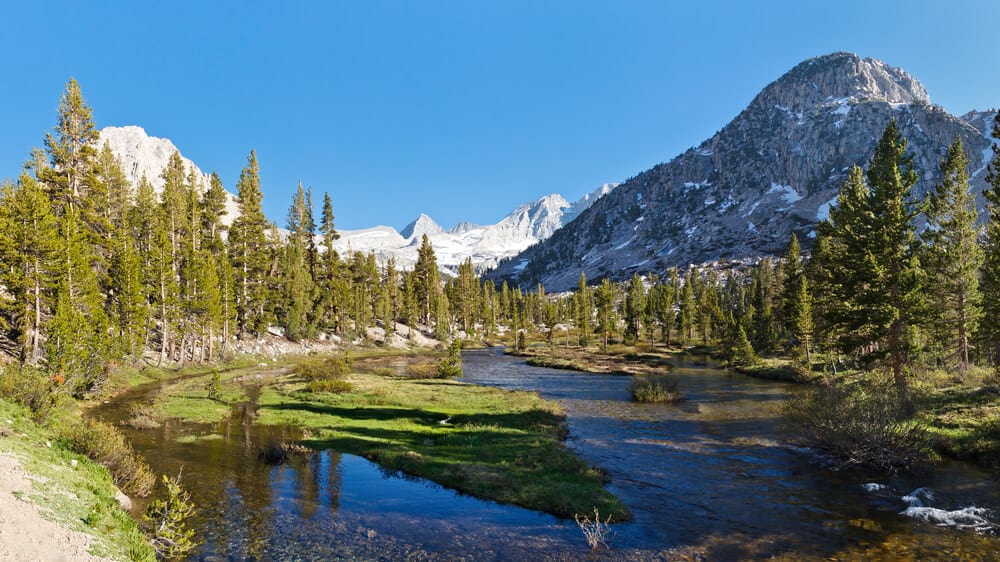
Along the Rae Lakes Loop, you can expect towering peaks and alpine meadows, along with plenty of lakes, rivers, and streams to filter water from.
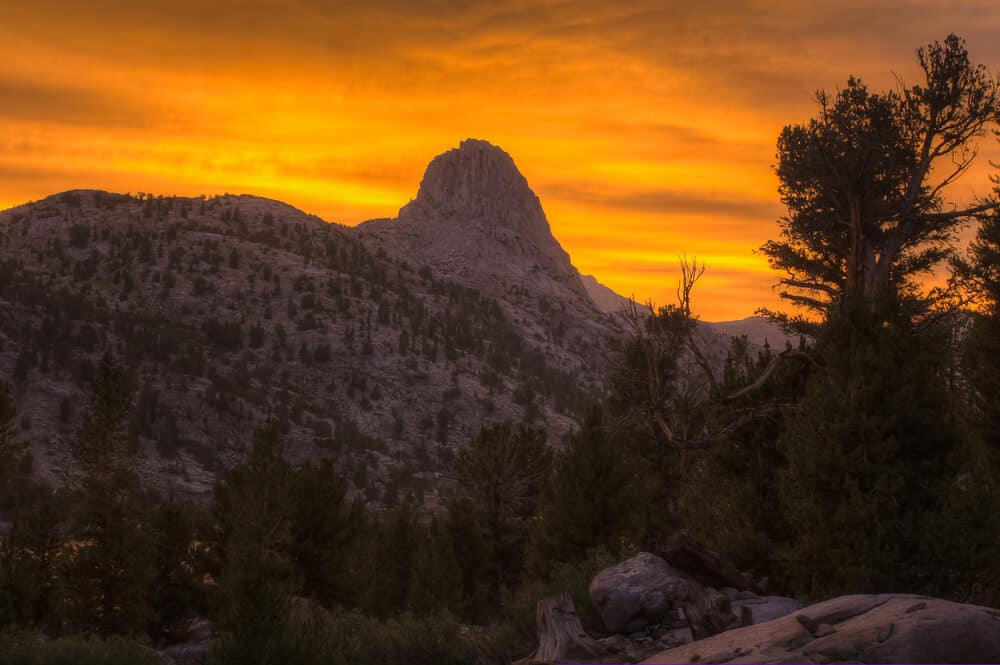
As difficult as this hike is, there is a payoff: this unforgiving trek is by far the grand prize winner for spectacular scenery and High Sierra exploration.
Rae Lakes Loop Trail: Details & Hike Specs
Note: This post contains affiliate links, which earn me a small commission at no extra cost to you if you make a purchase using one of these links. Thank you for supporting this free content!
Trail Type: Loop Trail
Mileage: 54.2 miles
Time: 4-8 days
Elevation Gain: 12,700 ft
Difficulty: Strenuous
The Planning
Be Prepared
The more preparation you make, the more streamlined your trip will be.
Know the rules and regulations associated with your permit, check the weather forecast, bring a topographical map of the route, and most importantly, let someone know where you will be, and when you plan on returning.
When to Go

August and September are ideal months to plan this adventure. By August, most of the snow has melted, making the roads and trails accessible.
The midsummer sun warms up this usually frigid alpine region that’s covered in snow for most of the year. However, the nights will likely be chilly any time you go.
Depending on the snowfall for any given year, mid to late July could work too, but ask a ranger beforehand so you can be aware of how much snowpack is left.
Note that, in the late spring and early summer, the mountain snow is still melting, adding to the already swollen rivers. There are water crossings on this route, so going too early in the season may be hazardous.
Be aware that the Sierra Nevada Ranges have unpredictable weather patterns; a late afternoon thunderstorm in mid-August is not uncommon. Be prepared for anything in terms of clothing and adjusting plans.
Getting There
Onion Valley Campground is the starting point for this trip.
As you roll through Independence from Hwy 395, turn west onto Market Street which turns into Onion Valley Road.
Continue up the mountain for 13 miles where you’ll reach the Onion Valley campground and trailhead. There is a parking lot at the trailhead and an adjoining campground.
Trailhead Notes
Starting from the east side of the range at the Onion Valley trailhead is a good idea primarily because you can camp and acclimate close to your starting point.
The Onion Valley Campground has vault toilets and there is also firewood for purchase.
The good news is there’s a large parking area adjacent to the campground with signs pointing to the trail for Kearsarge Pass.
The bad news is that you will have to hoof it over the 11,709 ft mountain first thing in the morning as you start your adventure!
Acclimating and Altitude
This is a high-altitude hike, so acclimating is essential for an enjoyable experience.
When you book your wilderness permit, you could also reserve a campsite at the Onion Valley Campground where the trail begins. Sitting at an altitude of over 9,000 ft, this campground is the perfect place to spend the night and acclimate before the hike.
If you decide not to camp at Onion Valley, you can always stay in town but be sure to take a high altitude hike the day before in preparation for your trip.
Permits
Permits are required for this trail and it’s advised that you plan 6 months ahead. Although most backpackers start this loop from Roads End, there’s still plenty of competition for permits out of Onion Valley via Kearsarge Pass. Permits can be obtained online.
If you plan on camping at Onion Valley the night before, you will need to reserve a campsite at least a few months in advance. The website for campground reservations is the same site as the one for overnight backpacking permits, which you can find here.
You may also require a California Campfire Permit which can be obtained online by watching a video on fire safety in the backcountry.
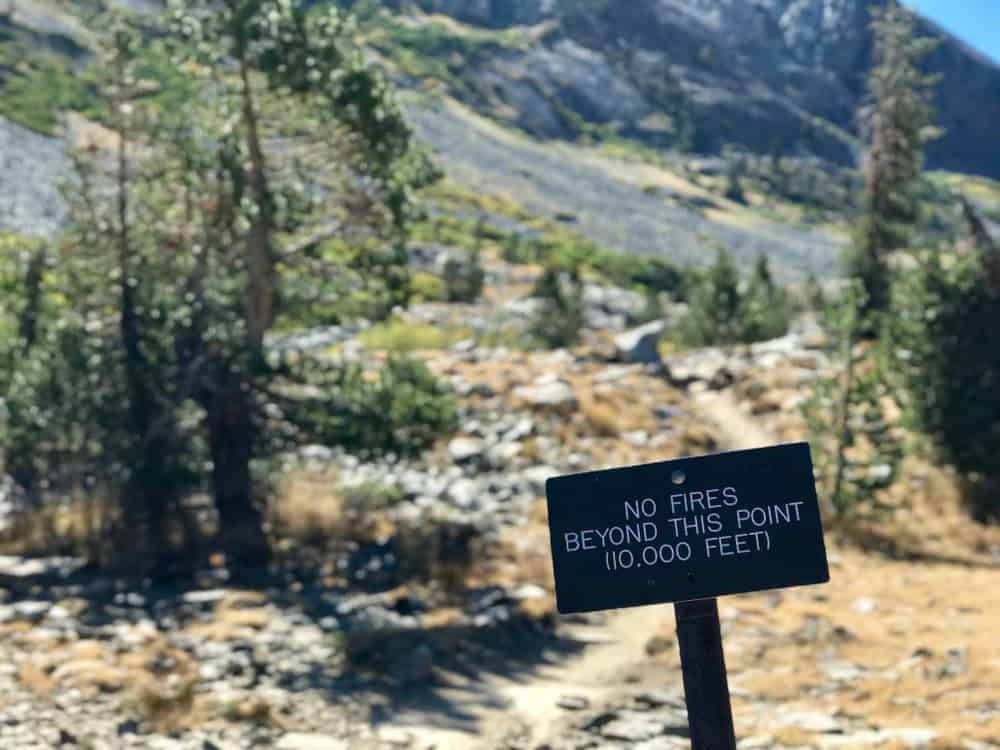
Note that this is needed for using any sort of camp stove and even though it says “campfire” you are still subject to fire restrictions, such as no campfires above 10,000 feet or no campfires at all during certain weather conditions.
Regulations
When you acquire your wilderness permits, they may have some or all of the following regulations in place as well as others not mentioned:
- No fires above 10,000 ft
- California Fire Permits required
- Approved bear-resistant canister required for food storage.
- Pack out all your trash.
- No firearms
- No dogs allowed
Hiking the Rae Lakes Loop: Itinerary for a 6 Day Hike
Day 1: Onion Valley to Charlotte Lake
Day at a Glance: 8.5 miles with 2,566 ft elevation gain.
From the Onion Valley trailhead, there’s no denying the arduous hike ahead.
As Kearsarge Pass takes center-stage in the foreground, you’ll make your way up the seemingly endless switchbacks wondering what you’ve gotten yourself into.
As soon as you crest Kearsarge Pass, you’ll be rewarded with unimaginable views of the mountains and lakes: a taste of what’s to come on the Rae Lakes Loop.
There will be an upper and a lower trail; take the upper trail which leads to the John Muir Trail.
When you reach the intersection of The John Muir Trail, you’ll have 3 choices; JMT North, JMT South or Charlotte Lake.
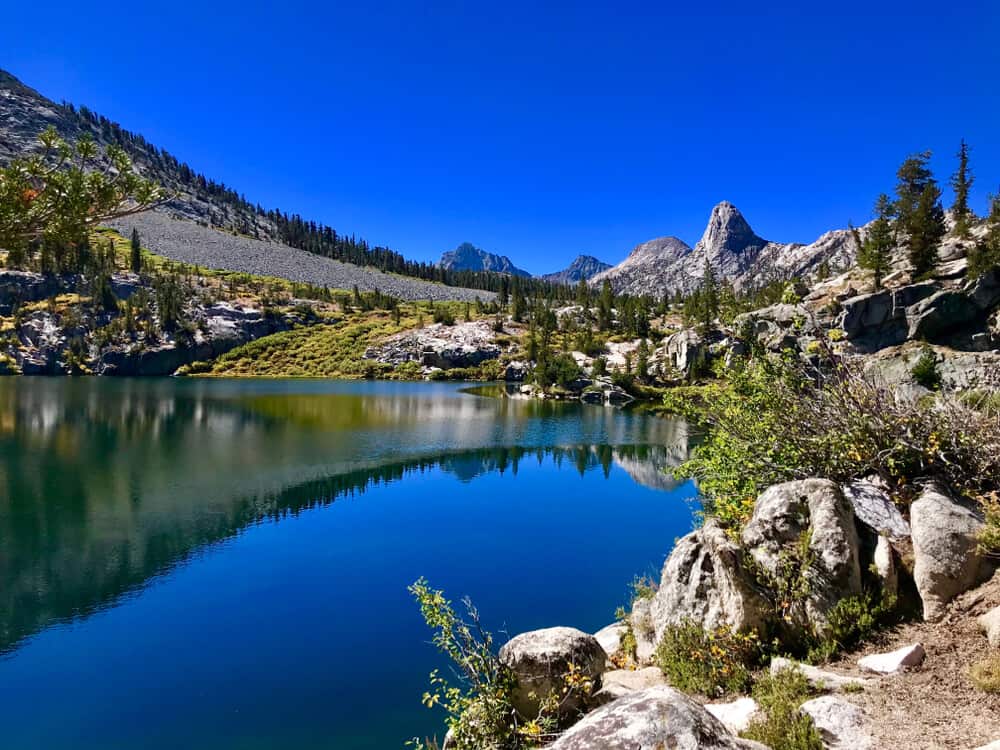
Take the 1.3-mile trail to Charlotte Lake, which will be your home for the night.
Charlotte Lake has nice campsites and is also a great place to take a swim. There is a ranger station and bear-resistant lockers at Charlotte Lake.
Day 2: Charlotte Lake to Bubbs Creek Junction
Day at a Glance: 8.5 miles with 400 ft elevation gain
Day two takes you deeper into the backcountry of Rae Lakes, and the scenery becomes more and more impressive the further in you hike.
The first thing you’ll need to do is backtrack up to the intersection where you met the John Muir Trail.
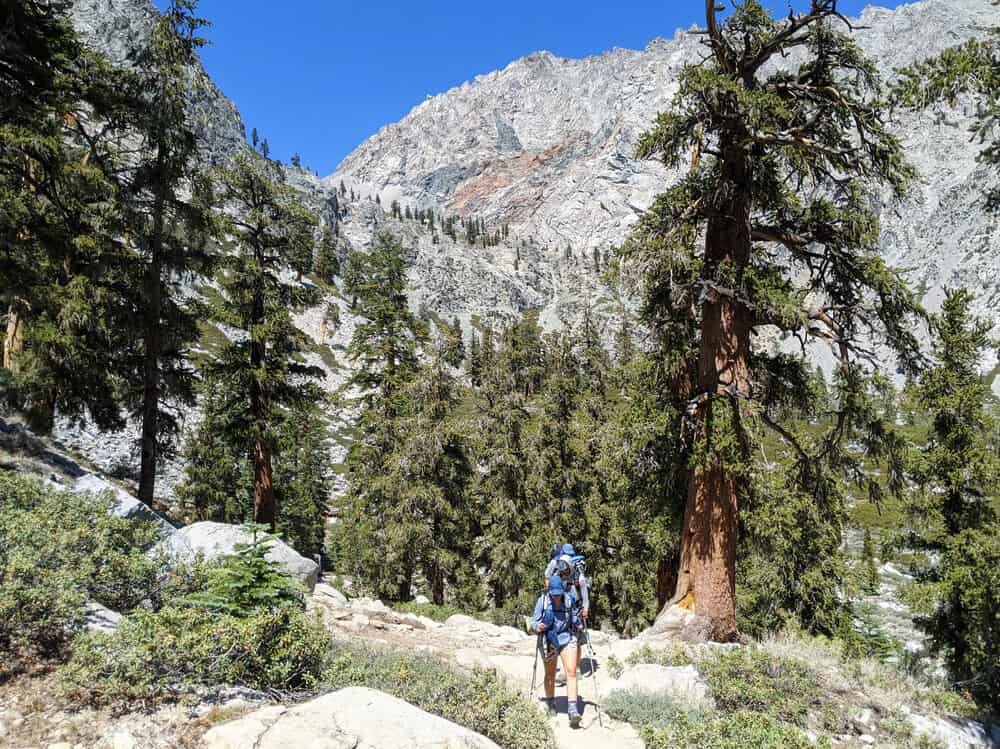
At this point, you will continue southbound on the John Muir Trail toward Vidette Meadow. The trail expands and opens up into the beautiful Vidette Creek, which is contained in a stunning canyon with walls towering above 10,000 ft.
Make your way up the switchbacks until you reach the junction of the John Muir Trail and the Bubbs Creek trail: take the Bubbs Creek trail heading west.
As you pass Junction Meadow, you’ll likely think you’ve been hiking forever; continue on until you arrive at Charlotte Creek.
This junction at Charlotte Creek and Bubbs Creek is the perfect place to make camp for the night.
The camping area is below 10,000 ft and some of the sites come equipped with fire rings.
Day 3: Bubbs Creek to Paradise Valley
Day at a Glance: 11.1 miles with 2,677 ft elevation gain
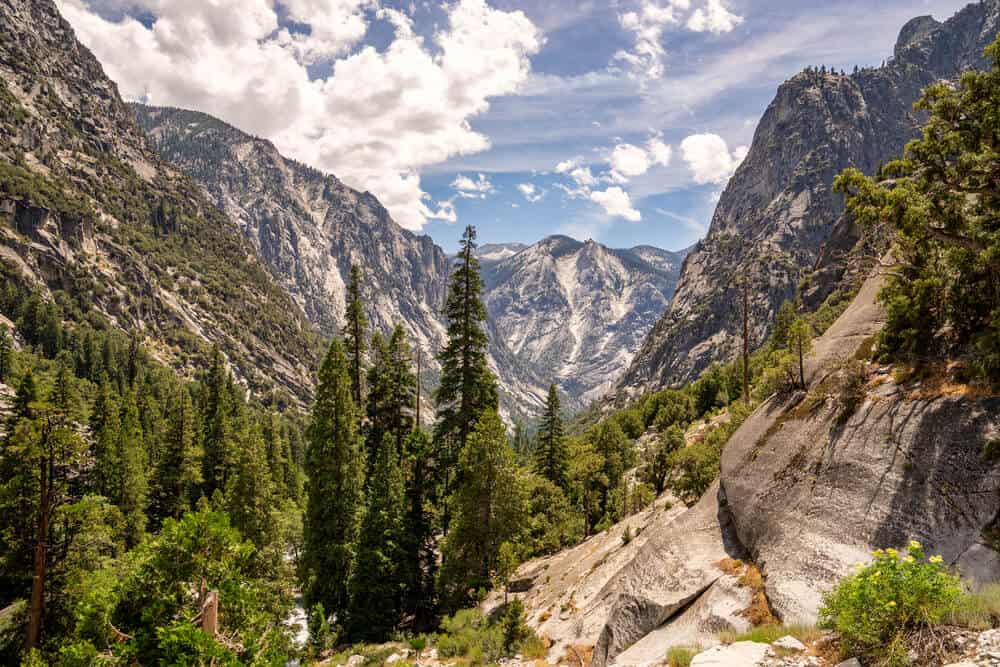
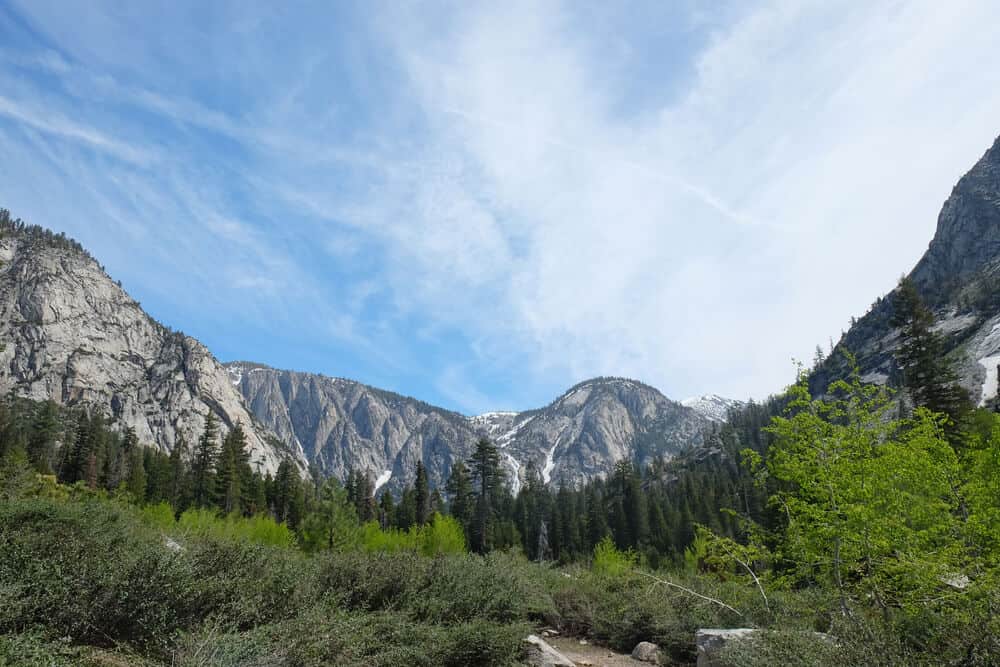
With waterfalls, bridges, and a Sphinx, day 3 introduces a variety of new and interesting scenery.
Continue hiking west, downhill, on the Bubbs Creek Trail until you arrive at Sphinx Junction. Sphinx Junction is a wonderful place to take a break, enjoy a snack, or take some photos.
This momentous rock formation is distinctly shaped like a Sphinx, as though misplaced from Ancient Egypt and landing somewhere in the California mountains!
Continuing on the trail and down yet another set of switchbacks, you will eventually arrive at some wooden bridges. Cross these small bridges and make your way to the larger steel bridge that takes you across the magnificent Kings River. The trail will ultimately take you up to Mist Falls.
Since the falls are close to the Roads End trailhead, these enchanting waterfalls are a popular destination for day-hikers and can be crowded at times.
Once you’ve stopped and enjoyed Mist Falls, the granite-lined trail continues until you reach Paradise Valley.
Paradise Valley is a huge space with 3 separate areas to camp. You can choose between the upper, middle, and lower campgrounds; all are equally inviting and distinctively beautiful.
Day 4: Paradise Valley to JMT Junction
Day at a Glance: 7.7 miles with 2,444 ft elevation gain
Progressing through Paradise Valley and over another bridge, the trail meanders along Woods Creek and up the canyon.
Pressing on, you’ll pass through Castle Domes Meadow with its remarkable domes that overshadow the valley below.
The trail climbs to almost 8,500 feet before reaching the legendary Woods Creek Suspension Bridge. This unnerving bridge carries only one hiker at a time, gently swaying as you cross the creek to safety.
There are an array of comfortable campsites across the bridge; some have ready-made fire rings. It’s important to arrive early, this camping area can be jam-packed at times since it also services the thru-hikers tackling the Pacific Crest Trail and the John Muir Trail.
You’ll likely hear some interesting campfire stories coming from PCT and JMT hikers who’ve been on the trail for weeks or even months at this point!
Day 5: JMT Junction to Rae Lakes
Day at a Glance: 6.5 miles with 2,130 ft elevation gain
After saying farewell to the hikers you met at JMT Junction, continue on the John Muir Trail which steadily climbs above 10,000 ft. The views are spectacular!
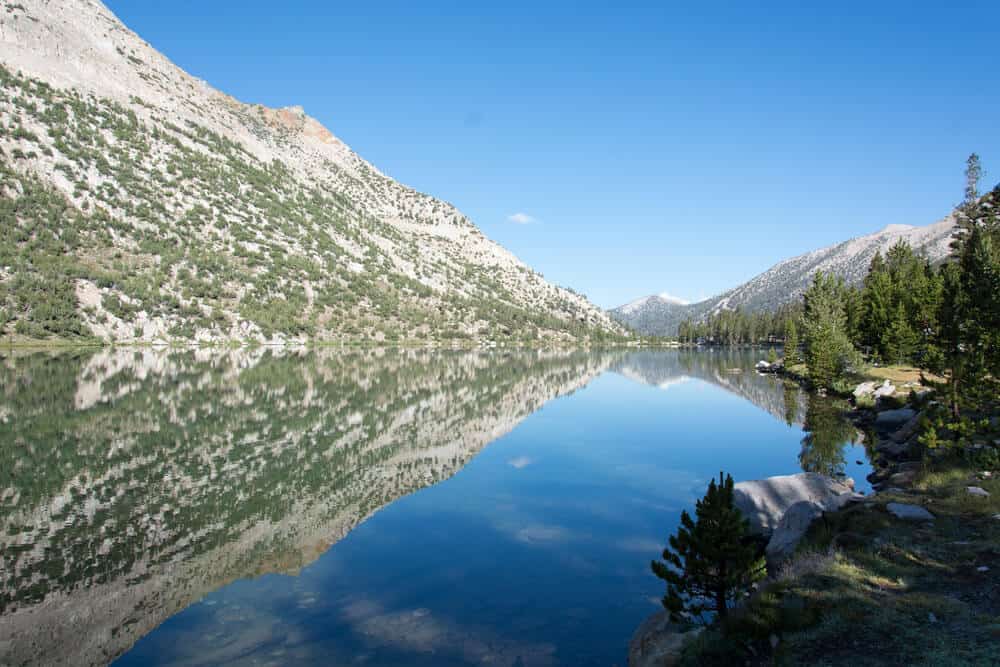
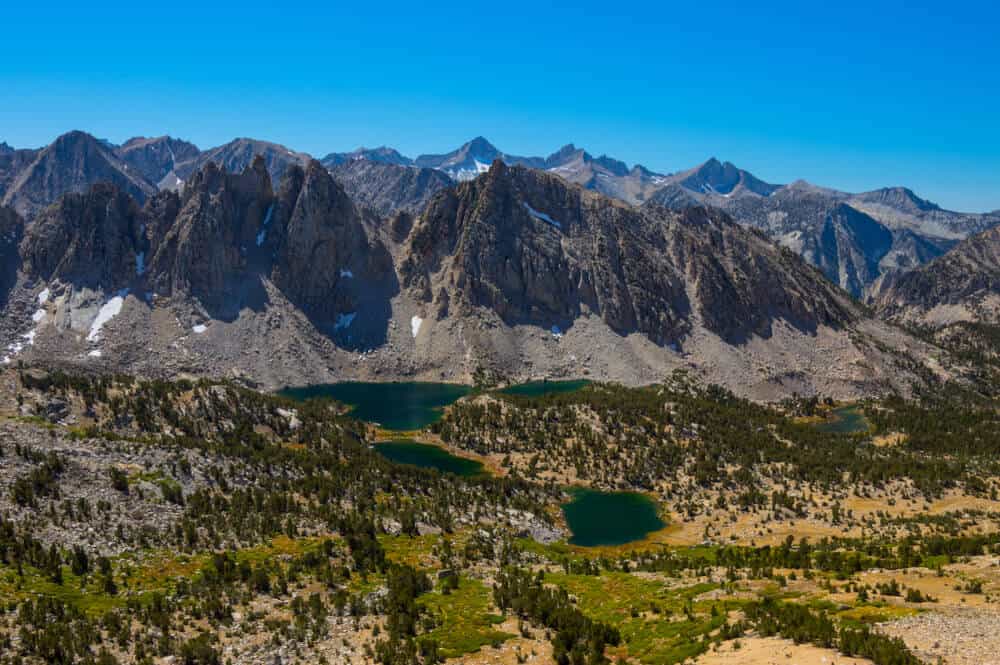
Today is the day the trail takes you to the renowned Rae Lakes. This scenic part of the trail will eventually bring you to Dollar Lake. Dollar Lake is a pretty little lake that’s perfect for a rest or snack; this lake is also great for fishing.
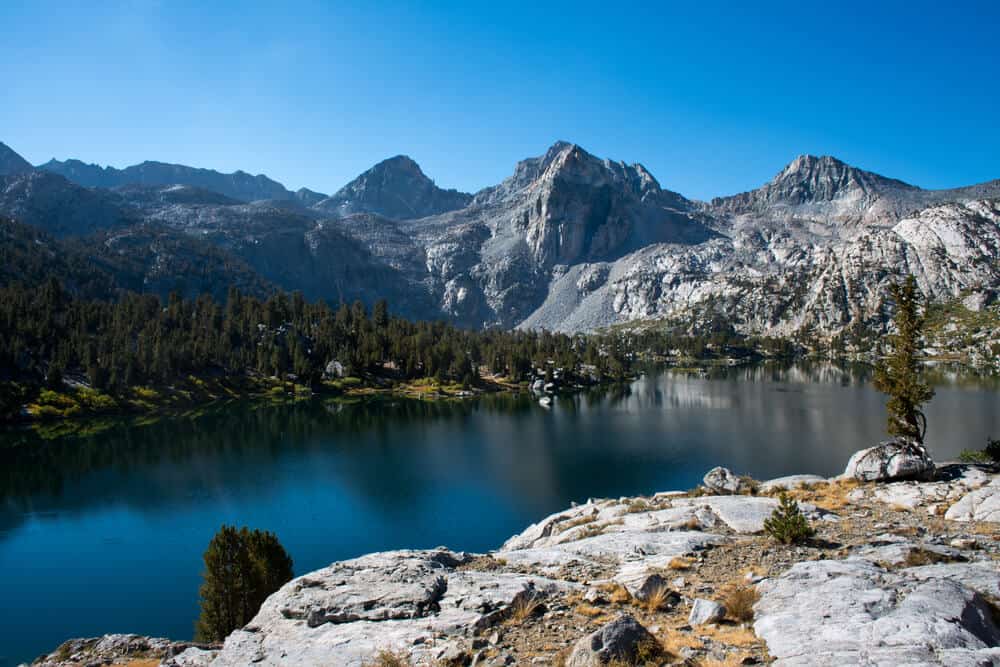
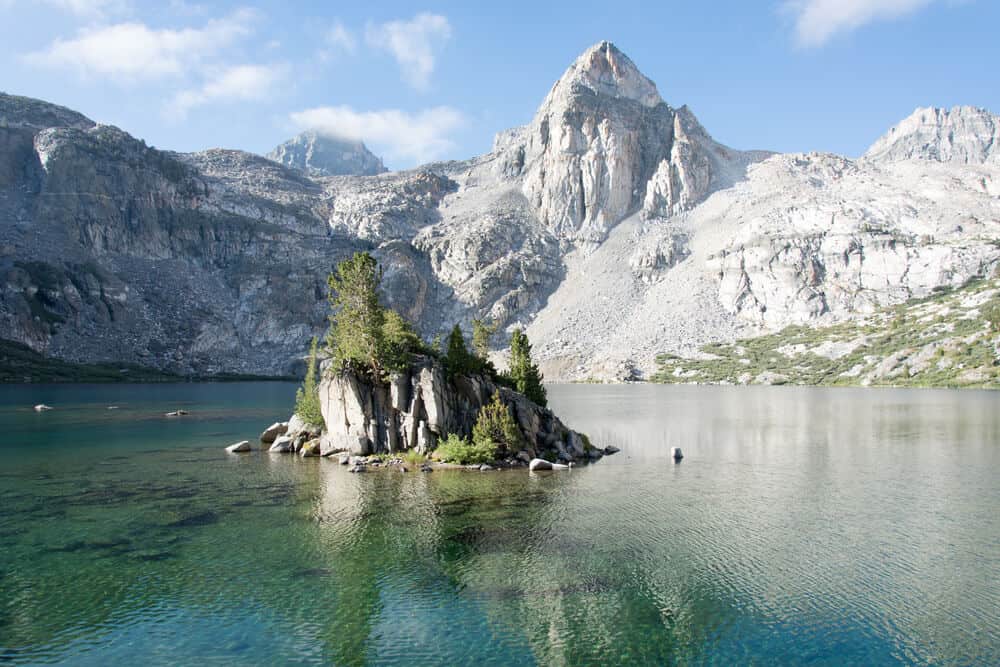
After a short respite, continue one more mile to the Rae Lakes. With panoramic views and crystal clear water, you can see why the Rae Lakes are the pride and joy of Kings Canyon.
There are three Rae Lakes, the upper, middle and lower. All lakes have campsites with the majority being at the middle lake where there’s a ranger station.
With towering peaks dominating the background, there’s nothing more pleasing than sitting by the lake and embracing the scenery while marveling at your own accomplishments.
There is also the option of staying an extra night and exploring the Rae lakes area; or even after you’ve set up camp.
The 60 Lakes Basin is a fantastic side trip clocking in at only 4 miles round trip from the Rae Lakes.
Like The Rae Lakes, these lakes are sparkling jewels hidden amongst the most nefarious peaks just waiting to be explored.
Day 6: Rae Lakes to Onion Valley
Day at a Glance: 12 miles with 2,478 ft elevation gain
On this final day of the Rae Lakes Loop trail, it’s time to say goodbye to the Rae Lakes and hello to Glenn Pass.
It’s difficult to fathom having to drag yourself over Glenn Pass just to be greeted by the all too familiar Kearsarge Pass, but that’s the agenda for day 6!
On the John Muir Trail, you will be heading straight up from the Rae Lakes, cresting Glenn Pass, and then heading downhill again.
After some time, you’ll arrive at a side trail indicating Kearsarge Pass. This is where you leave the John Muir trail and start your ascent up the back end of Kearsarge Pass.
After conquering Glenn pass, many backpackers don’t even stop to revel in the glory of once again defeating Kearsarge Pass: you’re so close now!
By this time you can almost taste the burger waiting for you in town as you crawl down the mountain reminding yourself of just how awesome you are!
The descent down to your vehicle is no easier than the climb to the crest, but when you finally get back to your car you’ll probably feel something like a zombie morphed with a superhero.
Packing for the Rae Lakes Loop
There is always some debate about gear, so this packing list for the Rae Lakes Loop is not exhaustive.
However, there are some things you will definitely need for a hike in the Sierras. Be prepared for all kinds of weather, as the Sierras see it all.
Here is a rough guide to what you should bring:
Non-negotiables
- Permit, printed at home before arriving
- Maps and navigation tools
The Big Five
- Tent: This lightweight North Face Stormbreak 2-person tent weighs only 5 pounds 5 ounces, which is a nice low weight given the cost. You can get lighter, but it’ll cost you a good deal more: worth it if you can afford it. It’s a good 3-season tent with loads of headroom, easy-pitching design for fuss-free set-up, and there’s plenty of room for two hikers to share.
- Backpack: For a hike this length, it’s best to get a proper fitting in a store. In case you can’t do that for whatever reason, I suggest starting with the Osprey Aether 65L (men’s version) and Osprey Aura 65L (women’s version).
- Waterproof Cover: Be sure to pack a waterproof rain cover like this Duck’s Back — the last thing you want on the trail is a compromised backpack!
- Sleeping bag: For a comfortable sleeping bag that won’t break the budget, I recommend the REI Trailbreak 30 (men’s version) and (women’s version). You can go more high-tech, but then you’re looking around the $300 range.
- Sleeping pad: You can buy a cheaper version like the REI Trailbreak Self-Inflating Pad, but I’d recommend going with the Flash Thermal — it provides extra warmth (as well as cushion and comfort from the rocky ground) when the nights can get really cold!
Clothing
- Warm clothes & extra layers: Think thermal layers as well as a fleece jacket which you can layer under a rain jacket for extra warmth. A beanie and gloves are also good protection in case of an unexpectedly cold day and won’t add much weight or volume to your pack.
- T-shirt and shorts: You’ll want at least 3 shirts (synthetic or wool, long and/or short sleeve), 1 pair of hiking shorts, and 1 pair of hiking pants.
- Rain Jacket: I recommend Marmot brand — this men’s jacket is great and stylish, and I have the women’s Marmot Precip (and have had it for years) and love it.
- Sun hat: I recommend a packable hat like this one which has a strap so it won’t blow off in guests of wind and you can easily wear it on your back when you don’t feel like wearing it on your head.
- Hiking shoes: Bring a comfortable pair as well as 3 pairs of socks to rotate out in case some get wet. Break them in first! Like a backpack, this is something you should fit in person when possible, but if it’s not, I own and love my pair of Ahnu Sugarpine hiking boots and recommend it for other women – especially if you have wide feet like I do! For men, I’ve heard good things about the KEEN Durand boot.
Safety / Protection
- Microspikes: These are essential if hiking in snow! Even if you think you won’t be, there’s a chance you’ll come across a patch where the snowpack hasn’t melted fully. Bring some just to be safe.
- Sunglasses & sunscreen: Essential every day, even if there’s cloud cover! It’s a lot easier to get sunburned at altitude, so reapply frequently. Use a mineral-based sunscreen Sunglasses are especially key if you come across a snowy patch of trail — the sun hitting the snow can be really blinding.
- Headlamp: For hiking after sunset or middle-of-the-night bathroom needs, this Petzl headlamp is highly-rated and affordable. Don’t forget spare batteries!
- Hiking poles: A pair of sturdy but lightweight trekking poles will help you keep your footing on muddy or rocky stretches of the trail and distribute your weight more ergonomically and give you better balance. Trekking poles can be a bit on the pricy side of the spectrum (I’ve picked the value-for-price pair I could find), but don’t skimp. Investing in a quality pair will make all the difference for your hike: think of them as essential to your kit as your backpack, tent, and boots!
- Bug spray: Mosquitos can come with a vengeance in the summer so be sure to bring some along!
- First aid kit: Start with a pre-made kit like this HART First Aid kit, which has all you need for 2 people for 2-3 days, and supplement it with extra bandages (especially blister bandages!), painkillers, and other first aid essentials.
- Trowel: For burying… well, you know!
Cooking
- Minimum 2 L of water carrying capacity: Essential! There are plenty of lakes along the way to fill up from, but they may be miles apart and the summer heat can be unrelenting. You’ll need that capacity to stay properly hydrated.
- Water filter: There are a wide variety of water filtration systems and treatments, but I have two preferred brands: LifeStraw and GRAYL. The LifeStraw set-up I recommend is this one: LifeStraw Flex. It has a 2-stage filter that removes over 99.999% of bacteria, parasites, and microplastics. It can be used as a personal straw (its original iteration), but it also can attach to a gravity bag (included), a water bottle, or a typical hydration bladder. Each filter can be used for filtering up to 1,000 L of water.
- Water bottle: If you just want a water filter inside a water bottle set-up, I recommend the GRAYL Geopress. It’s compact and easy to use!
- Food: I recommend freeze-dried meals! AlpineAire is a favorite of many backpackers and has tons of choices: this black bean and beef chili is a fan favorite. Patagonia also has a great selection including lots of vegan options: vegans love this spicy red bean chili. For breakfast, grab some granola with blueberries and milk packets and some tasty Kuju instant coffee!
- Stove & Fuel: If eating only freeze-dried meals, oatmeal, ramen, and other “just-add-boiling-water” dinners, you can get by with a lightweight Jetboil, which weighs in at less than a pound (fuel included) and is also great for making coffee in the morning!
- Cooking pot: If you want a more “cooking-friendly” set-up including pots and pans, check out this surprisingly lightweight Optimus camp stove that comes with a frying pan and cooking pot at under a pound of weight (not including fuel).
- Bowl & utensils: Be sure to bring a spork while you’re backpacking! You’ll also want a Hydroflask cup, as well as a bowl.
- Bear can: Keep your food away from bears with this bear-resistant canister! Yes, it’s heavy, yes, it’s bulky, and yes, it’s absolutely necessary.
***
The Rae Lakes Loop trail embraces everything the Sierras have to offer.
If you’re looking for a high-altitude adventure with plenty of elevation gain, you’ve certainly met your match!
This is one of those trails that can beat you down day after day only to awaken your senses to unimaginable beauty and grandeur the deeper you get into the backcountry.
You can find out about permits, bear canisters, and other important information at the park’s website here.
Kristina Ritchie is a writer and who was born in Australia and grew up in Africa. She was educated at Western Connecticut State University before finding her home in Southern California. She writes creatively on a variety of topics, mostly on travel and adventure writing. Having visited over 15 counties and 48 states, along with thousands of miles on the trail with a backpack, Kristina continues to explore and write as often as possible.