
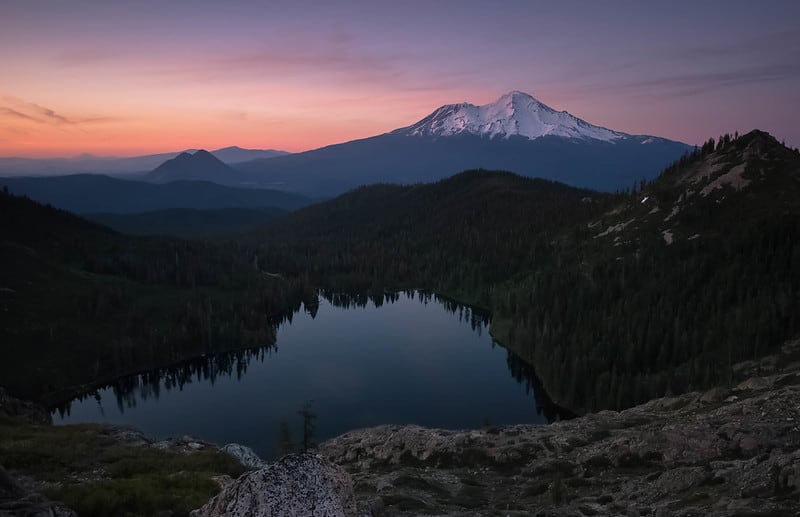
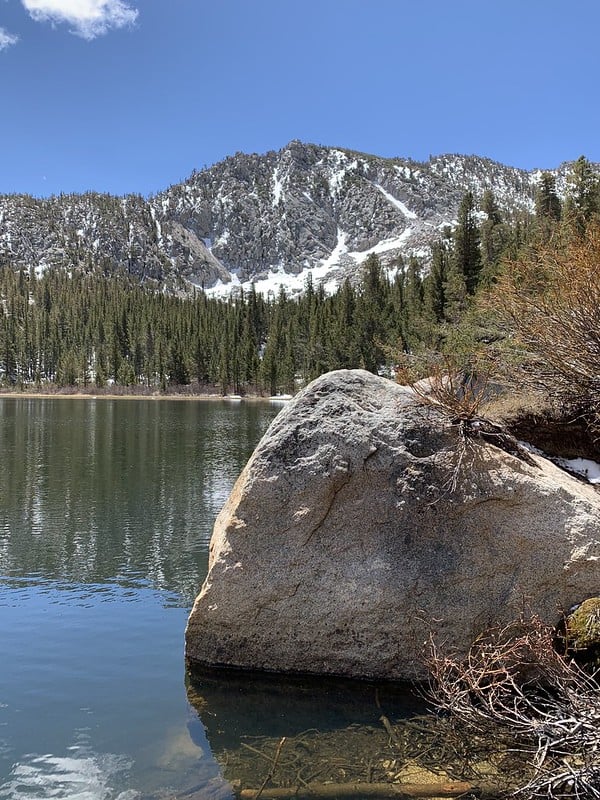
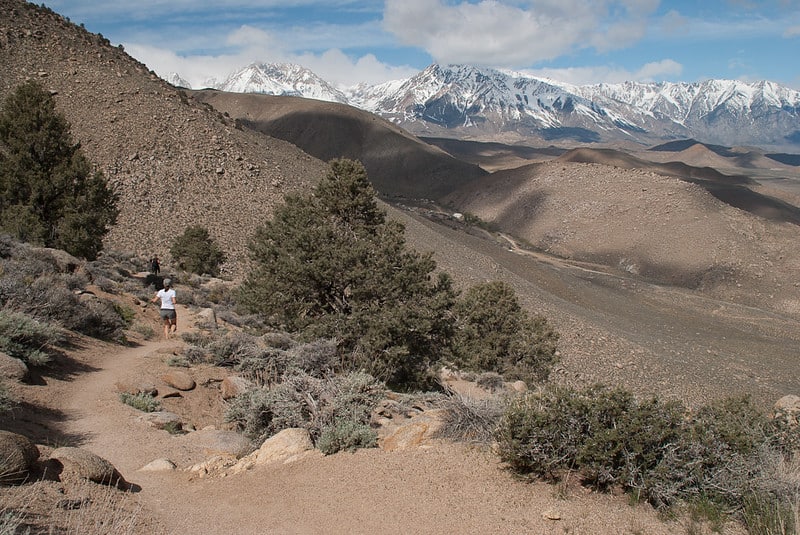
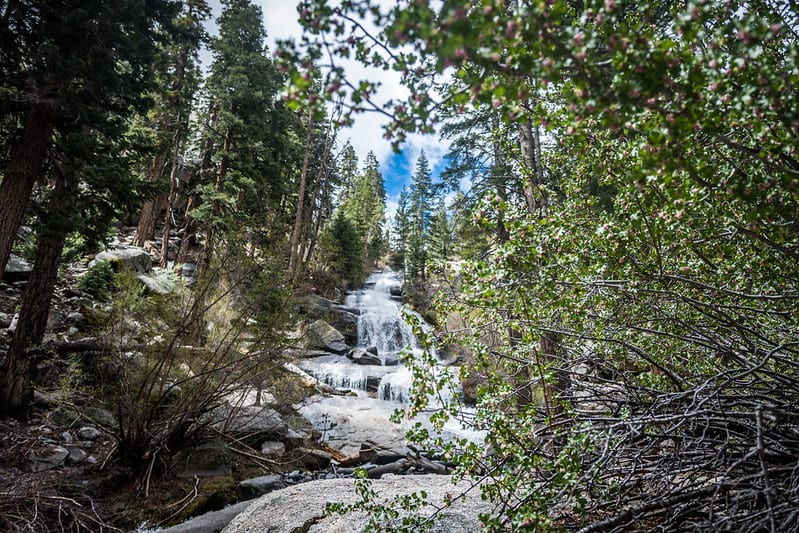
Along the historic Highway 395 lies an area with unlimited opportunities for experiences and adventures that will supply stories for a lifetime.
Here, you will find the world’s oldest tree, a mountain beach, otherworldly tufa formations emerging from a lake, and numerous other geological wonders.
Between these unique and natural attractions lie hundreds of miles of some of the most diverse and exceptional hiking trails you can find in the entire world!
Thanks to the Sierra Club and the State of California, there are limitless hiking opportunities in the Eastern Sierra region, many of which were developed in the early 1900s.
Within this guide, we will uncover 50 hikes in the Eastern Sierras that can be experienced in a single day.
Things to Know Before You Go
Note: This post contains affiliate links, which earn me a small commission at no extra cost to you if you make a purchase using one of these links. Thank you for supporting this free content!
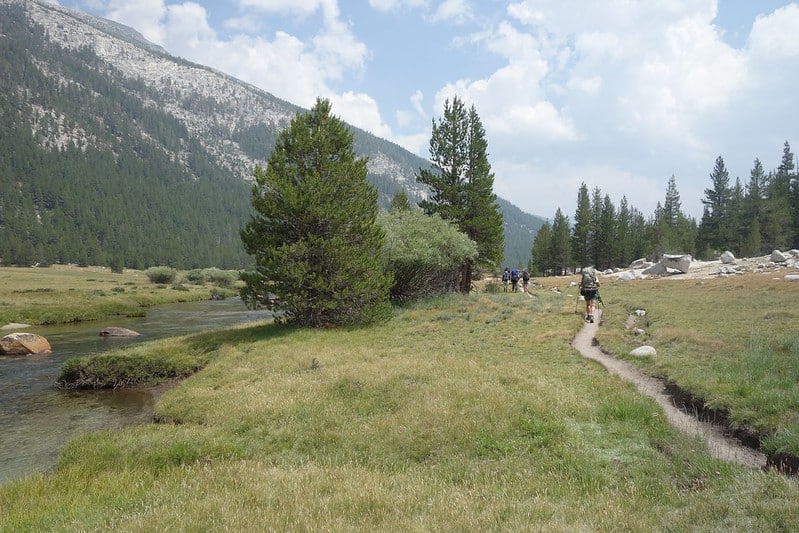
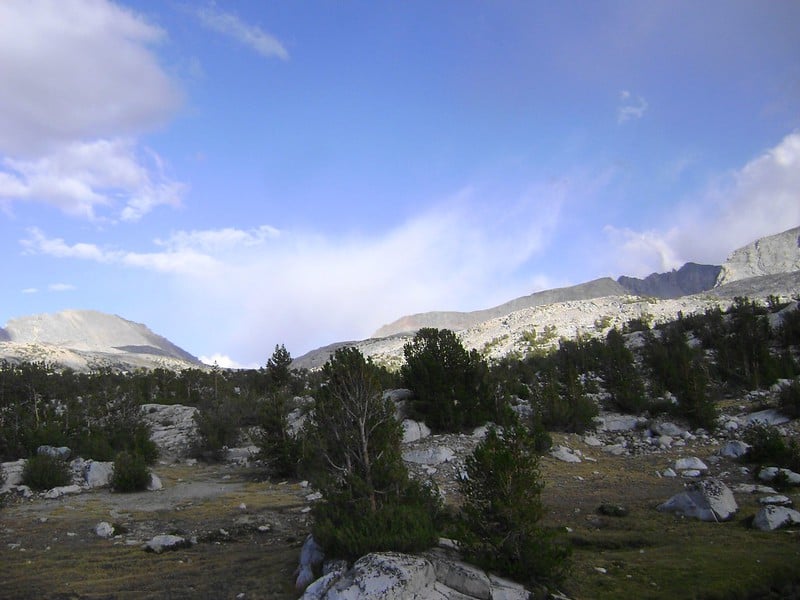
Hiking in the Eastern Sierra abounds with wildlife and untampered wilderness.
The East range is sparsely populated from the influence of human beings and is a truly natural and protected area.
To keep the range beautiful, please stay on the trail, pack out your waste and help us keep the Eastern Sierra untouched and beautiful.
The area is thriving black bear habitat.
Although you may not be backpacking, it is always a good idea to bring a hard case bear canister if you bring food or other items with aromas.
The BearVault bear canister is the gold standard amongst hikers in the Eastern Sierra and is the #1 most-purchased and rated bear canister on Amazon.
The same applies to your vehicles, as most trailheads will not have bear boxes or even dumpsters.
Be sure to bring skin protection. At higher altitudes, the effects of the sun are more severe, and some valleys can go long distances without shade, so bring plenty of sunblock.
I suggest this SunBum SPF 50 which is free of toxic chemicals like octinoxate and oxybenzone that harm aquatic ecosystems. Avoid using aerosol based sunscreens – the literal Cancer Council warns against it.
In addition to the sun, depending on the moisture in the air, the mosquitos can be absolutely brutal. From experience, be sure to find a repellent with a healthy amount of DEET. Lemon eucalyptus spray won’t get you far here.
Lastly, bring plenty of water – preferably in a water bladder like the CamelBak Crux (I suggest the 3 liter version over the 2 liter one, just to be safe).
Most of the hikes in the Eastern Sierra region are near or above 10,000 feet. The air is thin and the best way to fight the effects of altitude sickness is staying hydrated.
Being able to sip water through a straw that is easily accessible out of your daypack vs. always having to stop, open your day pack, and grab your water bottle out of the pack will help you to hydrate preventively rather than reactively — when dehydration has already set in!
Pro tip: Find a water filter. You do not want to be caught without water and the taste of the water from a high-altitude stream is beyond refreshing.
This tiny little LifeStraw is great if you have very little room in your pack, or you may want to use a water bottle with a filtration system like the GRAYL Geopress, which I love!
With that out of the way – let’s get to it!
The Eastern Sierra is generally known as the area from Yosemite to Lone Pine which covers 120 miles on Highway 395.
For this guide, we will break things down into three sections from North to South – Mammoth Lakes, Bishop, and Lone Pine.
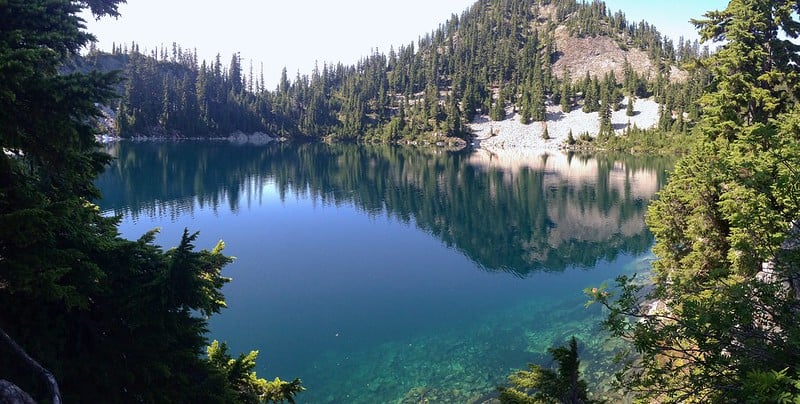
Eastern Sierra Day Hikes Near Mammoth Lakes
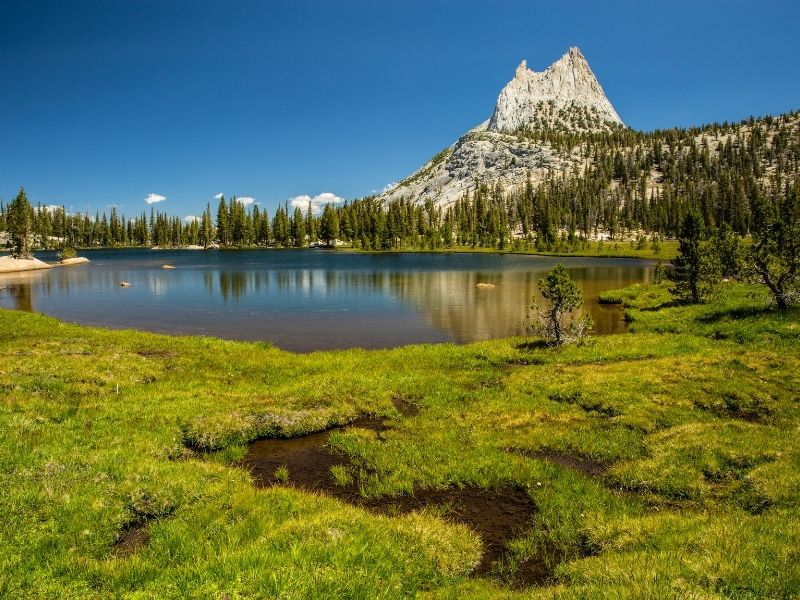
Cathedral Lakes Loop
Difficulty: Moderate
Distance: 7 Miles to the First Lake, 8 Miles to Both
Total Elevation Gain: 1,385 Feet
Located 12 miles from Lee Vining, down Tioga Pass Rd from 395, Cathedral Lakes Loop is on the East end of Yosemite National Park.
The hike will take anywhere from 4-8 hours and gives you the best views of Cathedral Peak from the shores of two reflective alpine lakes.
The upper lake is private and is a popular place to sunbathe on a granite slope.
Beginning at 8,500 feet, Cathedral Lakes Loop is a slow and steady climb up until finally reaching the pair of lakes, making the way down a breeze.
Of all the hikes in the Eastern Sierra, Cathedral Lakes provides the most proximity to the recognizable granite rock formations that make Yosemite famous.
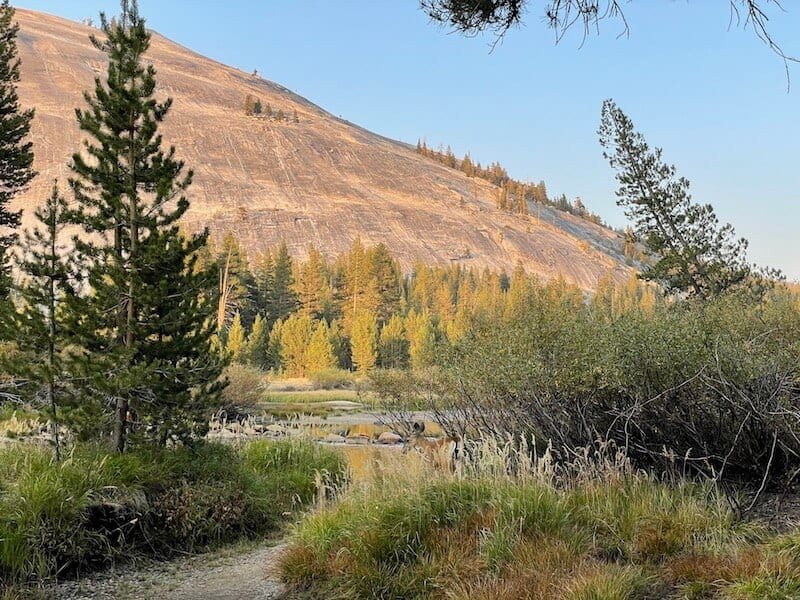
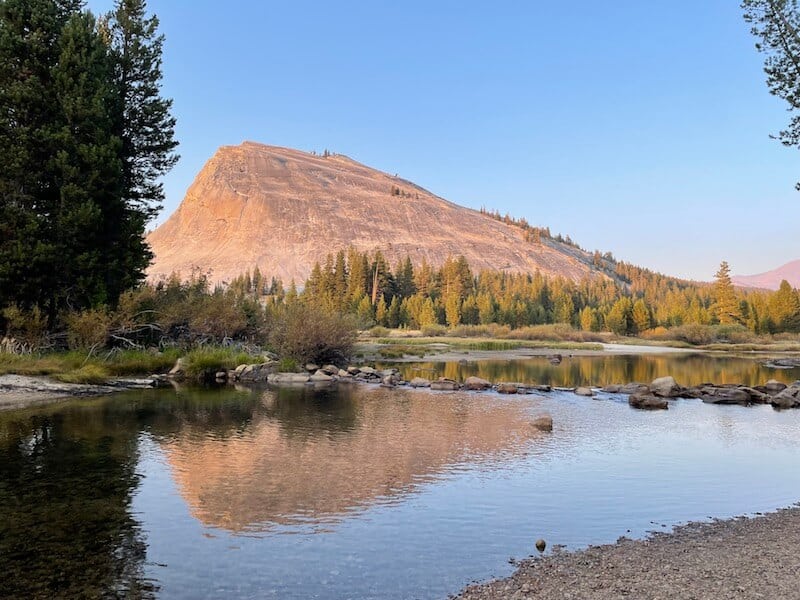
Lembert Dome Loop
Difficulty: Moderate
Distance: 3.7 Miles
Total Elevation Gain: 846 Feet
Not far from Cathedral Lakes is the Lembert Dome trailhead.
The hike is conveniently located, as the parking lot is on the shoulder of Tioga Pass Road, close to the Tuolumne Meadows Campground.
Lembert Dome is difficult to miss. Rising above the tree line, Lembert Dome is a glacially formed granite rock that is visible for miles and is unique to the areas of Yosemite and Tuolumne Meadows.
The Lembert Dome is the perfect day hike for hikers to experience the beauty and features of the Eastern Sierra in a loaded and jam-packed afternoon.
The hike is just 3.2 miles but be sure to set time aside to enjoy the summit. Here, is over 1000 feet of elevation gain and it all comes in the first half of the loop, making for a short, but laborious climb towards the top.
Once reaching the summit, which is the smooth granite rock surface, you can enjoy 360-degree views of Tuolumne Meadows.
If you are feeling bold, you can climb to the peak of Lembert Dome – but hiker beware, it is slick and steep.
Lyell Canyon
Difficulty: Easy
Distance: 11.7 Miles
Total Elevation Gain: 521 Feet
Beginning near Tuolumne Lodge along Tioga Pass Road, Lyell Canyon is a hike suited for all experience levels.
Although the distance is longer for the average day hike, the minimal elevation gain throughout is manageable and sends you deep within Inyo National Forest.
The hike is out-and-back and will take you through long stretches of lush forests and exposed valleys, so be sure to bring your sunblock, insect repellent, and plenty of water.
One of the highlights of this hike is the fruitful habitat for wildlife. Lyell Canyon follows along the Lyell Fork of the Tuolumne River and is a section of the John Muir Trail.
Because of the abundant water source and the healthy vegetation in the warm valleys of Lyell Fork, Lyell Canyon attracts all types of species of high-altitude wildlife, such as mule deer, willow flycatchers, and black bears.
Dana Plateau
Difficulty: Difficult
Distance: 3-6 Miles
Total Elevation Gain: 2,114 Feet
Located off Highway 120, the parking area is found about 11 miles west of the intersection of Tioga Pass Rd. and Highway 395, just beyond Tioga Lake.
Unlike many of the hikes in the guide, this hike is less of a “follow the trail” pathway and more of an experience that is encouraged to wander.
From either edge of the plateau, you can see an aerial view of Mono Lake to the East and can see Dana Lakes to the West.
The first mile of the hike is a steady walk through a field of pine trees before ultimately reaching the plateau.
Once reaching the plateau, the trail becomes less visible and is guided by rock cairns, so keep an eye out for them.
The plateau is considerably steep, gaining over 2,000 feet of elevation is just under 3 miles, and that does not account for the wandering mileage surely to be amassed.
Gaylor Lakes
Difficulty: Difficult
Distance: 3.7 Miles
Total Elevation Gain: 600 feet to Lower Gaylor Lakes, 1097 for Upper Gaylor Lakes, 1227 to Great Sierra Mines
A hike with an immediate payoff, the climb towards Gaylor Lakes is quick but strenuous. Located 12 miles from the intersection of Tioga Pass Rd and Highway 395.
The parking area is right off the road just beyond the Tioga Pass Entrance Station.
In addition to the picturesque alpine lakes and the surrounding mountain ranges, Gaylor lakes are home to the historic remains of the Great Sierra Mine.
The hike begins at a steep pace, but after the first 0.3 miles becomes significantly steeper.
The hike lends breathtaking views of Mount Dana and the Cathedral Range.
Less than a mile into the hike, you will encounter the shores of Lower Gaylor Lakes.
After getting a small rest at the lake, prepare for the climb to Upper Gaylor Lakes, another 0.6 miles to reach the shores.
Just beyond the shoreline is the short climb to the abandoned Great Sierra Mines.
Built in 1860, the remains of stone cabins, collapsed mines, and industrial homes are still hanging on.
Saddlebag Lake & Twenty Lakes Basin
Difficulty: Moderate
Distance: 7.7 Miles
Total Elevation Gain: 918 Feet
To reach the trailhead, head down Tioga Pass Rd for 8 miles until you see the signs for Saddlebag Lake.
From there, take the dirt road for 2.4 miles, staying to the right of every fork along the way until finally reaching the parking area and trailhead.
There are several ways to enjoy this hike.
With the limited amount of elevation gain, this hike is suitable for all levels of hikers.
You can hike around Saddlebag Lake in either direction of the loop, or if you do not feel like walking, there is a water taxi service that takes you across the lake for a small charge but is first-come, first-serve.
After walking the radius of the Lake, continue the trail towards 20 Lakes Basin.
Along the trail are multiple offshoots that lead you to numerous alpine lakes alongside the loop.
Gem Lake via Rush Creek
Difficulty: Strenuous
Distance: 6.6 Miles
Total Elevation Gain: 2,080 Feet
Gem Lake trailhead is found on June Lake Loop, at the Rush Creek fork of Silver Lake.
Approximately 14 miles south of the intersection of Tioga Pass Rd and Highway 395 is Highway 158, also known as June Lake Loop.
From there, follow along the loop for 7.5 miles until you reach Silver Lake.
The parking area is just past the Silver Lake Campground.
Be sure to bring plenty of water and skin protection as this hike is extremely exposed with long segments without shade.
There are multiple features and attractions along this stunning hike.
Unlike the previous hikes, this begins at a much lower elevation, about 7000 feet.
About 0.65 miles in, there is a side trail that leads you to the powerful and majestic Horsetail Falls.
After another mile or so, you will find yourself walking through an abandoned tramway once used for the Rush Creek hydroelectric plant.
From here, you will encounter a number of unrelenting switchbacks that will penultimately lead to Agnew Lake before reaching the deep blue waters of the enormous and beautiful Gem Lake.
Fern and Yost Lakes
Difficulty: Strenuous
Distance: 3.3 Miles to Fern Lake, 9.6 Miles to Yost Lakes
Total Elevation Gain: 1,644 feet to Fern Lake; 2,747 feet to Yost Lakes
The trailhead for Fern and Yost Lakes is along the June Lake Loop just prior to reaching Silver Lake.
Take Highway 120 for about 6 miles until you find an inconspicuous sign indicating a hiker and an arrow.
There is no official parking area, but it is perfectly legal to park along the side of the road near the Carson Peak Inn before beginning the trail.
The trail for both lakes is uphill for about 1 mile until you reach a fork that divides the paths of either lake.
Make a right at the fork and begin the arduous climb to reach Fern Lake.
The trail gains nearly 1,000 feet in elevation in only 7 miles and has some difficult sections that may be too difficult for a beginner.
Once you complete the climb, there are plenty of comfortable rocks to sunbathe or enjoy a snack at the shores of beautiful Fern Lake.
For a more secluded lake and longer hike, return to the fork and make a left towards Yost Lake.
From the fork, it is a 1.7-mile hike through grassy wetlands and forests leading to the beautiful shores of Yost Lake.
Fern Lake is highly trafficked due to its short distance, however, the hike to Yost Lake is more level and in many cases is only inhabited by a few adventurers.
San Joaquin Ridge
Difficulty: Moderate
Distance: 8 Miles
Total Elevation Gain: 2,035 feet
Moderately graded, the San Joaquin Ridge Trail has sections that are quite easy, but some are considered strenuous, so prepare accordingly.
To reach the ridge trail, head down Highway 203 west into the town of Mammoth Lakes.
Continue down this road until this until you reach Minaret Road and make a right.
Once here, continue down Minaret Road until you get to San Joaquin Jeep Road – just before the Devil’s Postpile Entrance and drive an additional 0.3 miles to the designated parking area.
While most of the trail follows along a traditional hiking route, portions of the early sections of the hike are on a 4WD route in which vehicles do pass through.
Once completing the road, the trail transforms into a sometimes difficult to navigate, but the lovely and open trail along the San Joaquin Ridge.
Once reaching the summit, you will earn a 360-degree view of the most beautiful sections of the Eastern Sierras.
Thousand Island Lake

Difficulty: Moderate-Difficult
Distance: 16.5 Miles
Total Elevation Gain: 2,470 Feet
Though the distance is long to be labeled a day hike, the Thousand Island Lake Trail is worth the effort.
Just like the drive towards the San Joaquin Ridge trailhead, take highway 203 west in Mammoth Lakes and make a right on Minaret Road towards Devil’s Postpile.
However, the road leading to this particular trail can only be reached by shuttle bus because of the popularity of the area and the limited parking opportunities beyond the parking lot at Mammoth Mountain Ski Area.
The shuttle bus tickets can be purchased at the gift shop.
* Very important – The shuttle only runs until 7 PM. With the length of this trail, it is important to budget your time wisely as this hike is long and the final bus will not wait around.
Take the bus to the Agnes Meadows trailhead.
The first section of the trail is the beginning of multiple trails, so to find the path to Thousand Island Lakes Trail, follow along the River Trail.
From here, you will encounter several forks and junctions that are well-marked so just follow trail signage leading you to Thousand Lakes.
The elevation profile is substantial, but the trail is a manageable and steady climb until you reach Thousand Island Lake.
Shadow Lake to Ediza Lake
Difficulty: Strenuous
Distance: 7.2 Miles to Shadow Lake, 13 Miles to Ediza Lake
Total Elevation Gain: 1,774 Feet
Just like the drive towards the San Joaquin Ridge trailhead, take highway 203 west in Mammoth Lakes and make a right on Minaret Road towards Devil’s Postpile.
However, the road leading to this particular trail can only be reached by shuttle bus because of the popularity of the area and the limited parking opportunities beyond the parking lot at Mammoth Mountain Ski Area.
The shuttle bus tickets can be purchased at the gift shop.
Depending on your hiking pace, the 14.8-mile path to Ediza Lake may be better enjoyed as an overnight.
The path to Shadow Lake is a steady and rolling hike for about 3.5 miles and is comfortable for hikers of all experiences.
Once here, be sure to check out the powerfully cascading waterfall from the west end of the lake.
This is also an excellent opportunity to gauge whether to continue towards Ediza Lake or to return to the shuttle bus.
If you choose to continue, the remaining hike to Ediza Lake is around 4 miles and is a steady climb with an additional 700 feet of elevation gain.
The closer to get to the lake, the more the trail transforms.
Leaving green forests behind, you will rise above the tree line, and from the shadows emerges the year-round, glacial mountains guiding you to the reflective shores of Ediza Lake.
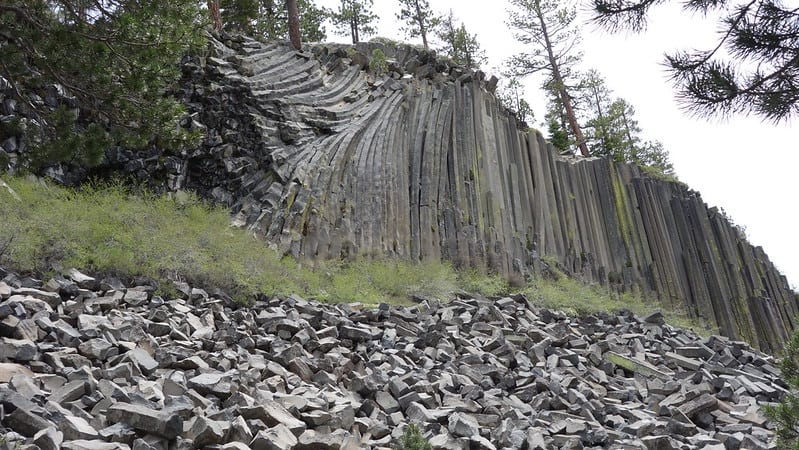
Devil’s Postpile and Rainbow Falls
Difficulty: Easy
Distance: 2.5 Miles
Total Elevation Gain: 414 Feet
To reach the trailhead, take the same shuttle bus in Mammoth Lakes.
Instead of exiting at Agnes Meadows, stay on the bus until you reach the Red Meadows/Devil’s Postpile exit.
Devil’s Postpile is an unusual rock formation that was shaped over 100,000 years ago.
These formations are called columnar basalt, massive symmetrical and polygonal columns.
The Devil’s Postpile rock formation is only 0.4 miles in with a wheelchair-accessible walkway.
From there, continue the downhill hike for another 2 miles until you reach the powerful Rainbow Falls.
Rainbow Falls is a 101-foot cascading waterfall that produces vibrant rainbows just above the surface.
Once there, sit along the banks of the San Joaquin River and relax to the overwhelming sound of the mighty waterfall.
The trail itself is exposed and offers little shade, once you reach the falls, the crashing mist cloud is a welcome relief.
Heart Lake
Difficulty: Moderate
Distance: 2.4 Miles
Total Elevation Gain: 564 Feet
To find Heart Lake, take Highway 203 in Mammoth Lakes.
Remain on 203 until it becomes Lake Mary Road and drive an additional 3.9 miles when you will turn left on Road 4S09.
Continue on this road until you arrive at Coldwater Campground, the trailhead will be the far east end of the campground.
The hike to Heart Lake is perfect for the adventurer looking for a light workload, but big payoffs.
The lake is only 1.1 miles from the trailhead, making for easy access for fly fishing, sunbathing, or a nice picnic with your sweetie.
In addition to the lake, there is a secondary trail outside the kiosk that is only a half-mile long that leads to an abandoned gold mining camp where you can learn more about the legacy of this historic area.
Duck Pass
Difficulty: Moderate
Distance: 9.5 Miles
Total Elevation Gain: 2,132 Feet
To reach Duck Pass, take Highway 203 in Mammoth Lakes.
Remain on 203 until it becomes Lake Mary Road and drive an additional 3.9 miles when you will turn left on Road 4S09.
Continue on this road for 3.6 miles until you arrive at Coldwater Campground, the trailhead will be the far east end of the campground.
Starting at the same trailhead as Duck Lake, Duck Pass is a more ambitious challenge with continuous rewards along your journey.
The trail begins as a shaded and forested walk through the woods.
At 1 mile, you will find a tough set of switchbacks that open your eye-line to clear views of Arrowhead Lake.
At mile 3.7, the trail becomes a rocky and exposed climb to the summit of Duck Pass, with a birds-eye view of Duck Lake.
From here, you can choose the steep hike down to the shores of Duck Lake or return the way you came.
Pro Tip: Once arriving at Duck Lake, follow the directions of the Duck Lake Trail to return to the parking lot for an easier return hike.
Valentine Lake via Sherwin Lakes Trail
Difficulty: Moderate
Distance: 11 Miles
Total Elevation Gain: 1,909 Feet
To find the trailhead for Valentine Lake, take Old Mammoth Road, which is just south of the exit for Mammoth Lakes from Highway 395.
Continue down this road for 1.4 miles until you arrive at the Sherwin Lakes trailhead.
The parking area is 0.4 miles from the signs for the trailhead.
One of the more popular and trafficked hiking trails in the Eastern Sierra, the hike to Valentine Lake begins with a steady climb of well-maintained and graded switchbacks that lead you to excellent views of a few of the Sherwin Lakes.
These lakes will parallel your hike for the first 3 miles of the day, making for an excellent accompaniment for the long journey.
The final 1.5 miles are increasingly steep but are still a very manageable hike before reaching the waters of Valentine Lake.
Once here, find yourself a sunbaked granite boulder to relax and appreciate one of the more beautiful bodies of water before the long hike back down the mountain.
Convict Canyon
Difficulty: Strenuous
Distance: 9.8 Miles to Mildred Lake, 12 Miles to Lake Dorothy
Total Elevation Gain: 2,300 feet to Mildred Lake, 2,733 feet to Lake Dorothy
The Convict Canyon Trailhead is 4 miles south of Mammoth Lakes, right off Highway 395.
Look for Convict Lake, which is a massive lake just off the road that is impossible to miss.
Turn onto Convict Lake Road and stay on it for 1.8 miles until you reach the parking area toward Convict Creek.
*Important note: This trail contains a washed-out bridge. Be sure to bring hiking poles and water-resistant footwear if you choose to cross. During the wet season, do not try to cross if the stream is beyond knee-high in depth.
The first 1.5 miles are a tame incline skirting Convict Lake before the climb increases into a shade-free valley for the next 2 miles.
At the 3.5-mile mark, you will encounter the washed-out bridge, so make your decision whether to continue or return here.
The next 1.5 miles is a difficult-to-manage trail and is poorly maintained.
However, once reaching the peak of the ridge, you finally encounter Mildred Lake, a nice reward for the difficult journey.
To reach Lake Dorothy, continue along the shores of Mildred Lake and find a series of switchbacks that lead you up another 1.1 miles until reaching the high-alpine waters of Lake Dorothy.
Convict Lake Loop
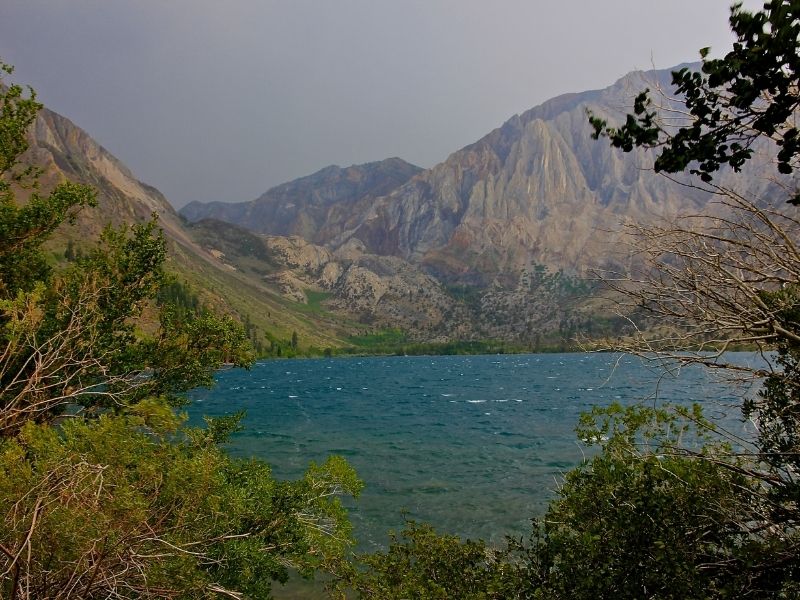
Difficulty: Easy
Distance: 2.8 Miles
Total Elevation Gain: 30 Feet
The Convict Canyon trailhead is 4 miles south of Mammoth Lakes right off Highway 395 until Convict Lake appears.
Turn onto Convict Lake Road and stay on it for 1.8 miles until you reach the parking area toward Convict Creek.
The hike around Convict Lake is not difficult, but it is popular year-round.
The lack of elevation gain makes this trail an excellent choice for an afternoon walk or a beautiful trail run.
Follow along the shores in either direction and enjoy the hike under the shadows of Laurel Mountain and Mount Morrison.
In the Winter, the giant lake freezes over and creates an enormous and natural ice-skating rink that covers the entirety of the lake.
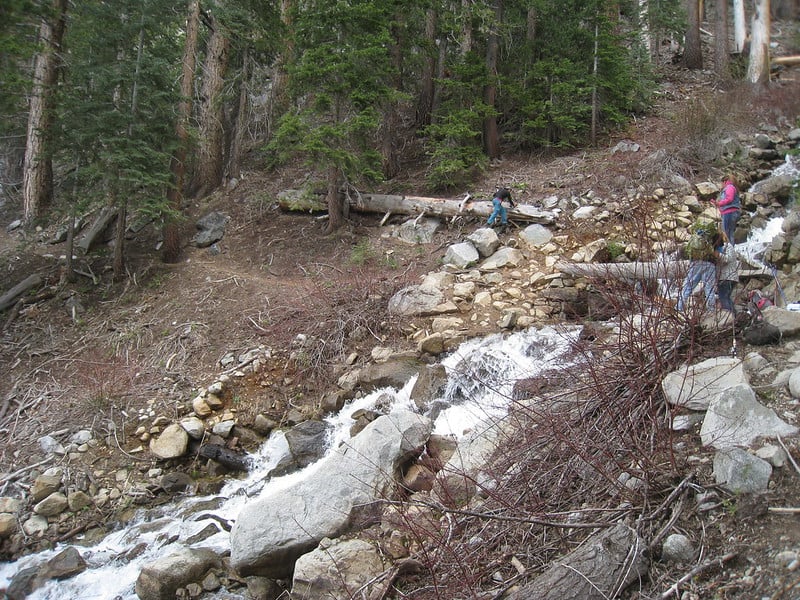
McGee Canyon
Difficulty: Strenuous
Distance: 13.6 Miles
Total Elevation Gain: 2,760 Feet
To reach the trailhead, head south on Highway 395 from Mammoth Lakes for 8.6 miles until you find McGee Creek Road.
Continue up McGee Creek for 3.3 miles until you reach the trailhead.
With the total length and the difficulty of certain sections of the mountain, the hike through McGee Canyon is best suited for experienced hikers.
However, if you are u.p to it, this hike is one of the more exquisite trails in the entire region.
Dense fields of wildflowers line the canyon that leads you up the hill on a vibrant and colorful path.
After 2.7 miles, there is a stream crossing that requires the use of a stability rope, where you will inevitably get your feet wet.
As you approach the 6-mile mark, the trail enters a clear and enjoyable meadow leading to the final destination of the long journey, Big McGee Lake.
Hilton Lakes

Difficulty: Moderate
Distance: 12.1 Miles
Total Elevation Gain: 2,152 Feet
From Mammoth Lakes, head south on Highway 395 south for 15 miles.
Once reaching the Tom’s Place turnoff, turn right and drive 9.8 miles to Rock Creek Lake and the trailhead will be about 100 yards from the parking area.
Starting from the beautiful Rock Creek Lake, Hilton Lakes Trail is a rolling hike that is enjoyable for hikers of all skill levels.
Most of the elevation gain is found near the end of the hike, giving hikers a steady 4 miles of valleys and meadows to meander through before reaching the final climb.
The final mile leads you to Third Hilton Lake, with its sister lakes on either side.
A short walk along the north edge of Third Lake will lead you to the expansive Davis Lake.
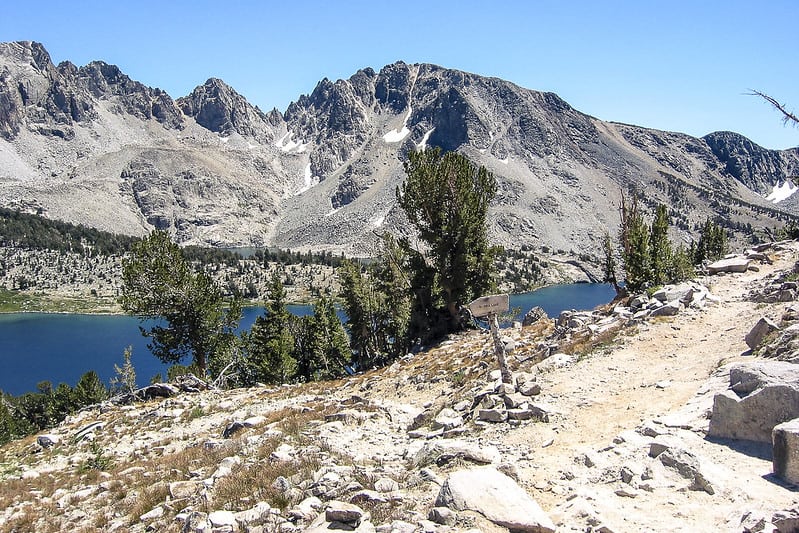
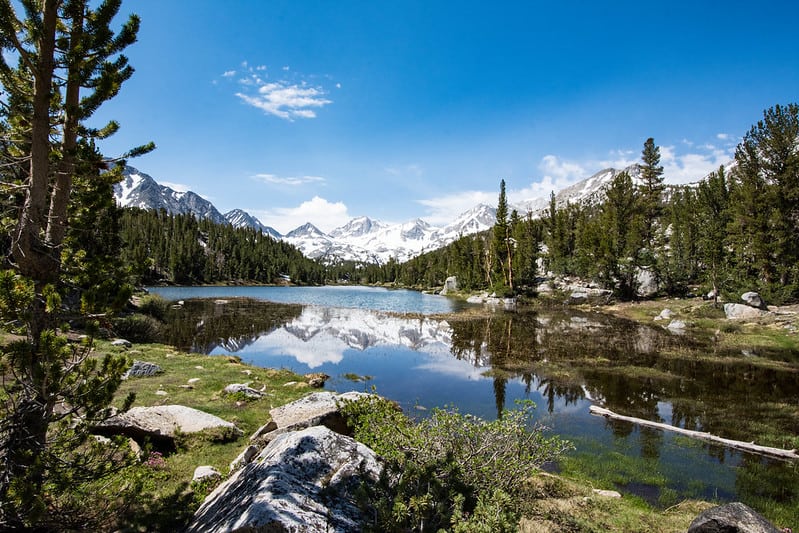
Little Lakes Valley
Difficulty: Moderate
Distance: 8 Miles
Total Elevation Gain: 1,059 Feet
From Mammoth Lakes, head south on Highway 395 south for 15 miles.
Once reaching the Tom’s Place turnoff, turn right and drive 10.3 miles to the end of the parking lot.
(Try to get there early, the parking lot is limited, and you may have to walk a long distance to reach the trailhead.)
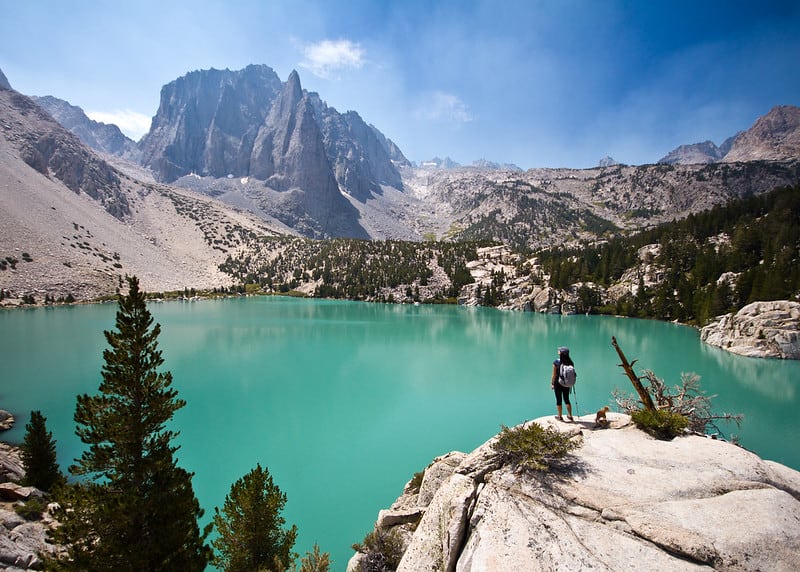
Arguably the most popular hike in the Eastern Sierra, Little Lakes Valley has all the favorite elements an adventurer could hope for.
From glacially formed valleys to year-round snowcapped mountains, Little Lakes Valley is a land full of wildlife, wildflowers, and matrimony.
Most of the elevation gain on the trail takes place in the first mile.
The trail then alternates from walking over granite boulders and through lush forests.
The first lake you encounter is Heart Lake.
Literally shaped like a heart, it is common to find outdoor wedding ceremonies tying the knot upon the shores.
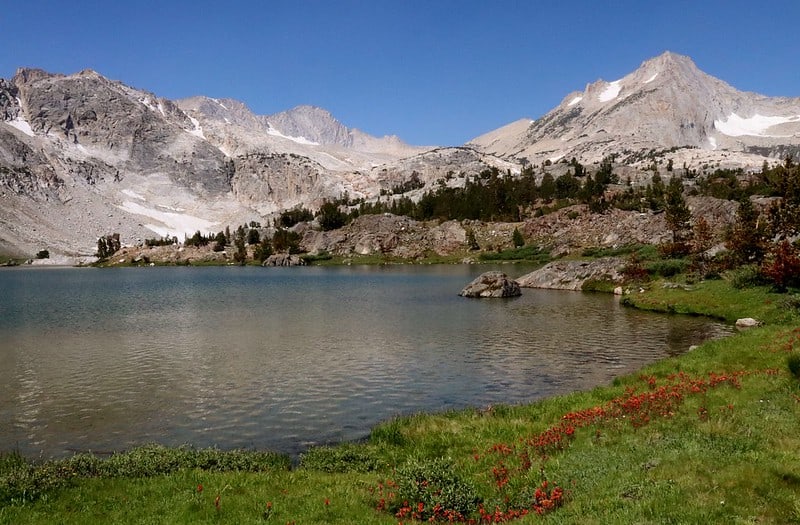
From there, there is a small climb to the beautifully reflective and picturesque Long Lake.
Follow along the shores until you reach the hill to your final lake, Gem Lake.
The crowds rarely hike past Long Lake, so Gem Lake is an excellent alpine lake to relax and enjoy the sounds of nature.
Eastern Brook Lake
Difficulty: Easy
Distance: 1.2 Miles
Total Elevation Gain: 312 Feet
From Mammoth Lakes, head south on Highway 395 south for 15 miles.
Once reaching the Tom’s Place turnoff, turn right and drive 10.3 miles to the end of the parking lot.
(Try to get there early, the parking lot is limited, and you may have to walk a long distance to reach the trailhead.)
A short walk from the Rock Creek Trailhead to Eastern Brook Lake is an excellent alternative to the busy crowds gathering to hike Little Lakes Valley.
Only a half-mile through a shady pine forest you will find the comfortable shores of Eastern Brook Lake, perfect for spending an afternoon reading a good book or casting a fly with hopes of catching a keeper rainbow trout.
Glass Mountain
Difficulty: Very Strenuous
Distance: 4.9 Miles
Total Elevation Gain: 1,053 Feet
*Requires a 4WD vehicle to reach the trailhead but a low clearance vehicle can take you there within 0.25 miles of the trail.
From June Lake, head north for 5.6 miles until reaching Highway 120 and take a right.
Stay on this road for 31 miles until you reach Black Canyon Road.
Continue down the dirt road for 1 mile and take a right on Sawmill Meadows Road.
You will arrive at an intersection after 6.6 miles that will only allow you to turn left or right, take the left to stay on Sawmill Meadows Road.
Continue driving for 3.6 miles until you turn up the 4wd road, which splits to the right.
The trailhead will be .25 miles down the road.
The first summit on our list, the road to Glass Mountain is short but exceptionally difficult.
To reach the summit, you must traverse 1.3 miles of borderline rock scrambles – 1,800 feet of it.
The trail is well-defined, however, due to the high grades of the climb and fragile obsidian rock, the mountain can be unstable.
With that being said, the summit provides an amazing 360-degree view of Long Valley.
Eastern Sierra Day Hikes Near Bishop
Piute Pass
Difficulty: Strenuous
Distance: 16.7 Miles
Total Elevation Gain: 3,454 Feet
In Bishop, head to the city center and turn onto Highway 168 towards Lake Sabrina.
Drive 18.2 miles until you see signs for North Lake Road and take a right.
Continue for another 1.8 miles down a one-lane road until reaching the parking lot.
From here, you must hike 0.6 miles through the North Lake Campground until reaching the trailhead.
*This is a wetlands area and attracts many mosquitos so be sure to bring insect protection.
A long but popular hike in the Eastern Sierra, the journey to Piute Pass has all the elements that the adventurers seek when venturing out into the John Muir Wilderness.
The early portions of the hike follow along the edge of the North Fork of Bishop Creek before climbing into a lush and green forest.
Much of the elevation gain is found in the first 2.5 miles before finding the blissful Loch Leven.
From here, the hike becomes more manageable until you reach the moonscape scene of Piute Pass.
Honeymoon Lake
Difficulty: Strenuous
Distance: 7.8 Miles to Pine Lake, 11.7 Miles to Honeymoon Lake
Total Elevation Gain: 3,149 Feet
From Bishop, drive 7 miles north on Highway 395 until you reach Pine Creek Road.
Take a left and drive for another 9.5 miles until the road ends, with the parking area to your left.
One of the more enduring hikes in the Eastern Sierra, the journey to Honeymoon Lake is abundant with a reward for the ambitious adventurer.
The trail is steep with many switchbacks; however, the switchbacks are comfortably graded.
After completing the unrelenting climb, at 3.9 miles you will reach Pine Lake.
Here is a good place to look for bighorn sheep, as this is known as a healthy habitat for this rock-climbing creature.
From here, the climb continues for the final two miles, finally reaching the beautiful shores of Honeymoon Lake.
Lamarck Lakes
Difficulty: Strenuous
Distance: 4.8 Miles to Lower Lamarck Lake, 5.8 to Upper Lamarck Lake
Total Elevation Gain: 1,562 Feet
In Bishop, head to the city center and turn onto Highway 168 towards Lake Sabrina.
Drive 18.2 miles until you see signs for North Lake Road and take a right. Continue for another 1.8 miles down a one-lane road until reaching the parking lot.
From here, you must hike 0.6 miles through the North Lake Campground until reaching the trailhead.
*This is a wetlands area and attracts many mosquitos so be sure to bring insect protection.
Starting from North Lake, enjoy the rich forests and the comfortable and level terrain for about 1 mile before reaching the junction at Grass Lake.
From here, the hike begins to climb significantly, abundant with switchbacks that will get your legs burning.
Once reaching the 2.3-mile mark, the trail levels off as you approach the rocky shores of Lower Lamarck Lake.
After relaxing at the lake, continue up the trail for another 0.5 miles, crossing streams as you go until you approach the overlook of Upper Lamarck Lake.
Hungry Packer Lake
Difficulty: Moderate
Distance: 12.6 Miles
Total Elevation Gain: 2,773 Feet
In Bishop, head to the city center and turn onto Highway 168 towards Lake Sabrina.
Drive for 18.8 miles until the road ends, leaving you at the trailhead at Sabrina Lake.
As you head towards Hungry Packer Lake, follow along the eastern shores of Lake Sabrina for 1.5 miles before reaching your first climbs of the hike.
This trail is also popular among backpackers, with 7 different exquisite and large alpine lakes that can make the remainder of this trail much longer than advertised.
Once you finish the initial climb after 2.8 miles, you will encounter Blue Lake – an excellent place to relax before continuing to climb.
The next 3.5 miles will have you crossing over streams and paralleling lakes and creeks before reaching the calm shores of the expansive Hungry Packer Lake.
Treasure Lakes
Difficulty: Moderate
Distance: 5.8 Miles
Total Elevation Gain: 1,384 Feet
In Bishop, head to the city center and turn onto Highway 168 towards Lake Sabrina.
Drive 15.1 miles until you reach the South Lake turnoff and drive an additional 7.2 miles until you reach the trail parking area.
Starting at beautiful South Lake, this trail is a wonderfully level trail for hikers of all abilities.
You begin by encircling South Lake before entering an expansive meadow full of wildflowers and wildlife.
As the trail steadily gains elevation, you will find the first Treasure Lake at 2.7 miles.
From here, the second Treasure Lake is just a small walk from the shores.
Bishop Pass

Difficulty: Strenuous
Distance: 4.6 Miles to Long Lake, 10 Miles to Bishop Pass
Total Elevation Gain: 2,345 Feet
In Bishop, head to the city center and turn onto Highway 168 towards Lake Sabrina.
Drive 15.1 miles until you reach the South Lake turnoff and drive an additional 7.2 miles until you reach the trail parking area.
Bishop Pass is a gem of the Eastern Sierra Nevada Mountain Range with your journey overlooking the boundaries of Kings Canyon National Park.
Beginning at South Lake, you will veer into a pine forest with plenty of shade.
After 2.3 miles of steady climbing and graded switchbacks, you will approach the shores of Long Lake.
From here, it is important to gauge the weather patterns.
The next 3.7 miles to Bishop Pass will take you above 12,000 feet and is exposed – certainly a place you wouldn’t want to be caught in a storm.
When you arrive at the pass, you will have an incredible view of both the Eastern and Western Sierras, with the trail ending at the entrance to Kings Canyon National Park.
Green Lake
Difficulty: Moderate
Distance: 6 Miles
Total Elevation Gain: 1,332 Feet
In Bishop, head to the city center and turn onto Highway 168 towards Lake Sabrina.
Drive 15.1 miles until you reach South Lake Road, take a left.
Stay on South Lake Road for 7 miles until the road ends where you will find the parking area for the trail.
The trail starts at the Bishop Pass trailhead but forks off early in the hike.
From here, you will find an old water pipe emerging from the surface and you are to follow along with it for the first mile.
The pipe will eventually sink beneath the surface, and a series of alternating switchbacks and level areas will lead you to the shores of the vibrantly colorful Green Lake.
Tyee Lakes
Difficulty: Moderate
Distance: 7 Miles
Total Elevation Gain: 2,135 Feet
In Bishop, head to the city center and turn onto Highway 168 towards Lake Sabrina.
Drive 15.1 miles until you reach South Lake Road, take a left.
Stay on South Lake Road for 5 miles and keep an eye out for a bridge that crosses the South Fork of Bishop Creek, this is where the trail begins.
If you reach Willow Campground, you have gone too far.
Tyee Lake is an exciting hike for adventurers and anglers.
After parking by the bridge, begin the climb up a series of switchbacks for 1 mile before the trail levels out.
In another half-mile, you will encounter the first of four Tyee Lakes in the shadow of Table Mountain.
From here, you will alternate from climbing switchbacks and coursing the edges of Tyee Lakes until you reach the final lake.
North Fork of Big Pine
Difficulty: Strenuous
Distance: 15.2 Miles
Total Elevation Gain: 3,982 Feet
Starting in Big Pine from Highway 395, head West on Crocket St. for 0.5 miles until the road changes into Glacier Lodge Road.
Continue down this road for 9.7 miles until you find a parking lot marked as overnight parking.
If you have the opportunity, attempt to obtain a backpacking permit for an overnight stay on this trail.
Along the hike, you will come across seven of the more beautiful lakes in all the Eastern Sierra, aptly named First Lake-Seventh Lake.
The trail is well-marked but splits into many junctions, so be careful to keep an eye out.
After 4.2 miles of meandering through an exposed stretch of meadows and valleys until you reach a fork, take a left towards the first three lakes.
Be sure to save ample time to enjoy these majestic lakes under the Palisades.
The remainder of the hike is a subtle climb that will take you along the shores of four more beautiful alpine lakes before turning around at Seventh Lake at the 7.6-mile mark.
Owens River Gorge
Difficulty: Moderate
Distance: 6.6 Miles
Total Elevation Gain: 1,527 Feet
From Bishop, drive 9 miles north until you find Gorge Road, pull up the stop sign, and turn left.
Drive for 3.3 miles until you reach an easy-to-miss sign for Middle Gorge on the right and turn here.
Continue down this road until you find a yellow gate, the parking area for the hike.
*Best visited in the winter months – the gorge is exposed during the summer and the heat can be overwhelming.
From the parking area, follow the paved path that leads you into the depths of the gorge.
The first mile through the gorge is a steady downhill descent, snaking between the towering rock formations.
While hiking through the gorge, keep your eyes up as rock climbers are known to be found scaling the walls.
After 2.5 miles, there is a short rock scramble that can be mistaken for the end of the trail.
The next mile is a climb that reaches a side road, signaling the end of the gorgeous hike.
Red Mountain Petroglyphs
Difficulty: Easy
Distance: 0.65 Miles
Total Elevation Gain: 87 Feet
From Bishop, take Highway 6 for 19 miles until reaching the gravel Chidago Canyon Road and turn left.
Continue down this road for 3.5 miles until reaching an unnamed road, turn left and Red Mountain will be in front of you.
Along this trail are a series of Petroglyphs thought to be nearly 5,000 years old crafted by the Piute-Shoshone tribe.
From the beginning of the trail, you can immediately recognize petroglyphs on the surrounding rock formations.
The most impressive collection can be found on a rock wall at the 0.5-mile mark.
These petroglyphs are carefully protected – be sure to show respect and avoid touching any of the ancient relics.
Druid Stones Loop
Difficulty: Strenuous
Distance: 5.1 Miles
Total Elevation Gain: 2,050 Feet
From Bishop, take Highway 168 West and take a left on Barlow Lane.
Stay on Barlow for 1.6 miles until encountering a fork in the road, take the right onto Bir Road.
After 1.8 miles, make a left on the high-clearance dirt road leading you to the trailhead after 0.4 miles.
The Druid Stones Loop begins with an unrelenting mile of switchbacks that are sure to get your heart racing.
Once reaching the ridge, keep an eye out for an inconspicuous fork in the road and stay left of it.
Walk for another 0.2 miles, taking you to the Druid Stone boulder fields. This is a popular spot to watch boulderers enjoying a climb!
There are a few offshoots of the trail that can take you to these stones and are a suitable place for a snack and a break.
After 2 miles, you will encounter carefully laid branches that signify the turn-around point of the loop.
On the way back, you will walk through the wildflower-laden Coyote Flats before returning to the trailhead.
Tungsten Peak
Difficulty: Strenuous
Distance: 2.1 Miles
Total Elevation Gain: 1,213 Feet
From Bishop, take Highway 168 West for 3.2 miles and turn right on Red Hill Road.
Stay on this road for 1.3 miles until reaching Ed Powers Road and take another right.
Drive 1.1 miles and turn left on Sawmill Road and continue driving for another 1.2 miles until you find the dirt road after Millpond Park – take a left.
From here, make a right at the first fork. In 0.5 miles, take a left at the next fork. In another 0.3 miles, take a left at the next fork.
Unlike the directions to get here, the hiking directions to Tungsten Peak are simple.
Climb, climb, and climb some more.
The hike is only 1.1 miles to the peak and is a steep and exposed path to the summit, but once reaching the end, Tungsten Peak delivers excellent views of the surrounding valleys and the range of mountains enveloping the area.
The Beach
Difficulty: Easy
Distance: 3.7 Miles
Total Elevation Gain: 878 Feet
From Bishop, drive for 3.8 miles on Highway 6 until you reach Silver Canyon Road and take a right.
Drive another 0.4 miles and turn left onto Joe Smith Road.
Drive another 1.3 miles and make a right on Jean Blanc Road.
In another 0.5 miles, turn left on Churchill Mine Road.
Another mile further, turn left on a high clearance, 4wd dirt road and drive the final 2.3 miles, and park at the turnout on the right side of the road that begins the trail.
One of the most unique experiences in the Eastern Sierra, the beach is an actual mountain beach made of bright white pumice sand.
Be sure to bring everything you would normally bring to the beach – towels, sunscreen, drinks, a beach ball, and most importantly, sunglasses.
Follow the graded pathway for about 1 mile when you will reach the first of two beaches.
The first beach will have excellent views of the mountain range and overlooks the valleys.
On this beach, DO NOT GO BAREFOOT!
The beach has hidden litter, including shards of glass and sharp metals washed up from a nearby mine that can be dangerous.
Follow the same path for 0.8 miles to reach the larger, and safer second beach.
Here, it is safe to remove your shoes and enjoy the beaches as you would normally do.
Methuselah Loop
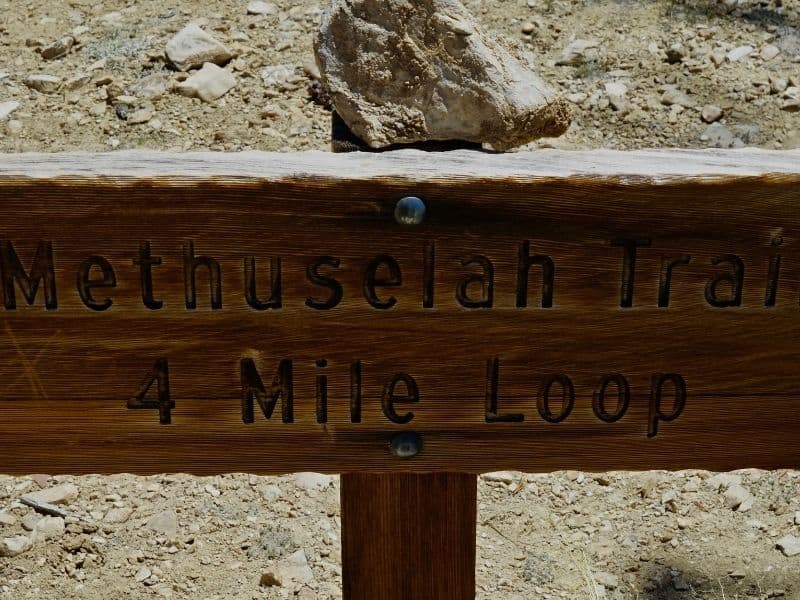
Difficulty: Moderate
Distance: 3.6 Miles
Total Elevation Gain: 1,629 Feet
From Big Pine, take Highway 168 east for 12.9 miles and turn left on White Mountain Road.
Continue up the hill for 13 miles until you see the Bristlecone Pine Forest Visitors Center.
Park in the parking lot and go inside to pay the suggested donation.
*Before your hike, there is an interpretive guidebook inside the Visitors Center and a supplementary 15-minute video to help appreciate the importance of this hike.
The trail begins as a loop behind the Visitors Center, be sure to go right of the fork as there are interpretive signs that correlate with the guide provided.
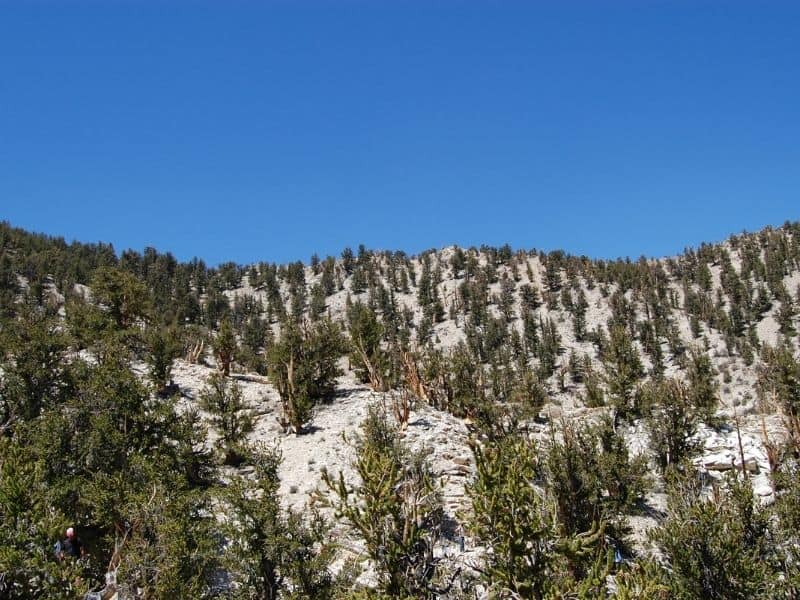
As you go along the ridge of the Ancient Bristlecone Forest, you will see dozens of Bristlecone trees, some nearly 4,000 years old.
After 2 miles, after marker 20, you will encounter the Methuselah Grove, home to the world’s oldest non-clonal tree, Methuselah.
There will not be any signage on which one is the oldest to protect Methuselah for visitors.
Old Silver Canyon Road
Difficulty: Strenuous
Distance: 10.2 Miles
Total Elevation Gain: 3,037 Feet
*This hike requires the use of high clearance, 4wd vehicle to navigate to the trailhead.
From Bishop, head north on Highway 6 for 3.8 miles and take a right on Silver Canyon Road.
The pavement will end after about 1 mile and if there is a “road closed” sign, continue past it, you can still access the trail.
After 1.3 miles, you will encounter a stream that you will have to drive through.
If the water level is too high, do not continue.
Along the way, you will cross an additional 7 streams over the next 5.3 miles before reaching the parking area on the left.
The hike is converted mining access road – creating a long but steady climb the entire way.
Although the hike is listed as 10 miles, Silver Canyon Road is a hike you can make as short, or as long as you choose.
The higher you can climb; the better views of the grand Eastern Sierra will become available.
Just follow the road until you reach 5 miles to get an unobstructed view in all directions.
White Mountain
Difficulty: Strenuous
Distance: 14 Miles
Total Elevation Gain: 2,908 Feet
*This hike is long and lacks water sources or shade, bring more water than you think you will need.
From Big Pine, take Highway 168 east for 12.9 miles and turn left on White Mountain Road.
Continue driving up the hill for 26.6 miles until you reach the Barcroft Gate, the parking area for the hike.
(Two weekends a year, the Barcroft Research Station will open the gate and allow you to drive an additional 1.1 miles up the hill.)
The directions for this hike are simple – follow the road to White Mountain.
The entire hike slowly climbs White Mountain Road with the 14,000-foot mountain glaring down on you, daring you to climb the hill.
The first 5 miles is a straight and steady climb up White Mountain Road until reaching 2.5 miles of increasingly steep switchbacks that lead you to the summit of White Mountain – a complete and panoramic view of the entire Eastern Sierra.
Granite Meadow
Difficulty: Easy
Distance: 2 Miles
Total Elevation Gain: 493 Feet
From Big Pine, take Highway 168 east for 12.9 miles and turn left on White Mountain Road.
Continue for 20.5 miles and turn right on Crooked Creek Road.
From there, you will reach a fork at 0.2 miles, stay right. After another 0.8, turn left at the fork.
There will be another fork after 1.9 miles, turn left on Cottonwood Creek Road.
After 0.8 miles, turn right. Continue up the increasingly rough road for 1.4 miles until reaching the trailhead.
Granite Meadow is a perfect hike for individuals who want to get lost in nature.
With its difficult access and its lack of a defined trail, the hike to Granite Meadow is generally unoccupied and will have the entire meadow to yourself.
Bring a compass to be safe and follow the natural pathway until opens into a beautiful granite meadow all to yourself.
Eastern Sierra Day Hikes Near Lone Pine
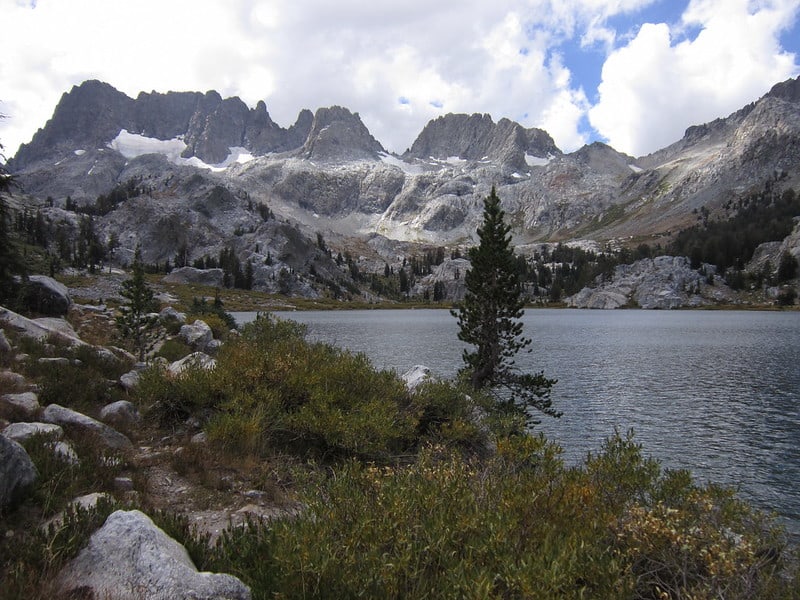
Kearsarge Pass
Difficulty: Strenuous
Distance: 12 Miles
Total Elevation Gain: 3,471 Feet
From the town of Independence, head west off Highway 395 for 13.7 miles to the parking area for this hike.
Kearsarge Pass is a popular trail through the backwoods of the Eastern Sierras that has access to the tallest mountain in the continental US, Mount Whitney.
For a day hike, Kearsarge Pass is a gem of the range. The hike begins with a manageable set of switchbacks.
Along the way, you will encounter three separate lakes: Little Pothole Lake, Gilbert Lake, and Flower Lake.
The trail levels out towards the pass, giving wonderful views of University Peak to the south.
Robinson Lake
Difficulty: Strenuous
Distance: 2.8 Miles
Total Elevation Gain: 1,300 feet
From the town of Independence, head west off Highway 395 for 13.7 miles to the parking area for this hike.
A lesser-known hike in the Sierras, Robinson Lake is an excellent find for adventures who enjoy their privacy.
Robinson Lake has all the elements the mountain range has to offer.
The hike greets you with a series of tough switchbacks and gifts you with more elevation.
Once you make it to the lake, enjoy the beautiful and reflective alpine lake, surrounded by granite boulders, and rest your weary legs on the mountain beach.
Whitney Portal Trail
Difficulty: Moderate
Distance: 7.8 Miles
Total Elevation Gain: 2,938 Feet
From Lone Pine, head west on Whitney Portal Road and through the beautiful Alabama Hills for 6.5 miles until you reach Lone Pine Campground and make a left.
The parking area is at the end of the road within the campground.
Most travelers will want to skip ahead and drive to Whitney Portal, but along the way is a section of the Sierra Nevada that is incredibly rewarding and equally beautiful.
The trail follows along Lone Pine Creek before moving towards a gently graded series of switchbacks.
The trail begins as desert climate and slowly transitions into a pine forest.
Continue climbing parallel to mountain creeks until you reach the parking area for Whitney Portal, the end of this hike.
Meysan Lake

Difficulty: Strenuous
Distance: 9.9 Miles
Total Elevation Gain: 4,009 Feet
From Lone Pine, head west on Whitney Portal Road for 11.2 miles and park on the side of the road near the Meysan Lake parking sign.
The good news – this hike is graded well the entire way.
Bad news?
It is nearly entirely switchbacks for 4,000 feet.
As you climb, the landscape is in constant flux.
The trailhead leads you into a lush forest of alpine trees, changing into high-altitude pinon pines, and eventually transforming into a moonscape of exposed granite pathways.
After 5 miles, Meysan Lake comes into view, with plenty of polished granite boulders to relax and celebrate the day’s challenges.
Stone House
Difficulty: Moderate
Distance: 2.1 Miles
Total Elevation Gain: 985 Feet
From Lone Pine, head west on Whitney Portal Road for 3.1 miles through Alabama Hills and turn left on Horseshoe Meadows Road.
Continue driving for 2.1 miles and turn right on Granite View Drive.
After another 2.4 miles, make a slight right on 16S01, a dirt road that takes you along some scary cliffs, so drive slowly.
Stay on this road for 2.5 miles and park your car at the turnout at the end of the road.
Stone House is a mountain home built by mystical philosopher, Franklin Merrell-Wolff.
It was built as a shrine to the transcendent consciousness of the human mind.
Built as a balanced cross to represent equilibrium, the house is open for visitors to enter and explore its interior.
Today, it is maintained by local volunteers so please show respect for their efforts.
Cottonwood Lakes Loop
Difficulty: Strenuous
Distance: 16.1 Miles
Total Elevation Gain: 2,673 Feet
From Lone Pine, head west on Whitney Portal Road for 3.3 miles and turn left onto Horseshoe Meadows Road.
Carefully drive for 20 miles until reaching Cottonwood Lakes/New Army Pass and take a right.
After 0.5 miles, you will reach the parking area for the trailhead.
The hike to Cottonwood Lakes begins in a shady forest for 1.5 miles until you cross Cottonwood Creek via a log bridge.
From here follow along the running waters as you climb through a steep meadow for 3 miles before arriving at a junction for the loop of Cottonwood Lakes – feel free to take either way.
About halfway through the loop, there is an offshoot for Long Lake that will add an additional mile to the hike if you wish.
Cottonwood Pass Loop
Difficulty: Strenuous
Distance: 10.6 Miles
Total Elevation Gain: 2,011 Feet
From Lone Pine, head west on Whitney Portal Road for 3.3 miles and turn left onto Horseshoe Meadows Road.
Carefully drive for 20 miles, just past the Cottonwood Lakes Loop trailhead at the terminus of the road where you will find the trailhead.
The junction of the loop begins only 0.3 miles into the hike. At the junction, it is best to slight right.
After 3.6 miles of climbing, you will reach Cottonwood Pass, giving you amazing views of the Great Western Divide and Sequoia National Park.
From here, there is a short offshoot that will take you to Chicken Spring Lake, a wonderful place to refresh and relax before completing the hike.
After 9.8 miles, turn left at the sign labeled, “trailhead-pack station” and cruise downhill through the expansive Horseshoe Meadows before returning to the parking area.
Pat Keyes Trail
Difficulty: Strenuous
Distance: 7 Miles
Total Elevation Gain: 2,180 Feet
From Independence, drive 5.5 miles south and turn left on Manzanar Reward Road.
Drive down for 4.7 miles (the pavement ends after 2.1 miles) until you reach a fork, turn left here and at the next fork.
Drive for another 0.5 miles and turn right and shortly after, turn left at where the road ends.
Drive another 0.5 miles until you reach the parking area.
Used as an old access route for miners, the Pat Keyes Trail is one of the more rustic and secluded hikes in all of California.
The hike is challenging, but every step opens new levels of solitude in your journey.
The first 3 miles are difficult switchbacks with little shade, so be sure to bring plenty of water.
Shortly after the switchbacks, you will come to a barbed-wire fence with a manmade opening – pass through the opening in the fence and follow the rock cairns for another 0.5 miles until you reach a clearing, making this the turnaround point for this hike.
Whitney Portal Arch Trail
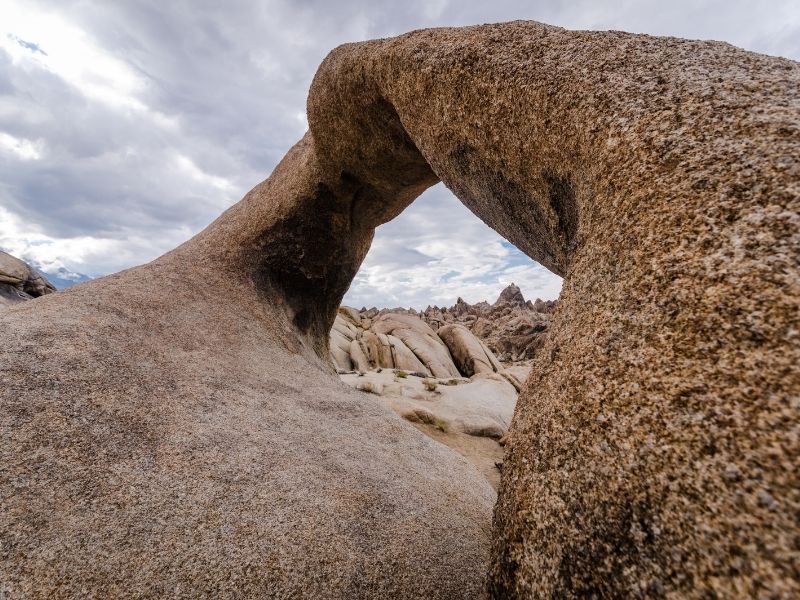
Difficulty: Easy
Distance: 0.5 Miles
Total Elevation Gain: 44 Feet
From Lone Pine, turn west on Whitney Portal Road and drive for 2.7 miles until you reach Movie Flat Road and take a right.
Drive for 1.5 miles and take another right. Once you reach the fork, the parking area will be to the right.
The trail to the arch is a short loop and you can choose either direction.
The climb is a gentle 0.25 walk up a small hill until you reach the arch.
Once there, the arch reveals itself as a window that perfectly frames Mount Whitney, creating a beautifully picturesque photo opportunity that encompasses the beauty of the Eastern Sierra.
Cerro Gordo Ghost Town
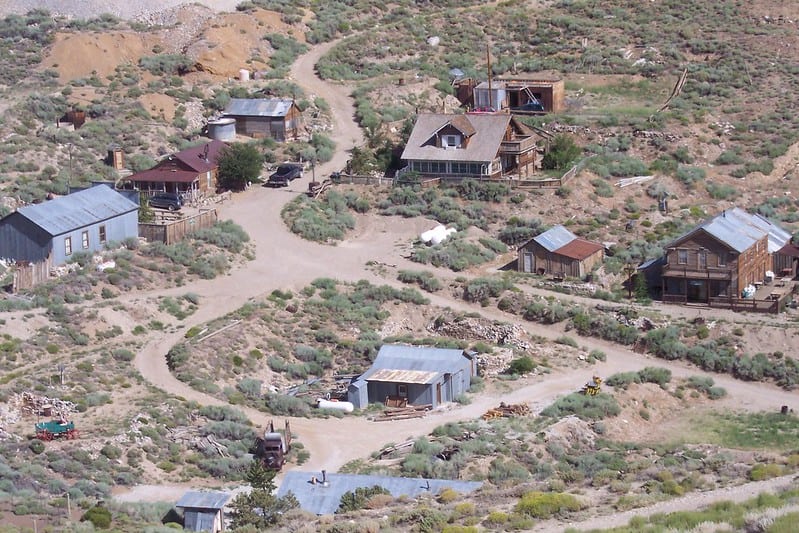
Difficulty: Moderate
Distance: 2.4 Miles
Total Elevation Gain: 1,000 Feet
From Lone Pine, drive south on Highway 395 for 1.9 miles until you reach Highway 136 and turn left.
Drive for 13 miles through the town of Keeler and turn on Cerro Gordo Road and turn left.
Continue driving for 7.7 miles until you reach the ghost town of Cerro Gordo.
The boom-and-bust ghost town of Cerro Gordo is full of stories and history.
Thriving during the gold rush, Cerro Gordo shut its doors as the gold dried up, but the town remains.
Nearly the entire town is a relic of older times, but the American Hotel is still operational and offers the rare opportunity to stay overnight in a ghost town.
The hike into the town is straightforward.
As you drive to the trailhead, you will drive through the ghost town.
From the trailhead, just follow the road back down to Cerro Gordo.
Raised in the Midwest, Alex is an RV pulling, bike-touring, globetrotting, slow-hiking nomad. He travels full-time with his travel nurse wife and their famous hiking tabby, Rafiki (yes, she has an Insta). He enjoys experiencing the lesser-known destinations and discovering hidden gems.