
If you love hiking, Northern California has just about every kind of hike you can imagine.
Redwood forests? Check. Fern-covered canyons? Got it. Rugged coastline and black sand beaches? Yup and yup.
There’s an astounding number of incredible hikes in Northern California for just about every difficulty level and location!
We’ve grouped this post by location, and then within each location, we’ve started with the easiest hikes and worked our way to the harder hikes.
Bay Area Hikes
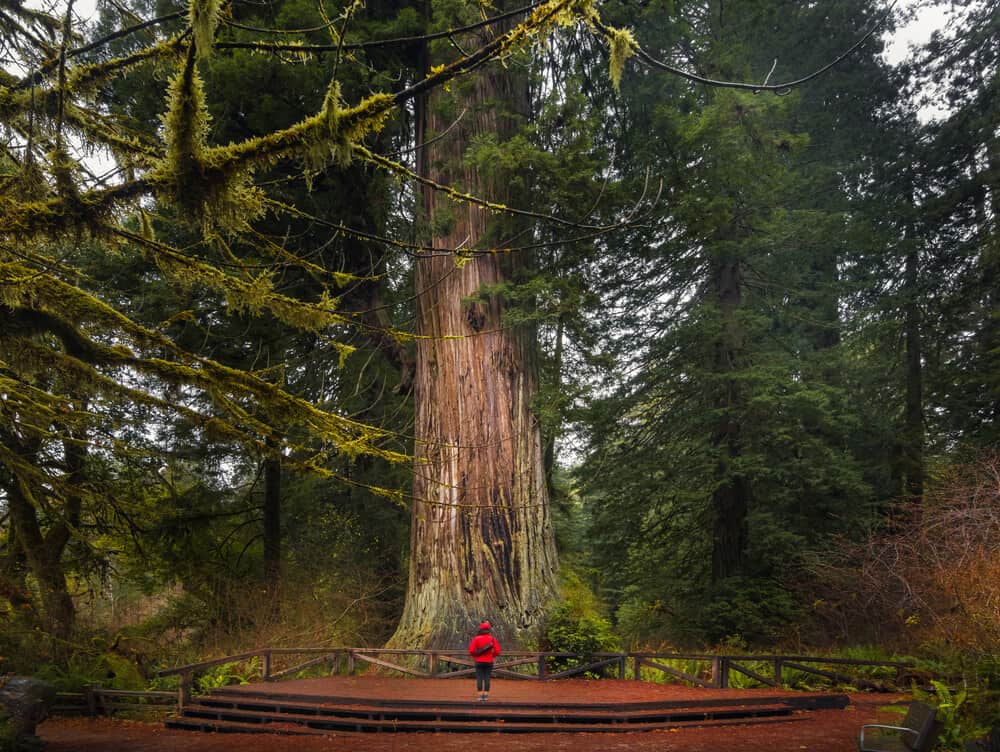
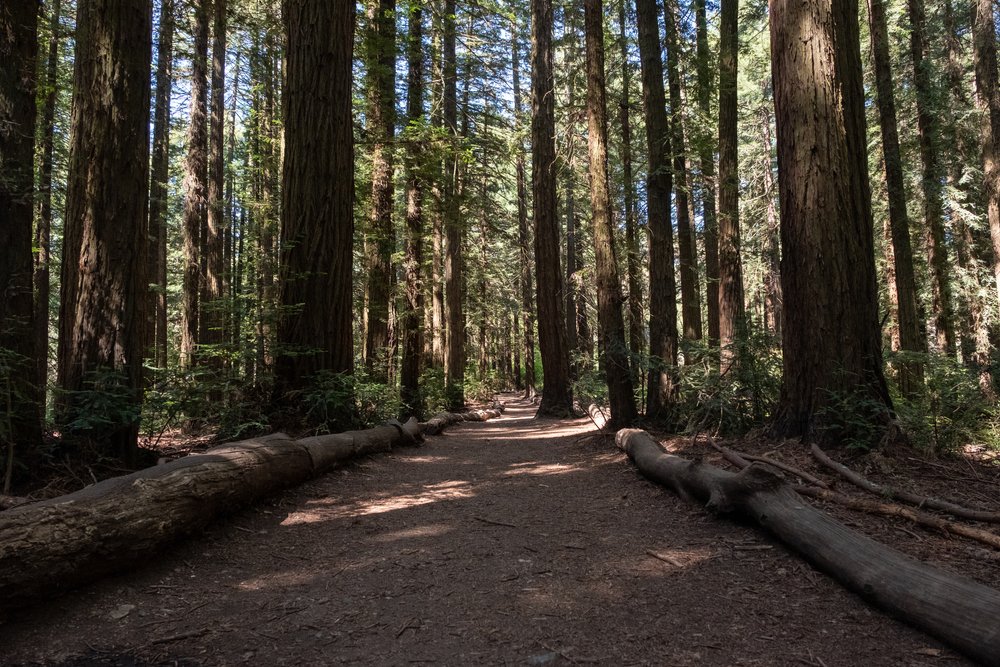
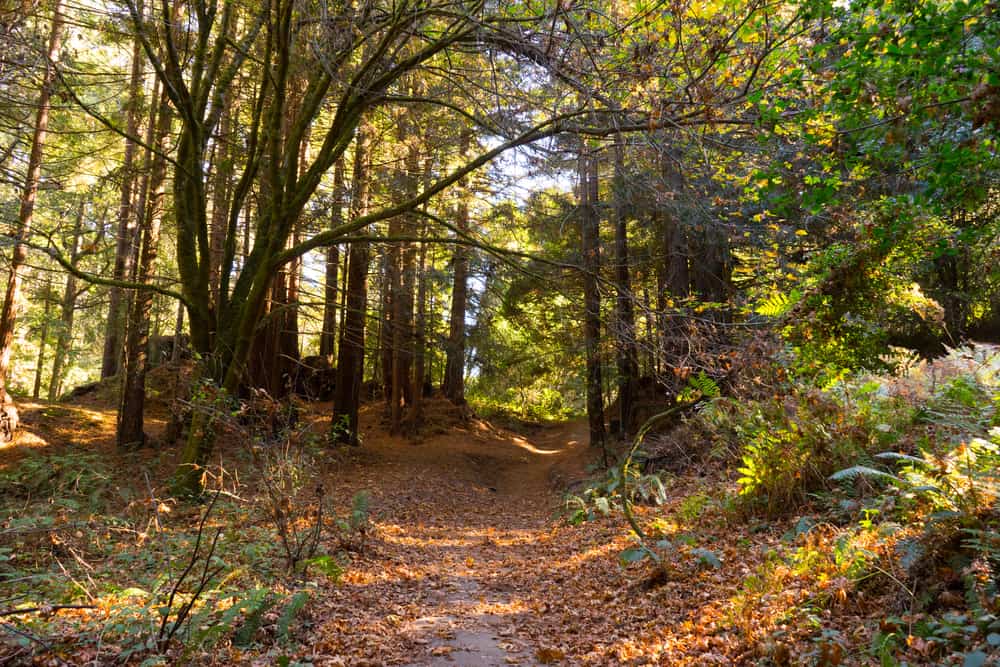
Muir Woods Main Trail, Muir Woods National Monument
Note: This post contains affiliate links, which earn me a small commission at no extra cost to you if you make a purchase using one of these links. Thank you for supporting this free content!
Distance: 0.5-2 miles round trip, depending on where you turn back
Elevation Gain: 90 feet
Difficulty: Easy
Section authored by Lena M.
Nestled in the southwest corner of Marin County, Muir Woods National Monument in Mill Valley is truly a special place.
Named as a National Monument in 1908, the park contains trees that are much older. You do need a parking reservation to visit, so check their website for information beforehand.
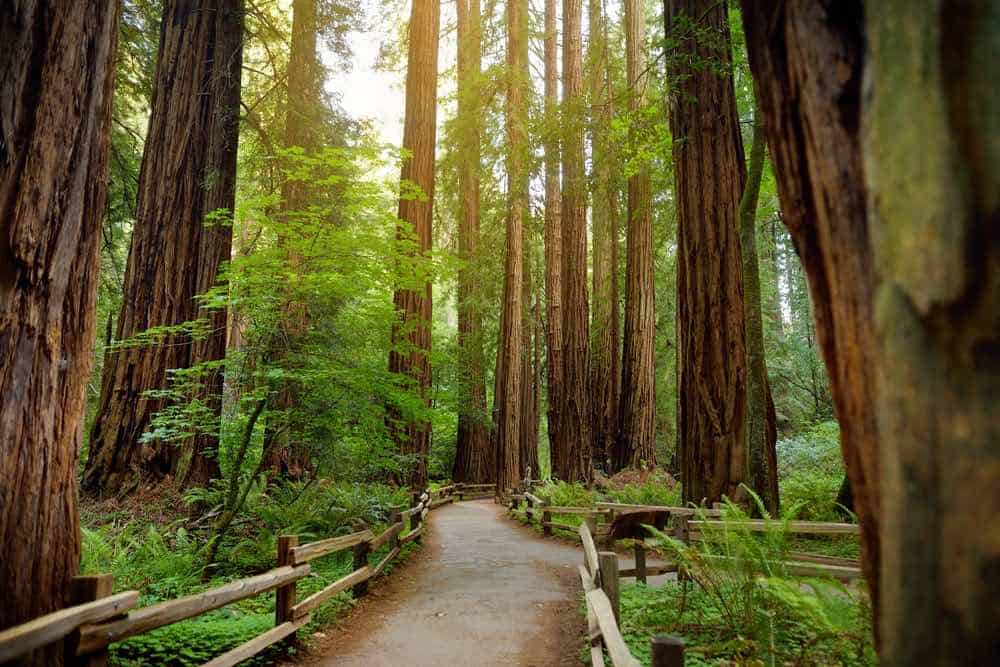
Muir Wood’s Main Trail takes you along through towering old-growth redwoods. Much of the trail is flat, making it a nice option for an easier hike in Marin County.
Begin at the National Parks Visitor Center, and follow the trail along Redwood Creek on a boardwalk. This section is wheelchair and stroller accessible. At 0.25 miles, you’ll hit Bridge 2 over the creek. If you’re just looking for a quick stroll, this is a great turnaround spot.
Continue on the boardwalk for another quarter mile until you hit Bridge 3. Continue onward, past Cathedral Grove, for another half mile until you reach Bridge 4.
After crossing the bridge, you’ll walk the only uphill on this hike. Take a left on the Hillside Trail, a dirt trail that will take you back to Bridge 2.
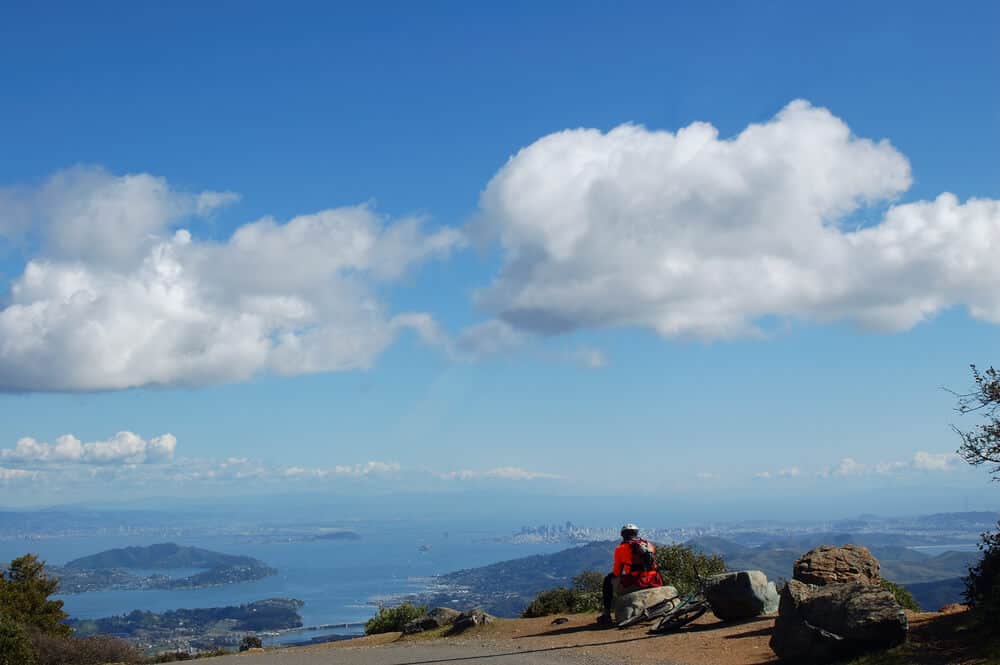
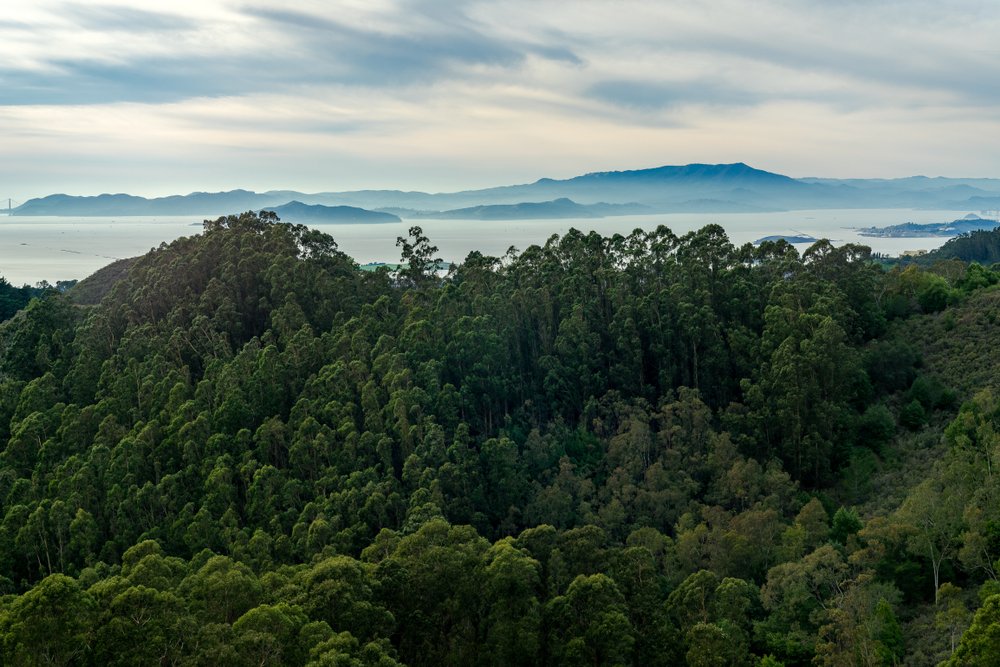
Verna Dunshee Trail to East Peak Summit, Mt. Tamalpais State Park
Distance: 1.2 miles loop
Elevation Gain: 285 feet
Difficulty: Easy
Section authored by Lena M.
The Verna Dunshee Trail offers the full summit experience without the climb!
This loop circles Mount Tam’s East Peak. It’s paved, so it is wheelchair friendly, and is a great place to bring kids in strollers. While you’ll have great views along the entire trail, make sure to stop at the official overlook platform!
To get to the trailhead, follow the Panoramic Highway until you take a right on Ridgecrest Boulevard. Follow this road until the parking lot.
You’ll have views of the San Francisco Bay sparkling below you, as well as grassy hillsides. If you’re there at the right time of year (spring), you’ll get to experience fields of wildflowers as well. In the summer, you can watch the sunset reflected on classic California golden hills.
You’ll also have the option to take the Plank Walk, a dirt trail (not wheelchair accessible) that takes you to the East Peak Fire Lookout Station.
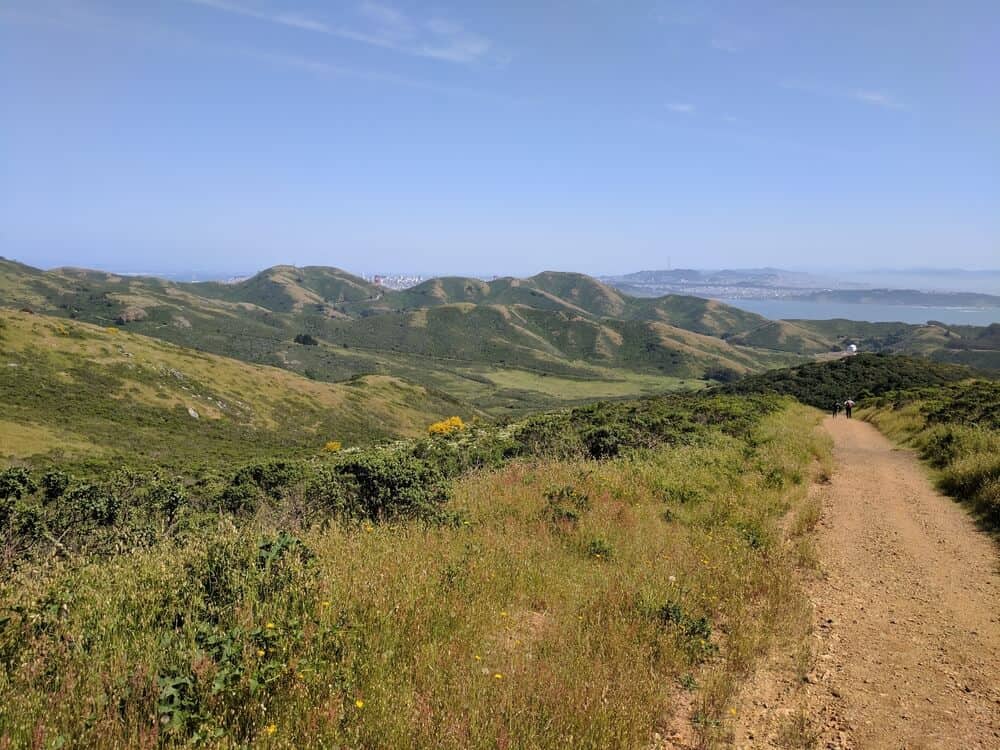
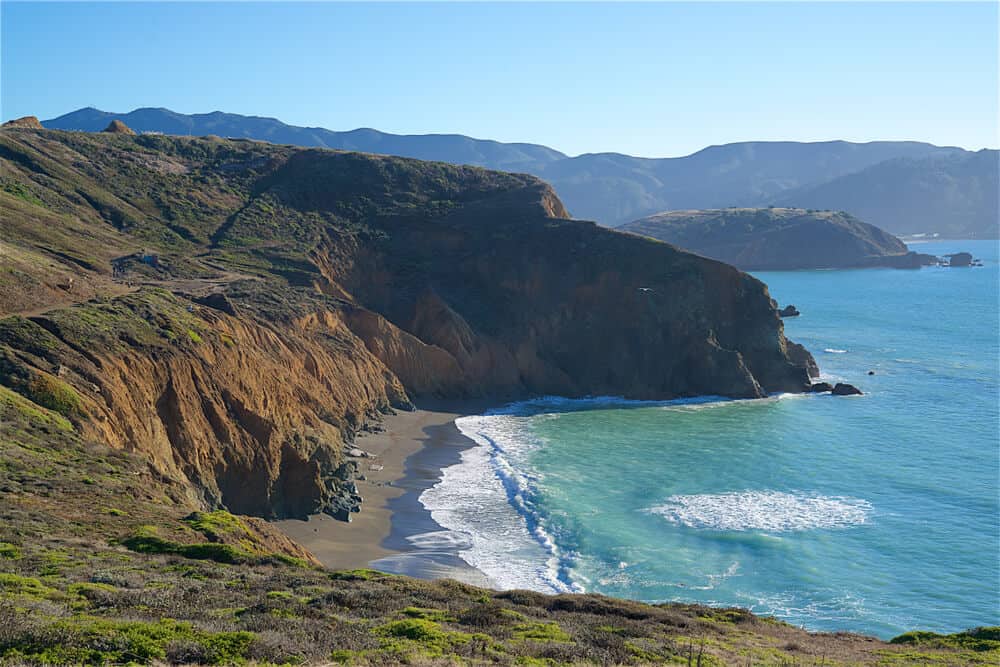
Tennessee Valley Trail, Golden Gate Natural Recreation Area
Distance: 3.4 miles round trip
Elevation Gain: 170 feet
Difficulty: Easy
Section authored by Lena M.
The Tennessee Valley Trail is a lovely stroll along grassy hillsides and wetlands that ends at the beautiful Tennessee Beach, a small cove with a sandy beach.
The hike is paved and accessible to wheelchairs for roughly the first mile. This is the perfect Marin hike to do with small children, especially children in strollers.
Park at the Tennessee Valley Trailhead. Make sure to get there early, especially on weekends, since this trail is extremely popular.
At about three-quarters of a mile, the trail will become hard dirt, and you’ll have the choice to take the Lower Spur Trail, or take the Upper Trail for a steeper, more difficult hike that includes an overlook. If you stay on the lower trail, at 1 mile, the trail begins climbing slightly towards the beach.
After 1.75 miles, you’ll reach Tennessee Beach. If you’ve got the time, this is a fantastic picnic spot!
Accessing the beach can get slippery, so make sure you have appropriate footwear and take caution.
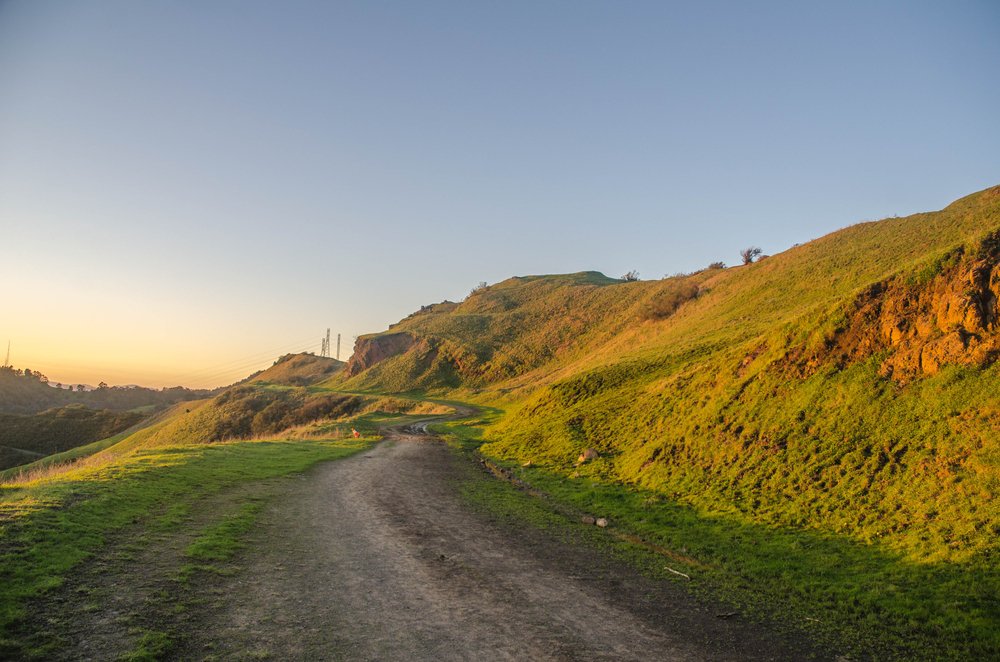
Round Top and Skyline Loop, Sibley Volcanic Regional Park
Distance: 3.5 miles
Elevation Gain: 550 feet
Difficulty: Easy
Surprise – there’s a volcano in the Bay!
Round Top is the most prominent feature of the Sibley Volcanic Preserve: an extinct volcano that dates back 10 million years and is the source of all the volcanic rock in the park.
The trails will lead you to a peak with sweeping views of the Oakland hills. You’ll also stumble upon man-made labyrinths around the park, arranged out stones.
To do this hike, start on Overlook Trail, make a left onto Round Top Loop Trail, following for Volcanic Trail. You may want to put it in AllTrails as the signage here can be a bit confusing.
The park is small, so it’s great for a short hike that won’t wear you out and locals love bringing dogs along for the hike.
Wildcat Gorge to Meadows Canyon Trail Loop, Tilden Regional Park
Distance: 3.3 miles
Difficulty: Easy
Elevation Gain: 518 feet
Tilden Regional Park is one of the original regional parks in the East Bay and a classic hiking spot in Berkeley.
Tilden is just a short drive from downtown Berkeley but once you’re there, you’ll feel far removed from the bustling college town.
On this popular hike, you’ll follow Lake Anza Trail and turn left onto Wildcat Gorge Trail until the Meadows Canyon Trail.
Follow onto Curran Trail and descend back to Wildcat Gorge Trail.
There’s plenty of shade on this beautiful East Bay hike, and a creek and lake along the way as well. If you can, go early!
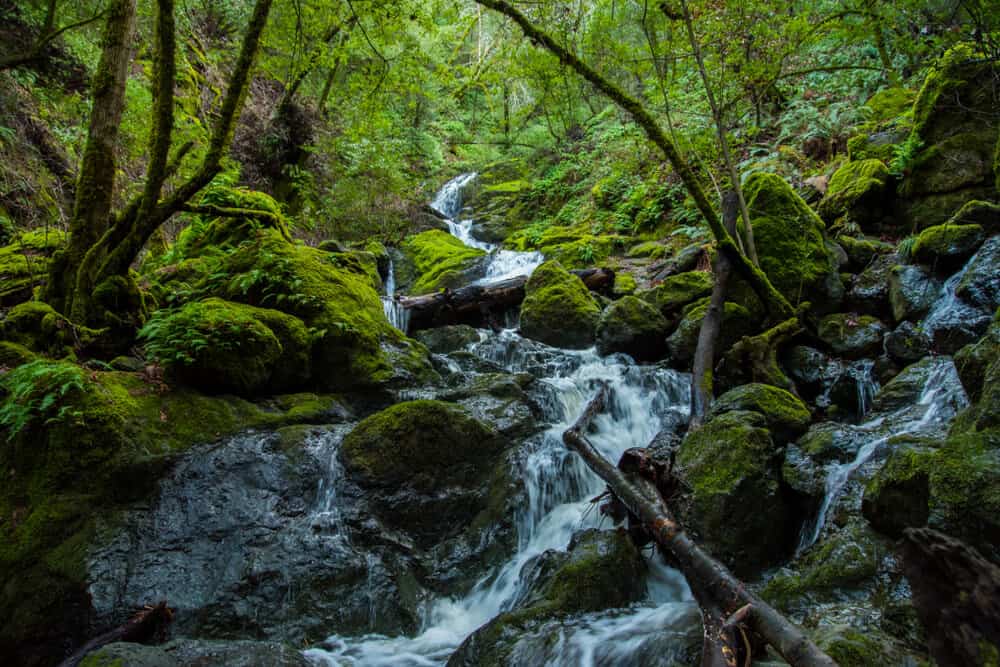
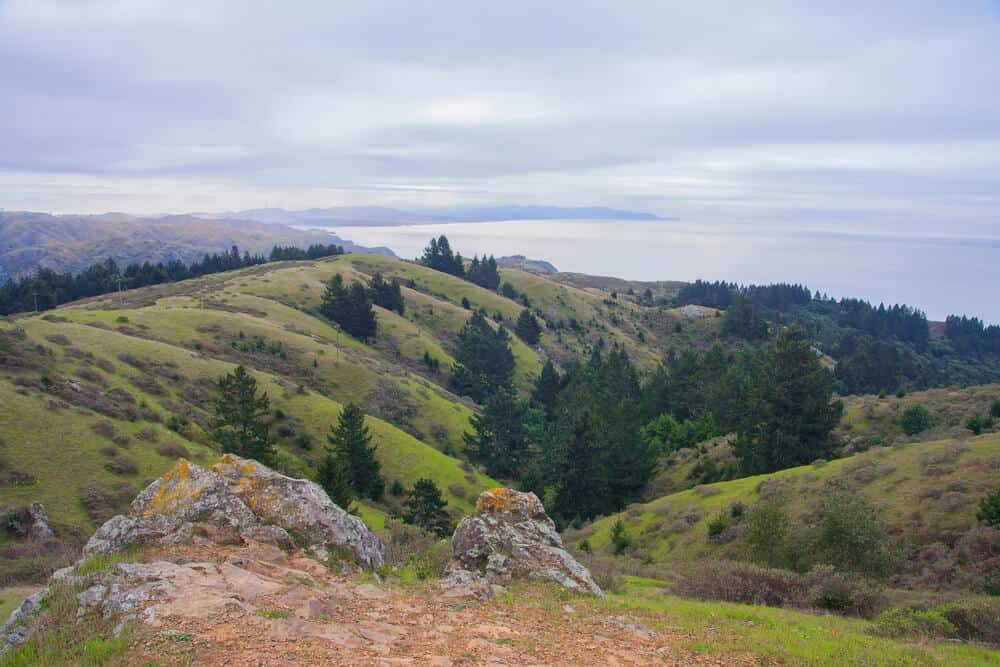
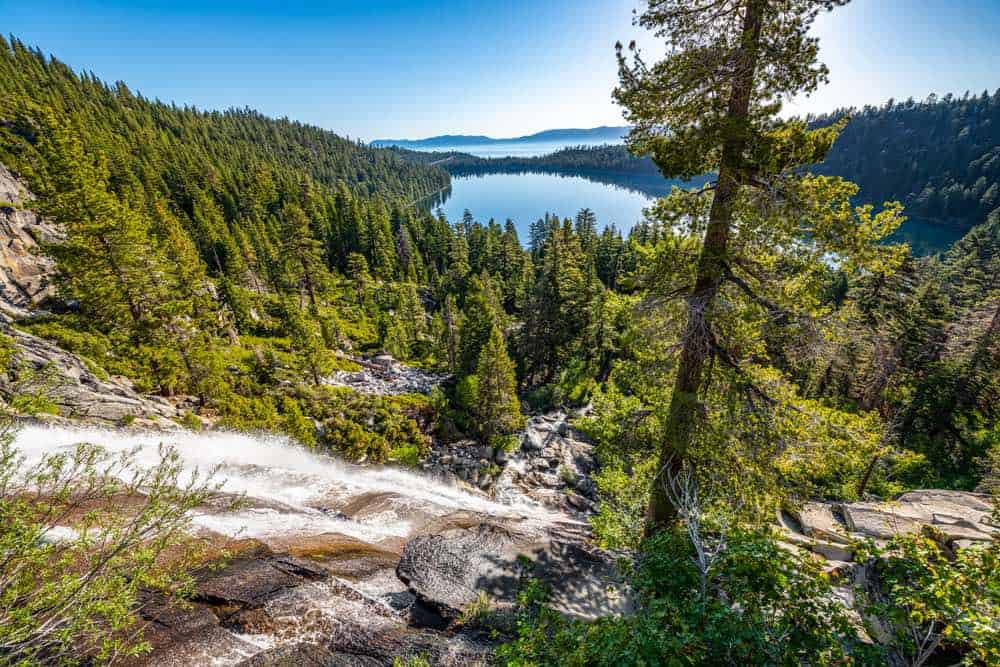
Cataract Falls Trail, Mt. Tamalpais Watershed
Distance: 4.8 miles round trip
Total Elevation Gain: 1,056 feet
Difficulty: Moderate
Section authored by Lena M.
Cataract Falls is a fantastic hike featuring multiple waterfalls. The trail does include some uphill, but as you’ll be climbing past waterfall after waterfall, the climb is really worth it.
This is another popular hike in Marin County, so leave time to find parking. The trailhead can be found off of Bolinas Fairfax Road, near Alpine Lake and Bon Tempe Lake, described above.
You’ll begin climbing on the Cataract Trail soon after you begin hiking. Climb up through fern-covered hillsides and across the creek multiple times. You’ll also cross over a small bridge and go up some steps soon after beginning hiking.
You’ll soon reach the Laurel Dell Picnic Area, which has several shaded picnic tables and a bathroom. After a snack or lunch break, you can turn around here or continue on the Cataract Trail towards the Upper Falls.
There is a beautiful pool at the base of the falls that make it an awesome place to stop and rest before turning around.
Stream Trail to French Trail, Reinhardt Redwood Regional Park
Distance: 5.2 miles
Difficulty: Moderate
Elevation Gain: 1,276 feet
The name says it all – come here if you want to see California’s coastal redwoods, right in Oakland!
It’s a great and quieter alternative to going to Muir Woods north of SF, which gets crowded with tourists and locals alike.
Reinhardt Redwood Regional Park is filled with many trails to choose from, and this one is moderate enough that you can admire the abundance of 150-foot redwoods and ferns as you go.
From the Skyline Gate staging area, take the Stream Trail, make a right onto Fern Trail, and continue onto French Trail. Make a right onto West Ridge Trail.
This park is also a great place for spying animals such as deer, rabbits, and even the rare golden eagle.
Once you’re deep in the heart of the forests, you’ll notice the air around you is cooler and milder thanks to a refreshing stream of air flowing in, making this spot great for the summer months.
Mori Point Loop Trail, Golden Gate National Recreation Area
Length: 2.5 miles
Elevation Gain: 400 feet
Difficulty: Moderate
Section authored by Allison Coulter
This is a popular coastal trail in Pacifica beloved by hikers from all parts of the Bay. It is dog-friendly, but dogs must be leashed.
It is a beautiful spot on the gorgeous bluffs that make the Pacific Coast Highway famous!
Enjoy wildflowers and wildlife along with great sunset viewing opportunities.
You can extend this hike to Mori Pier for more views and a connection to the Pacific Ocean.
Mt. Diablo Falls Trail, Mt. Diablo State Park

Distance: 7.9 miles
Elevation Gain: 1,709 feet
Difficulty: Hard
A little further east in Clayton, Mt. Diablo State Park offers over 40 trails to explore, some of which offer the most spectacular views of the East Bay.
Hikers clamber to Mt. Diablo for these panoramas, but if you’re looking to chase waterfalls, the Falls Trail is your best bet! Note, though, that these waterfalls are seasonal, in winter and spring only.
Starting at Regency Gate, follow Donner Canyon Road, following it until Meridian Ridge Fire Road and make a right. Continue until Middle Trail, make a left and follow until you reach Falls Trail.
You’ll meander through grasslands and oak savannahs with waterfalls (yes, plural) along the way. The waterfalls are of course best after rainfall, so going in the winter or spring means the waterfalls are flowing and the hills are at their most vibrant.
The path can be quite muddy and slippery after rainfall, and once you hit Falls Trails, there are some steep sections, so take care.
If you go during the summer or during dryer months, the landscape won’t be as lush but you’ll still spy some gorgeous wildflowers and amazing views of the valley.
A word of caution, especially to any arachnophobes out there: Mt. Diablo State Park is known for its tarantulas, which come out in full force for mating season in late August through early October!
If you spy a tarantula, they’re not out to get you and they’re actually harmless – their venom isn’t poisonous to people.
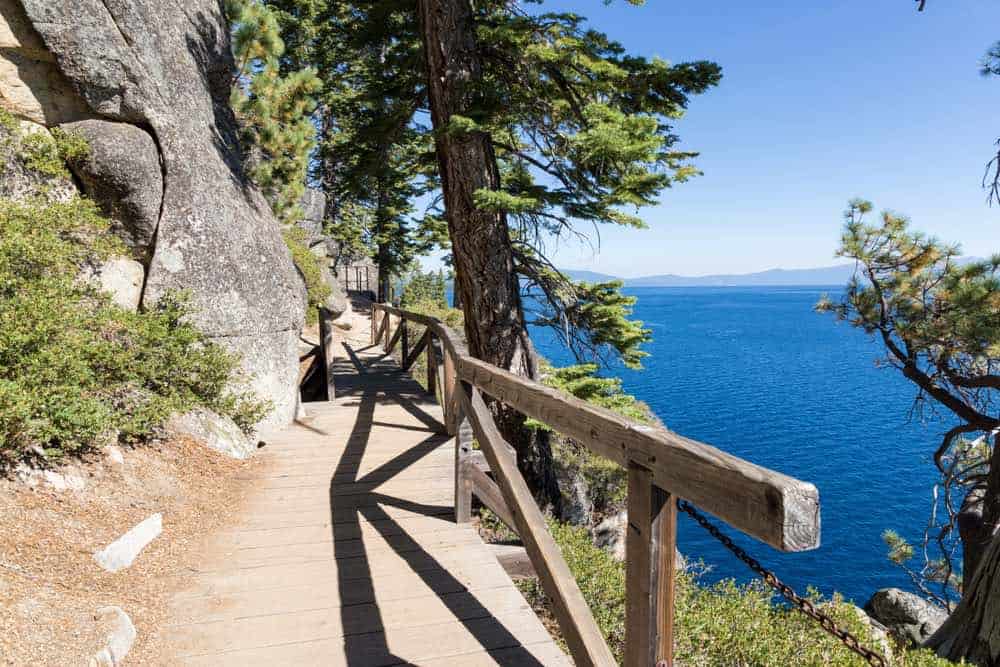
Steep Ravine to Dipsea Trail Loop, Mt. Tamalpais State Park
Distance: 3.5 miles loop
Elevation Gain: 950 feet
Difficulty: Hard
Section authored by Lena M.
The Dipsea and Steep Ravine Trail Loop is a classic Northern California hike, as you’ll experience both sweeping ocean views and dense forest.
If it’s not too foggy, you’ll be able to see San Francisco and the Golden Gate, as well as the rocky coastline of the Marin Headlands. You’ll traverse through ferns and redwood forests, and even get to climb up (or down!) a wooden ladder.
While relatively short, this hike is no joke, as you’ll literally dip down to the sea and back up again. In fact, the oldest cross country running race in the world, the Dipsea Race, takes place annually on this trail, and is notoriously difficult.
Begin at the Pantoll Ranger Station and follow signs for the Old Mine Trail. You’ll begin in a forest, which will quickly become grassy hills. At your next junction, make sure to stop and look out for great views of San Francisco. Follow the Coastal Fire Road left, towards the Dipsea Trail.
Follow the Dipsea Trail through grasses and along the ridgeline until you reach a junction at around 1.5 miles. Take a right, which will drop you into a long descent following a creek drainage. Get your legs ready, since there are lots of stairs in this section.
At the bottom, you’ll intersect with the Steep Ravine Trail, which is about 1.7 miles away from the Ranger Station. (You can also follow the Dipsea Trail all the way down to Stinson Beach for a snack break).
Follow Steep Ravine up through lush greenery and redwoods, up many stairs, and across the stream a few times.
After passing several waterfalls, you’ll reach a ladder. Climb up it (careful, it can get slippery) and then switchback your way back to the Ranger Station
Stinson Beach to East Peak Summit, Mt. Tamalpais State Park
Distance: 17 miles round trip
Elevation Gain: ~3,000 feet
Difficulty: Very Hard
Section authored by Lena M.
From sea to summit, this Marin County hike has it all!
You’ll begin at Stinson Beach, a very popular beach in the Bay Area for lounging, playing in the sand, and even surfing. It also makes a great jumping-off point for many of the hikes near Mount Tam.
Parking at Stinson can get crowded on nice beach days, so make sure you leave enough time to find a spot. You can park on the streets or in the beach parking lot. The trailhead for the Matt Davis Trail is marked with a sign and a small bridge.
You’ll begin hiking up switchbacks for about 2 miles, with great ocean views the whole way. Soon, the hike will become gentler (although with many ups and downs) as you make your way through smaller grassy hills.
At around 4 miles, you’ll reach the Pantoll Ranger Station. If you’re looking for a shorter hike, you can park here instead of at Stinson Beach. From the Ranger Station, continue hiking on the Old Stage Road. This road begins paved, but becomes a dirt road shortly after you begin.
At 2 miles in, you will hit the historic West Point Inn. (If you’d like to stay in one of their rooms or cabins, you’ll have to make reservations well in advance).
Follow the trail left to continue to climb up Mt. Tam. Once you hit the East Peak parking area, take a right and follow the Plank Walk Trail.
As always, take a minute to appreciate the stunning views from the top before you prepare for your long descent.
You can go back the way you came, or take the Steep Ravine Trail (after Pantoll Ranger Station) back to the beach to make a loop.
Santa Cruz Hikes
Four Mile Beach Trail, Wilder Ranch State Park
Length: 1.2 mi.
Elevation Gain: 85 feet
Difficulty: Easy
Section authored by Allison Coulter
Four Mile Beach is an easy out-and-back trail leading to scenic Four Mile Beach.
The beach is what’s 4 miles — lucky for you, this hike is just a little over 1!
It begins at Route 1 and descends down onto a lovely beach. Bring a picnic or go for a swim!
Check the tide charts and go at low tide to catch tide pools where you can view anemones, sea slugs, and starfish. There will be wildflowers to enjoy as well!
Note: This beach is for strong swimmers only, as tides are strong at this beach.
Bridge Creek Trail to Maple Falls, Nisene Marks State Park
Length: 11.6 mi.
Elevation Gain: 1,282 feet
Difficulty: Moderate
Section authored by Allison Coulter
This Santa Cruz hike winds through the redwood forests of Nisene Marks State Park and is absolutely beautiful.
It is a welcome refuge from the busy town of Santa Cruz as it is located 10 miles from town, off Aptos Creek Road, in Aptos, CA. It’s not to be missed!
This trek will take you through groves of redwood trees, past mushroom-laden patches of pine needles.
Find yourself wandering across creeks and bridges, and finally to the beautiful Maple Waterfall!
Big Sur Hikes
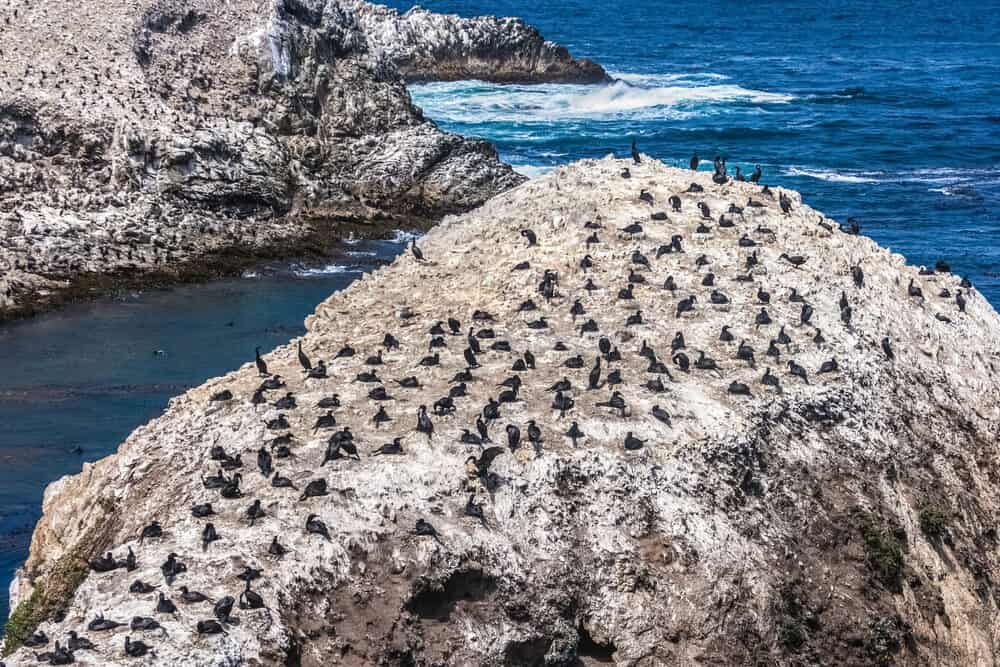
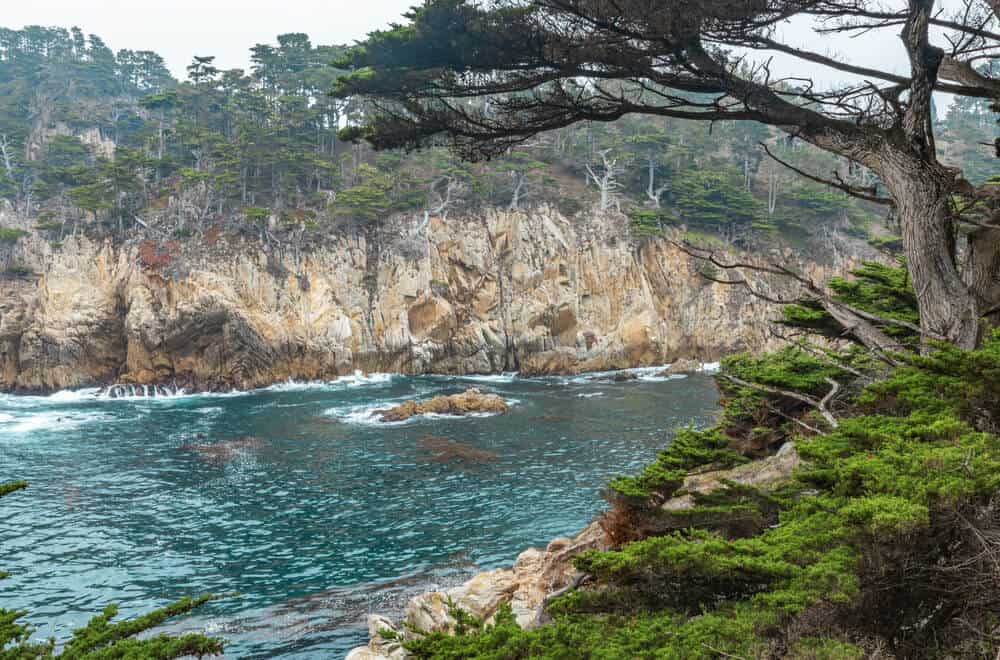
Bird Island & China Cove Trail, Point Lobos State Park
Distance: 0.8 miles
Elevation Gain: 37 feet
Difficulty: Easy
Section authored by Hannah Morrison
As you hike on the Bird Island & China Cove Trail, you will walk through green cliffs to multiple eye-catching locations.
From Point Lobos Road, you will have access to the dirt path to Bird Island Trail. After some switchbacks, you will have sweeping views of China Cove.
The cove shows off bright turquoise and jade green ocean shades and is home to many seals during seal pupping season in the spring.
During this time of year, the park limits access to the staircase leading to the beach. However, in other seasons hikers can wander down to the sand.
Past the gorgeous China Cove, you will find an intersection between Gibbons Beach and Pelican Point.
Unlike many other beaches in Big Sur, Gibbons Beach has calm water, which you may be able to swim in depending on the time of year you visit!
Heading to the right of the intersection, you will walk until you reach Pelican Point, which overlooks small, rocky islands.
The area’s name will start to make sense to you as you watch various bird species, such as Western gulls and black-crowned night herons, flying to and from Bird Island.
With numerous wildlife species to observe, Bird Island and China Cove Trail is a favorite hike for animal lovers. Though short and sweet, there is much to see as you walk along the cliffs.
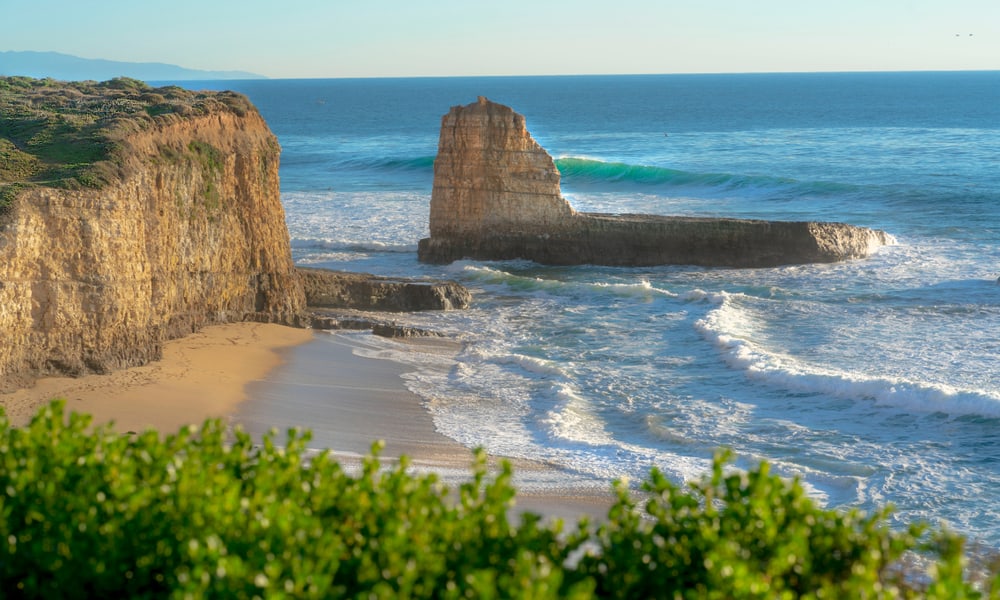
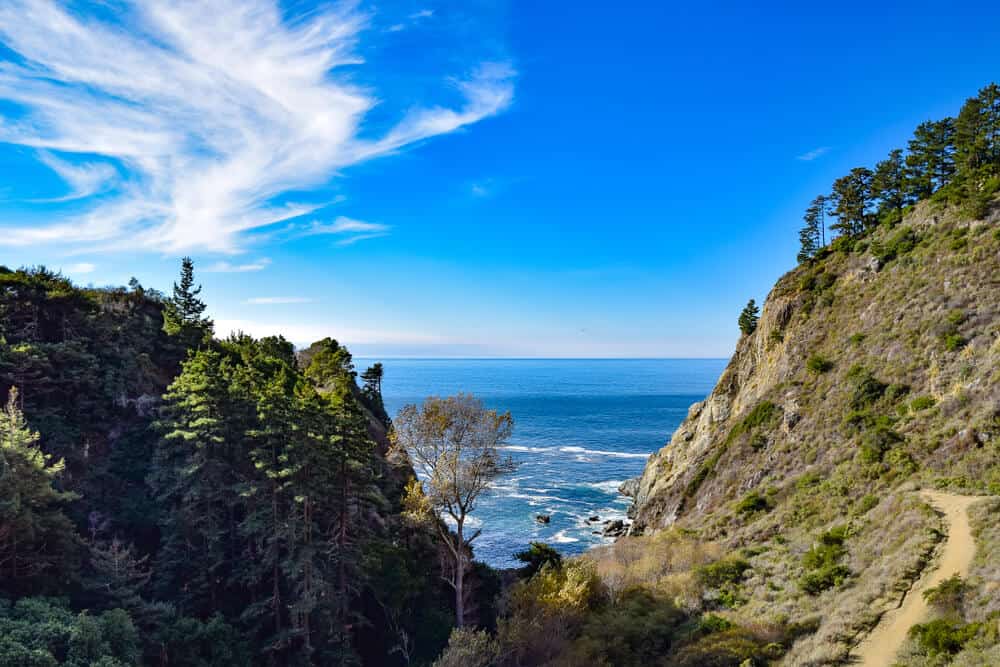
Partington Cove Trail, Julia Pfeiffer Burns State Park
Distance: 1.1 miles
Elevation Gain: 347 feet
Difficulty: Easy-Moderate
Section authored by Hannah Morrison
Partington Cove Trail follows along a dirt wagon road and is classified as a moderate hike, but it’s on the easy side of things.
You will follow the out-and-back trail across a wooden bridge and through a tunnel to a view of the protected Partington Cove, a symbolic attraction of Big Sur’s waterfront.
Visitors use Partington Trail year-round, as it constantly provides an incredible look into Big Sur’s light blue, clear ocean water crashing into the rocky shoreline.
The path’s starting point is on a bend on Highway One, two miles north of the Julia Pfeiffer Burns State Park’s entrance.
Descending towards the ocean, you will walk along the path until you come to a left turn to cross the wooden bridge that hovers over a small creek.
Instead of heading to the viewpoint, you can continue straight down to the sandy beach.
This beach is not typically used for swimming with unpredictable surf conditions, but it is a beautiful area to listen to large waves rolling onto the shore.
The entire hike is relatively short, so you will most likely have time to visit both the strand and the cove lookout!
Past the bridge and the spot for beach access is Partington’s Tunnel, a 60-foot tunnel constructed in the past for transporting oak to ships in the cove.
After venturing through the tunnel, you will arrive at Partington Cove Point. People previously used this zone as a boat loading point, but it is not in use today.
You can return to your starting point by tracing your path to make your way back to Highway One.
Along the way, you will pass by flourishing flora and fauna such as blackberry and high brush bushes. Look around to find trails you can turn on to access secluded rivers on your ascent.
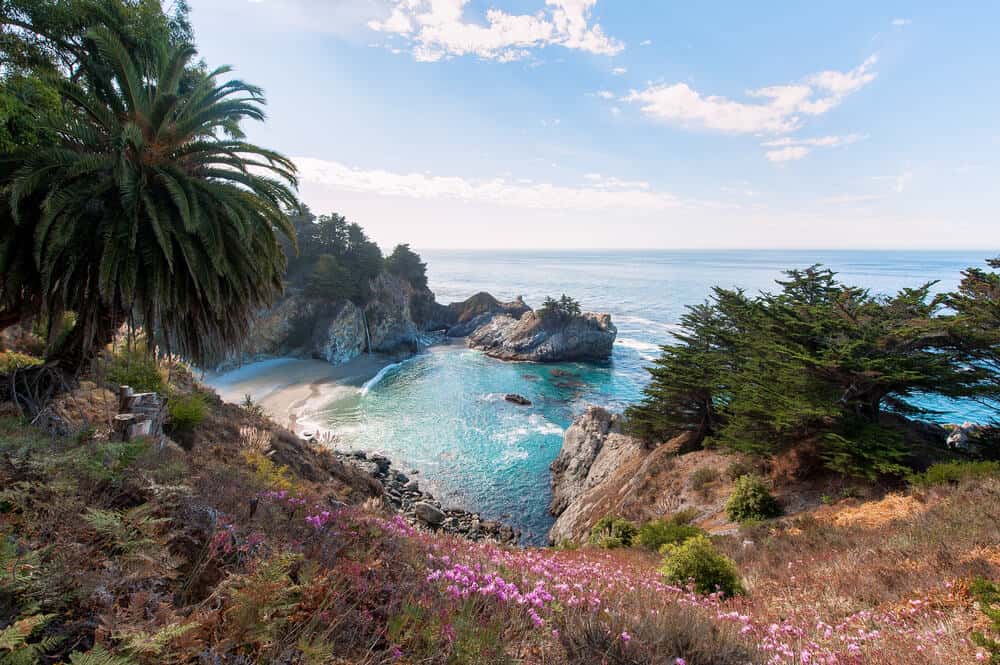
Overlook Trail to McWay Falls, Julia Pfeiffer Burns State Park
Distance: 1.1 miles
Elevation Gain: 50 feet
Difficulty: Easy
Section authored by Hannah Morrison
This quick hike, which could be considered more of a walk, takes you to a view of McWay Falls, a renowned 80-foot waterfall falling onto the beach below.
A landslide in 1983 created the beach where the waterfall spills: now, it’s one of the most famous landmarks in California.
Parking on the side of the Julia Pfeiffer Burns State Parke entrance, you will walk to the dirt road on the mountain’s edge.
Rails line the flat path of Overlook Trail, helping to ensure hiker’s safety and peace of mind. This leisurely excursion leads to exceptional views, the likes of which you see on postcards of California!
Before visiting, make sure to check the visitor’s center or park website, as there may be ongoing construction due to recent erosion.
Though the view of the falls is impressive, any attempt to access this beach is a citable offense and extremely dangerous.
Make sure to remain on the trails and enjoy all there is to do in Big Sur while staying safe!
Point Lobos Loop Trail, Point Lobos State Park
Distance: 6.7 miles
Elevation Gain: 741 feet
Difficulty: Moderate
Section authored by Hannah Morrison
The Point Lobos Loop Trail follows the park’s perimeter, showing off its natural wonders, including native wildflowers, tide pools, and wildlife life such as sea lions, harbor seals, otters, whales, and shorebirds.
The path takes you through the forests of Monterey pines and Cypress groves to areas overlooking the rocky beaches off of the Pacific Ocean.
This walk begins at the park’s entrance, leading to South Plateau Trail. Continuing on Bird Island Trail, you can get a view of Gibson’s Beach and China Cove.
You will see South Shore Trail and Point Lobos trail openings at the end of Bird Island Trail, where there is a parking lot.
Take South Shore Trail to walk on the outskirts of the park. The path lies on the coastal cliffs and includes a few turns leading to hidden beaches along the way.
South Shore Trail eventually becomes Sand Hill Trail continuing north along the coastal ridge.
To continue along Point Lobos’s perimeter, you will take Sand Hill until you reach an intersection at Sea Lion Point Trail.
This path has an outturn at Sea Lion Point, where you can make a short loop to hopefully see marine life perched on the shore, enjoying their natural habitat.
Sea Lion Point Trail leads to one of the foremost Point Lobos parking lots, connected by the main Point Lobos road. You will easily find your way back to your starting point from here.
The following hikes go into more detail about specific areas noted above, such as Bird Island and China Cove, that you may see on the perimeter hike, as many of them are features of Point Lobos Trail Loop.
Many visitors choose to complete the northern and southern hikes at different times. The blue ocean looks particularly remarkable when the sun shine’s bright through Golden Hour at sunset, so you may want to complete the hikes through the forest in the morning.
Whether you take the time to go around the whole park or just visit a few sections, you will not be disappointed!
Yosemite Hikes
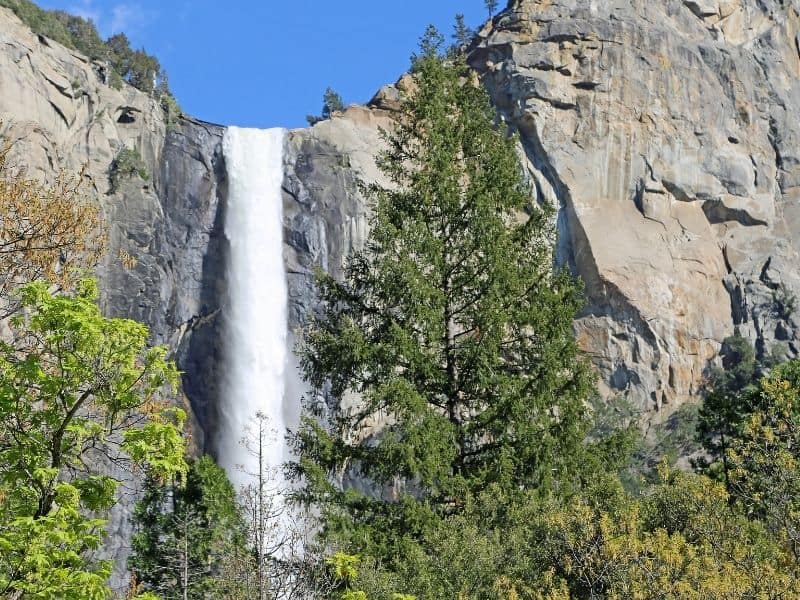
Bridalveil Fall Trail, Yosemite National Park
Distance: 0.5 miles round trip
Elevation Gain: 80 feet
Difficulty: Easy
Section authored by Lena M.
Bridalveil Fall is one of Yosemite’s most famous sites, but this doesn’t mean it’s hard to get to! This easy hike to Bridalveil Fall is a family favorite, as it offers a paved path for the short half-mile jaunt to the waterfall.
Unfortunately, the trail is not wheelchair accessible because of its steeper grade. You can also bring your dog (on leash) on this quick hike!
There is no shuttle service to Bridalveil Fall, but there is parking at the trailhead. It does get crowded, so get there early.
For more parking, or to extend your hike a little, park a bit further east on Southside Drive. This option adds about a quarter-mile to your hike, and you’ll get to cross Bridalveil Creek on your way to the waterfall.
Start at the Bridalveil Fall Parking Area and take the paved path all the way to the falls. Bridalveil Fall flows 620 feet to the ground and can be quite a dramatic sight.
In spring and early summer you can expect a lot of water! While the waterfall becomes more of a trickle in late summer, it’s still worth taking this relaxing walk.
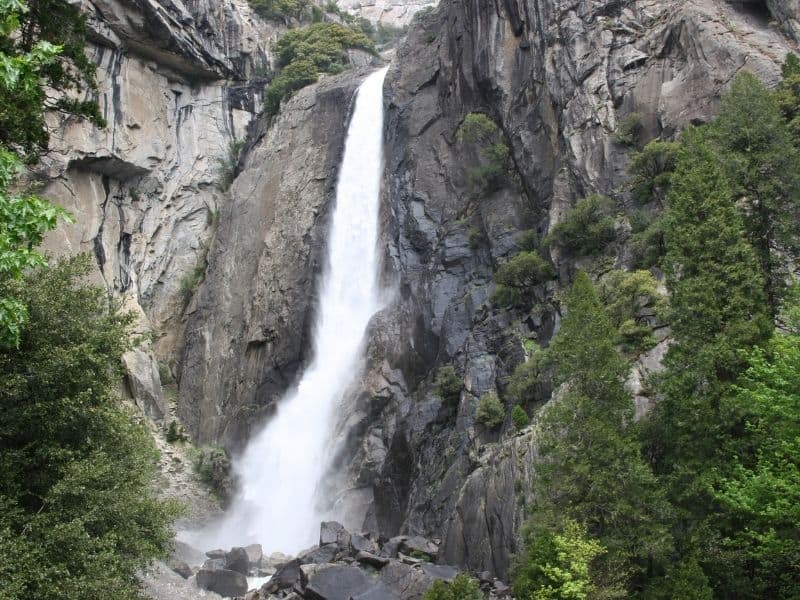
Lower Yosemite Fall Trail, Yosemite National Park
Distance: 1 mile loop
Elevation Gain: 50 feet
Difficulty: Easy
Section authored by Lena M.
The paved loop to Lower Yosemite Fall is another classic Yosemite Valley hike that offers a huge reward for minimal effort.
The reward is truly huge, as Yosemite Fall is the tallest waterfall in North America, clocking in at 2,400 feet!
This hike in Yosemite Valley leads you to the bottom of Lower Yosemite Fall, the lowest part of the falls.
While the view is most dramatic when there’s a lot of water (spring and early summer), this stunningly tall waterfall is worth the hike any time of year.
At high water levels, you can even feel the spray of the falls on the bridge near the bottom!
This is a great hike to do with young kids or with a person in a wheelchair (note that only the eastern half of the loop is accessible by wheelchair).
There is no parking at the trailhead, but there is nearby parking at Yosemite Village.
Walk or bike on the bicycle path about 0.5 miles from the Valley Visitor Center, or take the free Valley Visitor Shuttle to shuttle stop #6. From the trailhead, you can take the loop in either direction, but you’ll get the best views hiking clockwise.
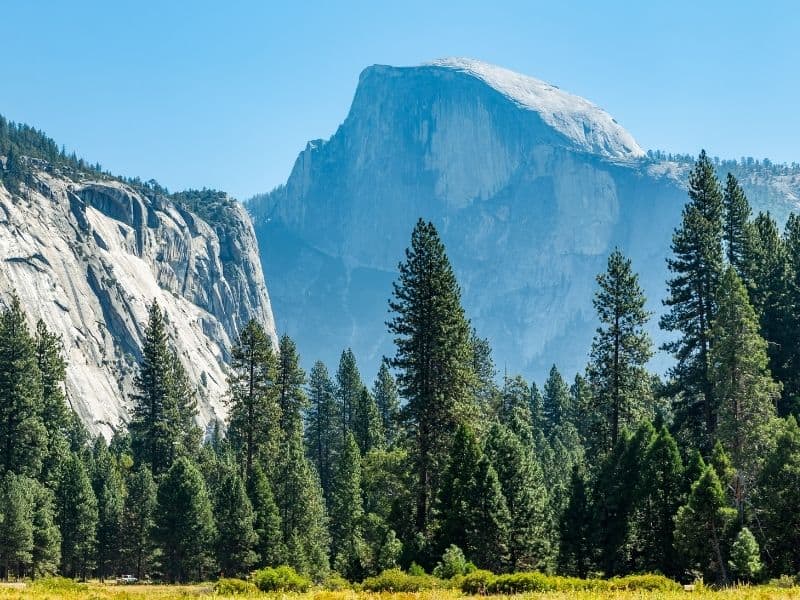
Cooks Meadow Loop, Yosemite National Park
Distance: 1 mile loop
Elevation Gain: Flat
Difficulty: Easy
Section authored by Lena M.
This hike joins together several areas within Yosemite Valley to create a beautiful meadow-filled loop.
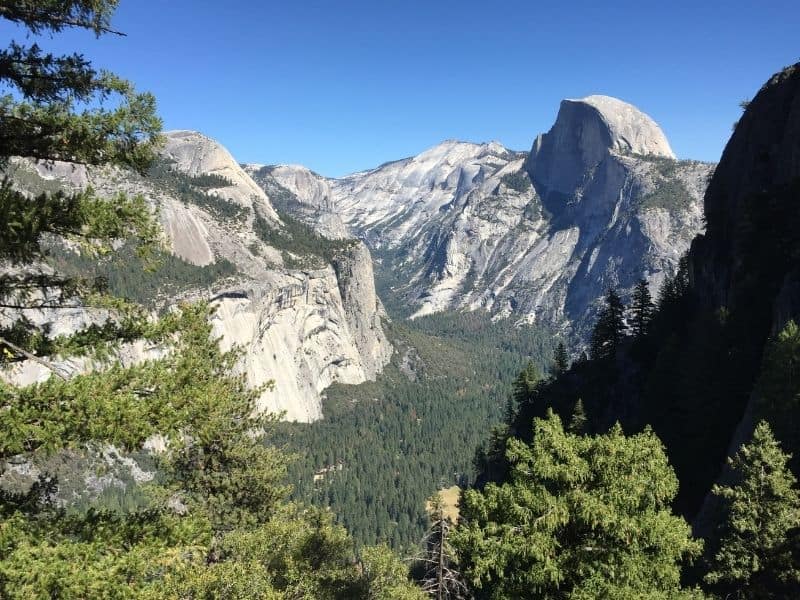
Along this Yosemite Valley hike, you’ll have views of many of Yosemite’s most famous landmarks, including Yosemite Falls, Half Dome, Glacier Point, and Sentinel Rock.
This loop is great because it can be done on foot, on a bicycle, or even by taking the shuttle! The loop is wheelchair and stroller accessible and is open year round.
This loop begins at the Yosemite Valley Visitor Center, or shuttle stops #9 or #5. From there, you’ll walk about a half-mile to Yosemite Fall, shuttle stop #6. Follow the bicycle path across the street and take a left.
Continue walking until you reach shuttle stop #11 for the Sentinel Bridge Parking Area. From there, you can walk out onto the bridge for a stunning view of Half Dome. After returning to the parking lot, follow the boardwalk across the meadow. Be careful, as the boardwalk can get a little slippery!
Take your time in the meadow while you gaze up at the tall granite walls surrounding you. Please make sure not to step off the boardwalk into the meadow, as it is a very fragile environment.
After you’ve crossed the meadow, cross two streets and take a right in order to return to the Visitor Center.
The Mist Trail, Yosemite National Park
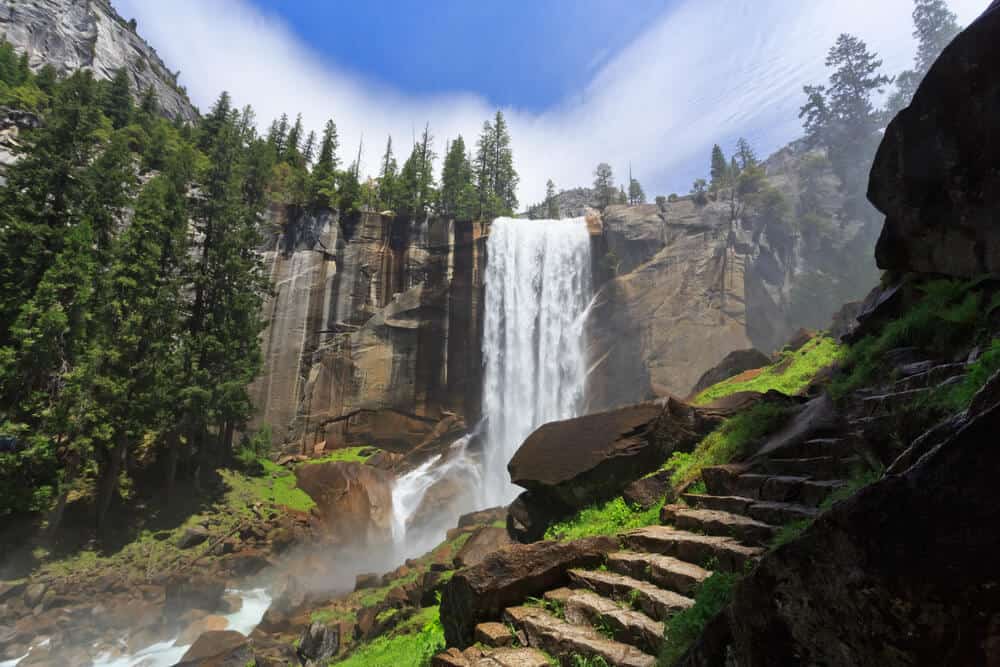
Distance: 2.4 mile round trip to the top of Vernal Fall, 5.4 round trip to top of Nevada Fall
Elevation Gain: 1,000 feet to top of Vernal Fall, 2,000 feet to top of Nevada Fall
Difficulty: Moderate-Hard
The Mist Trail is a classic Yosemite hike, as it leads to two of the most famous Yosemite landmarks: Vernal and Nevada Falls.
You have the option to take a shorter, easier hike to the Vernal Fall Footbridge, or to take on the strenuous 2,000-foot climb up to the top of Nevada Fall.
No matter how far you go on this trail, you’re guaranteed to have great views along the entire length of the trail.
This trail begins at the Happy Isles Trailhead at shuttle stop #16. Catch the shuttle to the trailhead or walk from Curry Village, where parking is available (walking adds 1.5 miles round trip).
This is also where the John Muir Trail begins! This hike can get quite crowded, so it’s recommended that you start early.
The first mile to the Vernal Fall footbridge is paved. From the footbridge at 0.8 miles, you’ll have a great view of Vernal Fall. To continue on a more strenuous hike, follow the Mist Trail up a set of more than 600 granite-carved steps for about a half mile.
Be careful in the spring, as the steps can get quite wet and slippery! Look out for rainbows in the mist surrounding the 317-foot Vernal Fall.
If you want to turn around here for a more moderate hike, take the way you came, or take a slightly longer route back on the John Muir Trail (JMT) to make a loop. (Note: Going down the steps may be prohibited at some times of year, so you may be required to take the JMT down).
For a more strenuous hike, continue on the Mist Trail another 1,000 feet up to the top of Nevada Fall.
You’ll have views of thundering, 594 foot Nevada Fall on the entire 1.5 miles up. Take the John Muir Trail down to make a loop with new views (this is about 4 miles back to the trailhead), or go back the way you came.
As tempting as it may seem, do not swim in the water. The currents can get very strong despite the river looking calm.
Yosemite Falls Trail, Yosemite National Park

Distance: 7.2 miles round trip
Elevation Gain: 2,700 feet
Difficulty: Hard
Section authored by Lena M.
This historic trail leads to the top of Yosemite Falls, North America’s tallest waterfall. It is recommended that you start this hike early in the morning because it gets quite hot later in the day.
This trail begins along the Valley Loop Trail at Camp 4. You can take the Valley Visitor Center to shuttle stop #7, or take the El Capitan Shuttle to stop E2 between May and early October.
Parking is available at the Yosemite Falls parking area nearby Camp 4, but parking in the camp is restricted to campers only.
Switchback up about one mile (and 1,000 feet) to Columbia Rock. From here, you’ll get amazing views of the entire valley floor, as well as Yosemite landmarks Half Dome and Sentinel Rock.
You can turn around here, but hiking a mere half-mile farther leads you to great views of Upper Yosemite Fall.
Continue climbing up a steep trail to the top of Yosemite Falls, where you can see Yosemite Creek feeding the giant waterfall.
If you’re still not tired, you can extend the hike to Yosemite Point by following signs for North Dome. This side trip will add 1.6 miles in total, and offers fantastic views of Half Dome.
Four Mile Trail, Yosemite National Park
Distance: 9.6 miles round trip
Elevation Gain: 3,200 feet
Difficulty: Very Hard
Section authored by Lena M.
Contrary to its name, this trail is actually a little longer than 4 miles, at 4.8 miles one way.
This hike is known as the hardest route to Glacier Point, an amazing overlook that offers views of all of Yosemite’s most famous landmarks.
While difficult, the Four Mile Trail will reward you for your effort with amazing views along the entire trail.
The trail begins at the base of Sentinel Rock. You can park along Southside Drive (follow signs for the Four Mile Trail), or take the Valley Visitor Shuttle to stop #7 (or the El Capitan Shuttle stop E5).
From the shuttle stop, follow the bike path to Swinging Bridge, and then walk west to the trailhead (this walk adds .5 mile to the hike).
This hike continues climbing until you reach Glacier Point. Look out for views of Yosemite Falls, El Capitan, Half Dome, The Sentinel, and Tenaya Canyon. A very short side trail will take you to Union Point, which is a great overlook spot to stop for a snack.
To keep this hike closer to a true 4 miles, you can arrange for a friend to pick you up at Glacier Point (parking is available), or hike back down.
There is also a bus that runs three times a day from Glacier Point to the valley. You can purchase a ticket from the driver at Glacier Point, but there is no way to guarantee space.
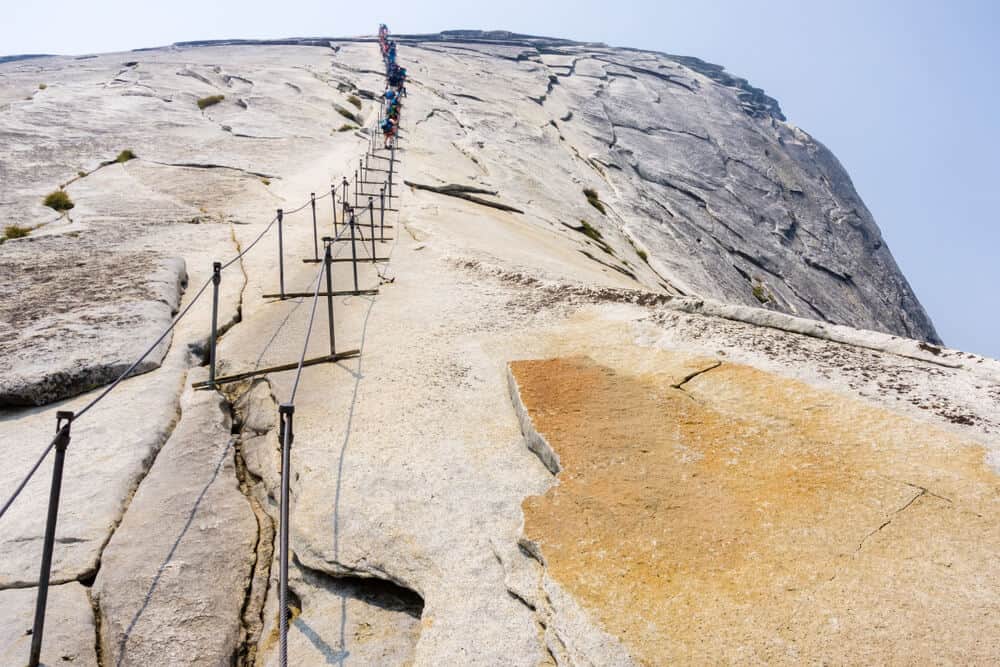
Half Dome Trail
Distance: 14 miles round trip
Total Elevation Gain: 4,800 feet
Difficulty: Very Hard
Section authored by Lena M.
Everyone’s heard of Half Dome, but not everyone has summited it! This hike is one of the most famous hikes in the United States, but is also quite difficult.
The last section of the hike is the Cables Route, where you’ll make your way up to the top of Half Dome using metal cables installed in the rock. This hike is not for the faint of heart, but it’s bound to be quite an adventure!
You will need a permit for this hike, as only 300 hikers are allowed on the trail each day. The permits are available by lottery on Recreation.gov. For more information on permits, please see the park website.
It is most common to start the hike from Happy Isles (shuttle stop #16), which is about 0.5 mile from the trailhead parking lot and about 0.75 mile from Curry Village, where parking is also allowed.
The shuttle service doesn’t begin until 7 AM, so don’t depend on that for your transportation if you’re getting an early start.
Starting at Happy Isles, you’ll take the Mist Trail up past Vernal and Nevada Falls. At Nevada Fall, you’re about 5 miles away from Half Dome.
Continue on the John Muir Trail until you hit the junction for the Half Dome Trail, then follow the Half Dome Trail another few miles up to Half Dome itself. After the harrowing cable climb, celebrate on the large granite top of Half Dome!
Weather in Yosemite National Park is variable, and the area is prone to afternoon thunderstorms later in the summer.
In order to avoid storms and give yourself enough time to complete the hike, it is recommended that you check the forecast, and begin hiking around sunrise. It is also recommended that you bring a headlamp in case your hike takes longer than expected.
The cables are typically only accessible Memorial Day through Columbus Day, but make sure to check the dates and weather conditions on the park website. Do not use the cables if they are wet.
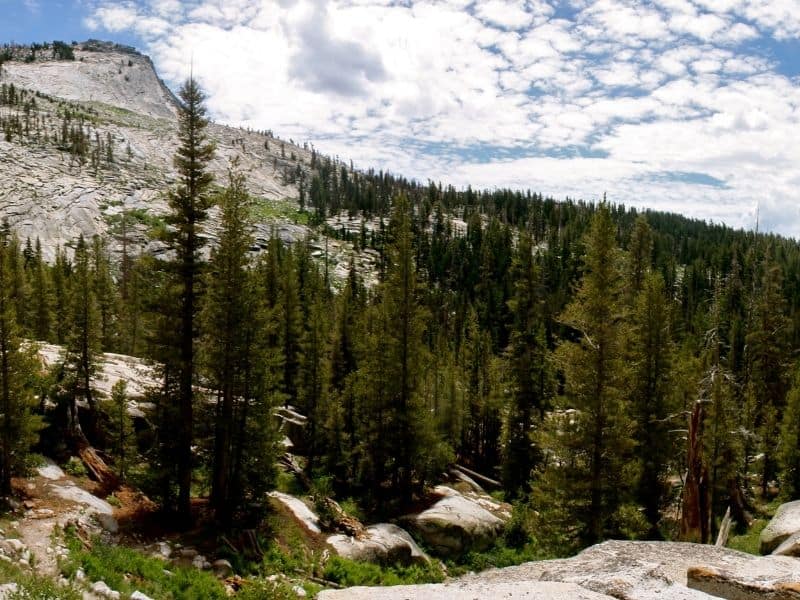
Cloud’s Rest, Yosemite National Park
Distance: 19.8 miles out and back
Elevation Gain: 5,346 feet
Difficulty: Very Hard
Section authored by Lena M.
Cloud’s Rest is truly so high that you’ll feel like you’re up in the clouds — and on a cloudy day, you may even be up in the clouds! This is one of the most difficult hikes in Yosemite Valley.
The difficulty pays off though, as you’ll get stunning views of the valley below you without the crowds (or permit hassle!) of Half Dome.
Like Half Dome, this trail begins at Happy Isles Trailhead. Take the Mist Trail past both falls until you hit the John Muir Trail. Take the John Muir Trail up until you reach a junction with the Cloud’s Rest Trail.
You’ll begin switchbacking steadily up, surrounded by granite slabs. You’ll be rewarded at the top with an amazing view of Half Dome and the rest of the valley, from an angle that most park visitors don’t get.
This is another hike where it is absolutely crucial that you leave prepared with plenty of water, layers, food, navigation tools, and a headlamp. Make sure you check the forecast, and turn around at the first sign of storms.
Tahoe Hikes
Cascade Falls Trail, Lake Tahoe Basin Management Unit
Length: 1.4 miles
Elevation Gain: 255 Feet
Difficulty: Moderate
Section authored by Allison Coulter
Everyone loves a waterfall! This is a great short hike in Tahoe with epic views. It’s also probably the most famous hike in Lake Tahoe.
Feast your eyes on views of Cascade Lake, Emerald Bay, and Lake Tahoe itself.
Once you reach the falls, there are lots of small pools to dip your feet in while enjoying the sound of the falls. It’s best seen in late spring and early summer, when the falls are at their strongest.
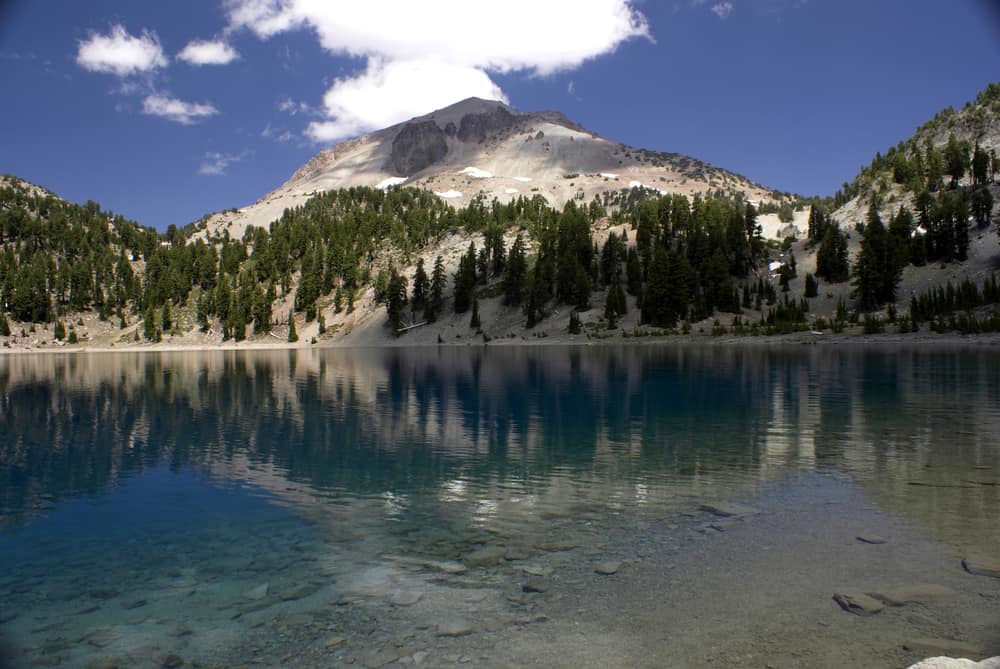
Winnemucca Lake via the PCT, Mokelumne Wilderness
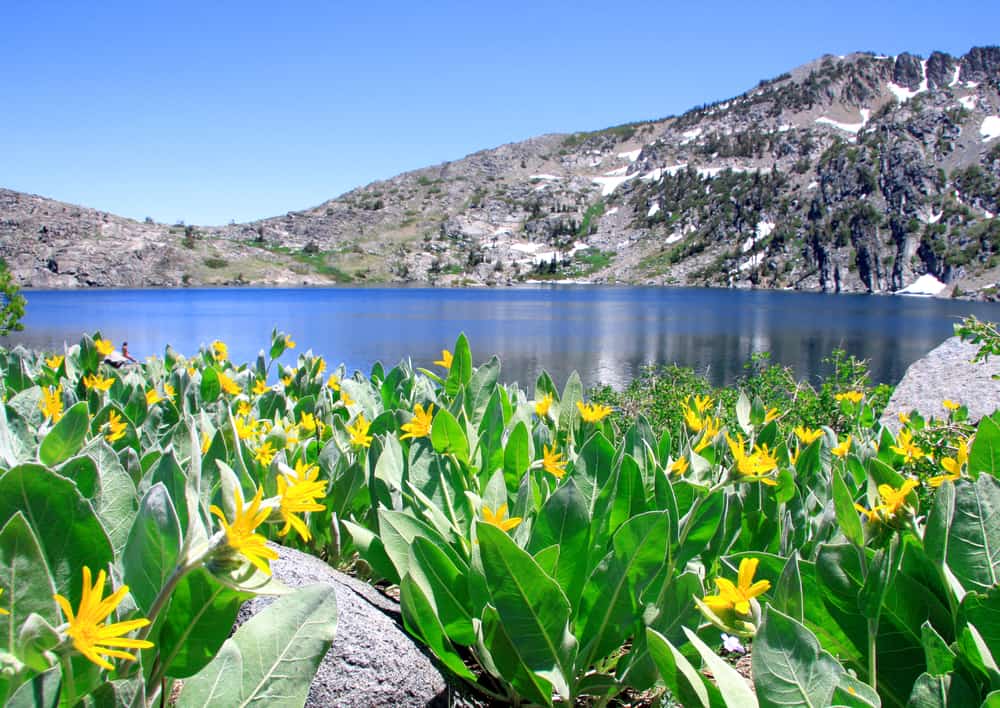
Length: 5.1 miles
Elevation Gain: 629 feet
Difficulty: Moderate
Section authored by Allison Coulter
Begin at Carson Pass and follow the PCT until you reach the junction to head to Winnemucca Lake. Hike in July to meet thru-hikers!
The high elevation of this trail rewards one with views of Caples Lake. Breathtaking wildflowers like columbine, Mariposa lily, and Indian paintbrush await you in the late spring and summer months.
The lake sits below notable landmarks of Elephant’s Back and Round Top.
Continue on for a few miles once at the lake to summit Round Top Peak at 10,381 feet! Enjoy expansive views of the Sierras.
Note: This peak is jagged and not for beginners.
Rubicon Trail
Length: 16.4 miles
Elevation Gain: 2,306 feet
Difficulty: Moderate-Hard
Section authored by Allison Coulter
This is one of the most popular hiking trails in Tahoe for a reason!
You get to bask in wonderful views of Lake Tahoe ascending up and down along the rocky shoreline. There are plenty of flat spots as well so it’s not a totally punishing hike.
Forest bathe beneath Aspen, Sierra juniper, and incense cedar as you walk alongside wildflowers like columbine and Mariposa lily. Keep an eye out for bald eagles! They nest on this trail.
You also have the chance to hit two state parks on this trail as you will hit Emerald Bay State Park as you take this trail.
Shasta & Trinity Alps Hikes
Boulder Lake Trail, Trinity Alps Wilderness
Distance: 3.9 miles round trip
Elevation Gain: 859 feet
Difficulty: Easy
Section authored by Lena M.
The Boulder Lakes Trail is perfect for the whole family. You’ll face some uphill on the way there, but the hike as a whole is not difficult. You are also allowed to bring your dog!
The drive to the trailhead is about 11 miles, and can be quite bumpy, so SUVs or trucks are recommended. The Boulder Lake Trailhead can be found off of Highway 3, where you can follow signs for the Boulder Lake Trailhead.
You will not have signal on Highway 3, so a paper map is recommended. Take a right on the dirt road labeled 37N52, (look out for views of Mt. Shasta!) and begin your hike at the parking area.
Make your way through pine forests and lush meadows on the Boulder Lakes Trail until you hit a fork after about 1 mile. Boulder Lake and Little Boulder Lake are 0.6 miles in either direction from the fork. You can’t go wrong with either lake; both are a bright, clear blue color that will call you in for a swim!
If you’d like to extend your hike, there are several smaller lakes beyond Big Boulder Lake, such as Lilypad Lake.
Castle Dome Trail, Castle Crags State Park
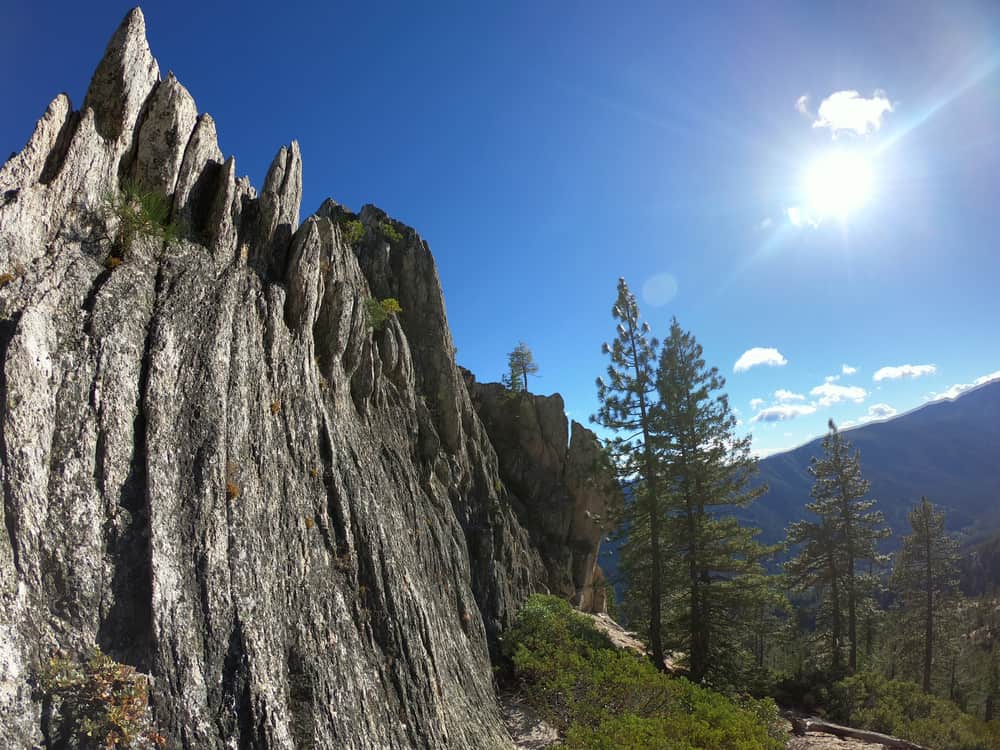
Length: 5.5 miles roundtrip
Elevation Gain: 2,200 feet
Difficulty: Hard
Section authored by Emma Webster
The peaks of Castle Crags were formed over millions of years of erosion, slowly being shaped into the unique spires you see today.
The Castle Dome Trail at Castle Crags State Park is the only trail to actually climb into the granite peaks of Castle Crags – but you’re going to have to work for it.
Follow signs for the Crags Trail as you begin walking through the forest on your journey to the dome. You’ll cross the Pacific Crest Trail around 0.5 miles and then begin to climb steadily.
A little over two miles in, you’ll be treated with a jaw-dropping view of Castle Dome and Mount Shasta. If you’re feeling tired or are just looking for a shorter hike, this vista is a good place to turn back.
For those that choose to keep climbing, walk through more forest until you finally reach the granite pinnacles. Here’s where the real fun begins. You’ll start to weave around the granite walls as the trail gradually gets steeper. Congratulations, you’re officially in the peaks of Castle Crags!
Continue until a clearing where you’ll be met with sudden spectacular views. At the top, the trail veers off into dense bush. Despite its misleading name, the trail actually ends at the base of the dome, not at the dome.
You can try to reach the summit without rock climbing gear, but it is dangerous and should only be done by very experienced hikers (and those who aren’t afraid of heights). Don’t worry – the views and experience are well worth it even if you forego the scramble.
Helen Lake Trail, Shasta-Trinity National Forest
Length: 6.5 miles roundtrip
Elevation Gain: 3,500 feet
Difficulty: Hard
Section authored by Emma Webster
The trail to Helen Lake can serve many purposes. You can utilize the trail as a strenuous out-and-back hike, turning around at Helen Lake, or, if you’re looking for more of a challenging adventure, you can plan to use Helen Lake as your basecamp to summit Mount Shasta.
This trail – no matter how far you choose to go – requires a wilderness permit. While many regard Helen Lake as merely the basecamp to summit Mount Shasta, it can also serve as a nice day hike for those not looking to go all the way to the top.
Depending on the time of year, however, you may still need specialty gear to traverse the snow, and you should not undertake this hike without researching the conditions first.
Begin at the Bunny Flat trailhead and head towards the historic Sierra Club Horse Camp Lodge. The first leg of the hike is a steady climb up through the trees. Horse Camp is two miles into the journey, and many will end their hike here to stay overnight.
From Horse Camp, the route continues up the mountain and through the valley. It’s uphill every step of the way, but the views of mountains that continue to reveal themselves as you walk make it well worth it. The last part is the hardest, but you’ll be rewarded with a viewpoint at Helen Lake.
Set up camp and spend the night or head back down the way you came. Either way, give yourself a pat on the back for ascending one of the toughest mountains in the area!
Redwood National & State Park Hikes
Fern Canyon Loop Trail, Prairie Creek Redwoods State Park
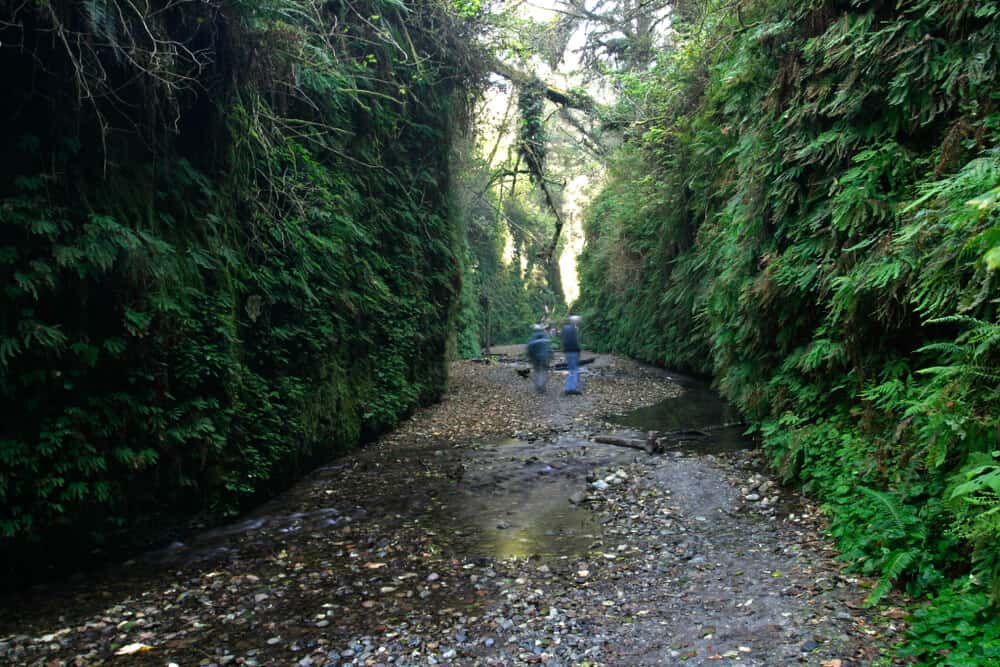
Distance: 1.1 mile loop
Elevation: 118 feet
Difficulty: Easy
Section authored by Cara Abilez
This hike is accessible to most, regardless of age or physical prowess!
It is also a fantastic trail choice for someone who needs a quick refresh in nature but can’t dedicate an entire day to tramping through the forest.
The trail meanders magically through a gravelly creek bed surrounded by overwhelmingly lush vegetation. As the name would suggest, the understory along this trail abounds with mammoth fern, but there is no lack of old-growth redwoods and firs to remind us all to stop and look up.
Bring your waterproof boots and gear and let the kid in you and/or the kids with you splash and play your way over the stones and fallen logs.
Pull out your camera along the way and do your best Julianne Moore impersonation, as you may recognize this otherworldly trail from The Lost World Jurassic Park sequel!
You will not likely have this trail to yourself, it has become quite popular, but it is hard to care very much in the company of such an incredible display of life. The serenity is a built-in feature!
Trillium Falls Trail
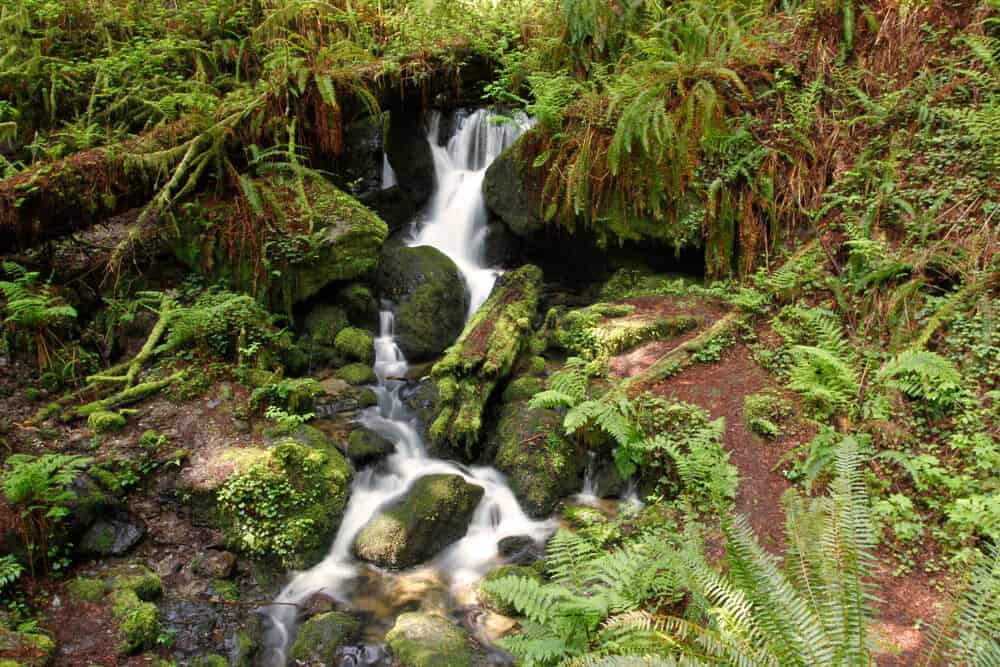
Distance: 2.6 mile loop
Elevation: 433 feet
Difficulty: Easy
Section authored by Cara Abilez
The Trillium Falls hike offers slightly more of a challenge than Fern Canyon, with a bit more distance to it and steeper slopes to traverse, but that isn’t the true purpose of this hike.
This is the hike you take for the hard reset. This is the hike you take to forget, or to remember. The hike you take to feel utterly connected to it all and disconnected from everything else.
While this hike is still accessible enough for the whole family, and it is one of the more heavily trafficked trails in the parks, it is an excellent choice for the solo hiker. If you are aiming for a little solitude, hit the trail early in the morning or better yet in the off-season between November and March.
Of course, it is worth making the hike in the spring as well though, even through the crowds, to catch the trail’s namesake in bloom alongside a plethora of other beautiful flora.
The bright white petals of the trillium flowers stand in almost defiant distinction to the dark rich soil and the vibrant greens of the leaves and moss spreading from the forest floor to its impossibly high ceiling.
You will hike under a canopy of old-growth redwoods with an understory teeming with fern and moss-covered tree trunks and stones.


Allison Green is a travel blogger, writer, and podcaster who grew up in the Bay Area of California. She has spent time living in New York, Prague, and Sofia, but has returned to live in the East Bay. She has traveled to 60 countries before the age of 30 while running several digital travel publications. Her writing and podcast have been featured in Forbes, CBC Canada, National Geographic, the Huffington Post, and CNN Arabic, amongst others. She’s obsessed with bouldering, houseplants, other people’s pets, and anywhere she can see the ocean.